
|
|||||||
| 200 Series Articles How to's and Guides for the 200 series. |
 Information
|
|
How to change a cam beltViews : 10501 Replies : 11Users Viewing This Thread : |
|
|
Thread Tools | Display Modes |
 Feb 3rd, 2008, 23:32
|
#1 |
|
Former contributor
Last Online: May 15th, 2024 09:52
Join Date: Dec 2004
Location: Rhosgoch, Anglesey
|
Changing the cam belt can seem a little daunting and I will admit there is potential for problems but properly prepared and allowing adequate time it should be within the capabilities of the amateur 240 mechanic. Not really one to do as a first job but once you have done some of the other basic servicing it should be one that can be tackled. The most important thing is to know what you need to do - this guide should do that - and make sure you have all you need to do it and allow plenty of time so you are not under time pressures.
This article applies to the black top engines - there will be differences on the silver top ones which are actually easier to do as bottom crankshaft bolt does not have to be removed. This series of pictures were taken whilst changing the belt on Paul Clark's 240 over in Brittany - a joint effort one this with both of us doing some of the work. This was a good example as it did throw up the odd problem or two. The bulk of the job just need your normal tool kit of 10, 12, 13 and 17 mm sockets and spanners. The BIG problem one is the crank bolt at the bottom which needs a 1/2 inch drive 24mm socket and long breaker bar or better still an impact wrench for undoing it. You will require a cambelt - only use a Volvo one they are cheap enough now and have the markings on them. This is also a good time to replace the other drive belts as they are coming off anyway. Make sure you get a matched pair for the alternator - Volvo supplies these in a boxed matched pair. Also it is a time to consider replacing any of the three front oil seals. The first job is to remove the drive belts. First slacken the bolt the alternator is locked by: 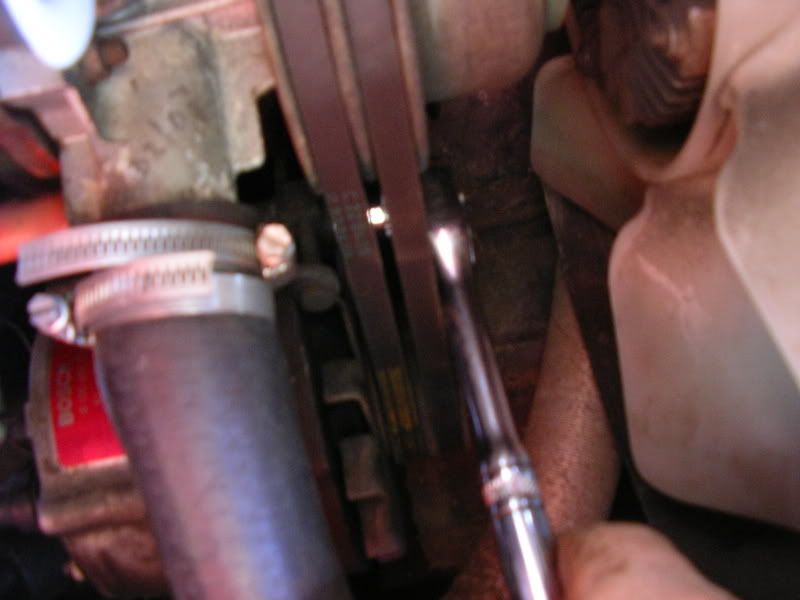 and then slacken it using the 10mm headed bolt of the tensioner. The belts should now be loose. Next to the power steering pump Again slacken the bolts it pivots on 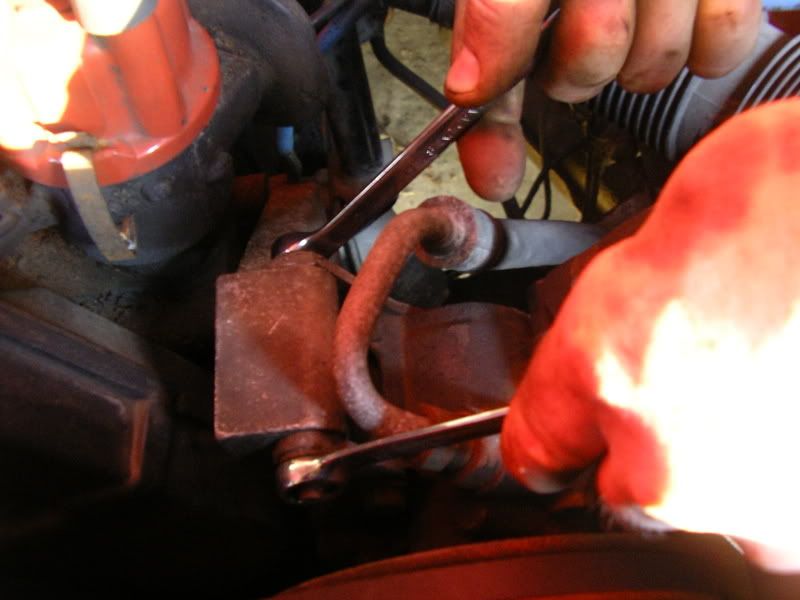 Loosen the tensioner  The three drive belts can now be removed The next job is to remove the radiator shroud. There is a screw either side at the top holding it: 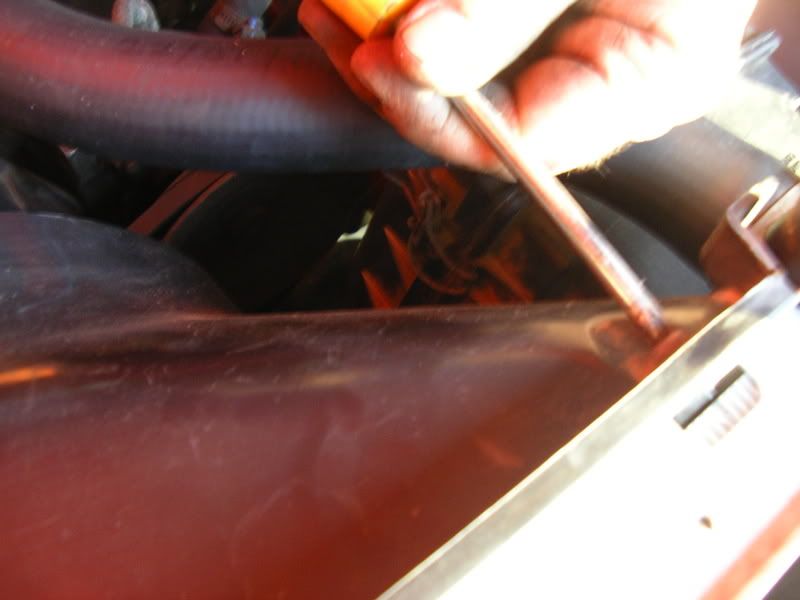 It then lifts upwards to free it from the two locating lugs at the bottom. It can the be carefully wiggled out past the fan being careful not to damage the radiator. 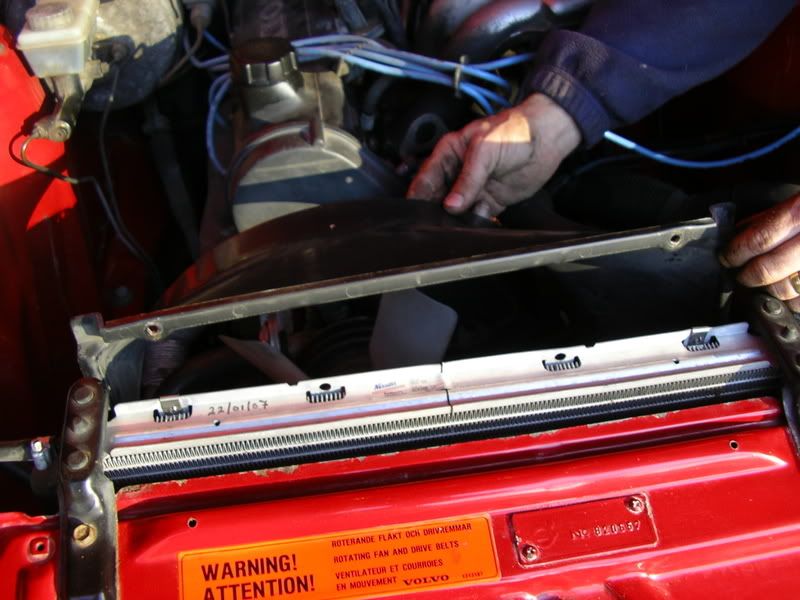 The next thing to be removed is the cam belt cover. This is in two pieces. Starting with the top cover undo the three bolts to the front and the screw to the back as shown in the picture. Make sure you keep all the bolts in order as they are all different! 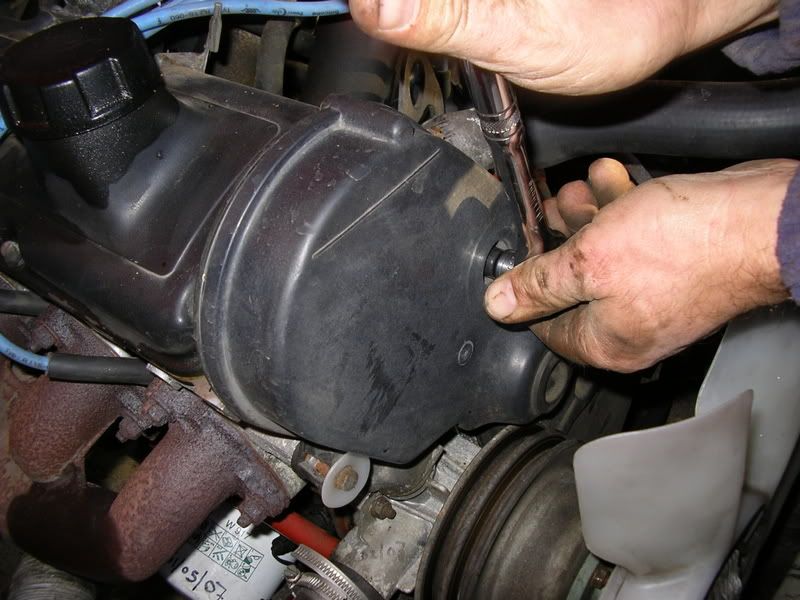 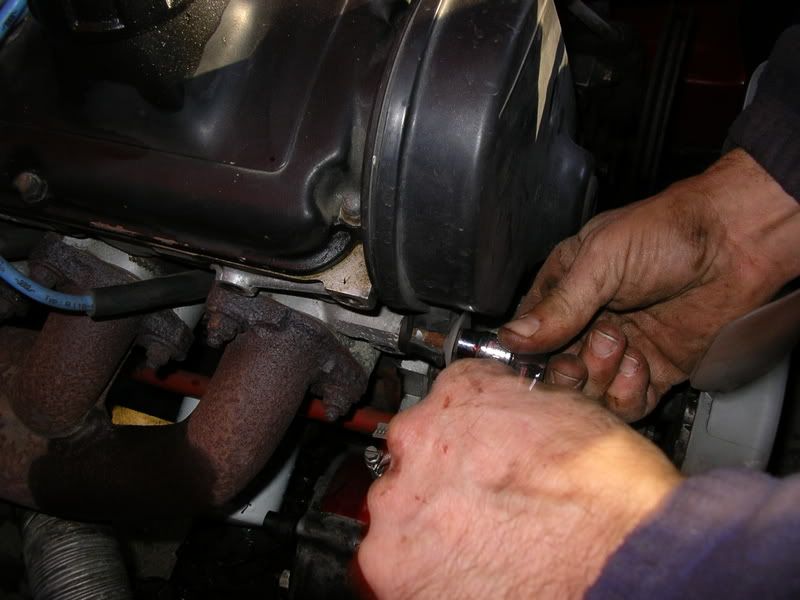 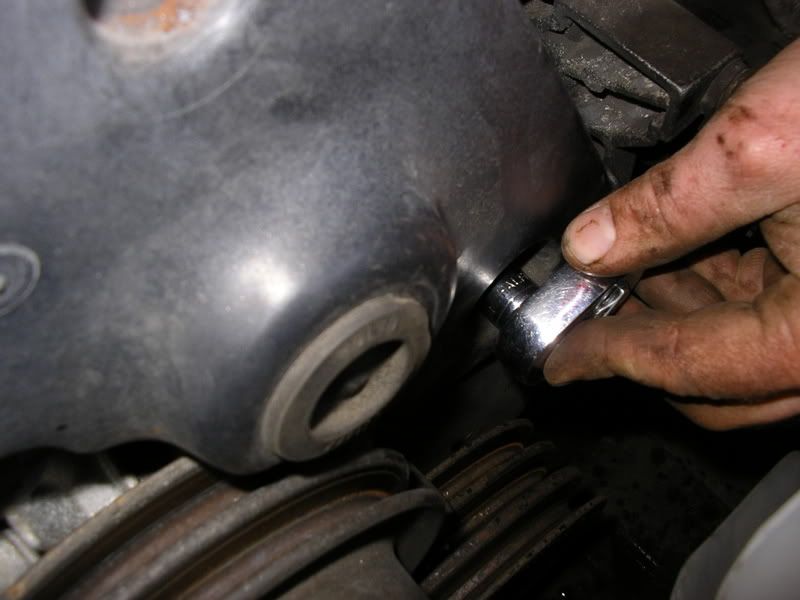 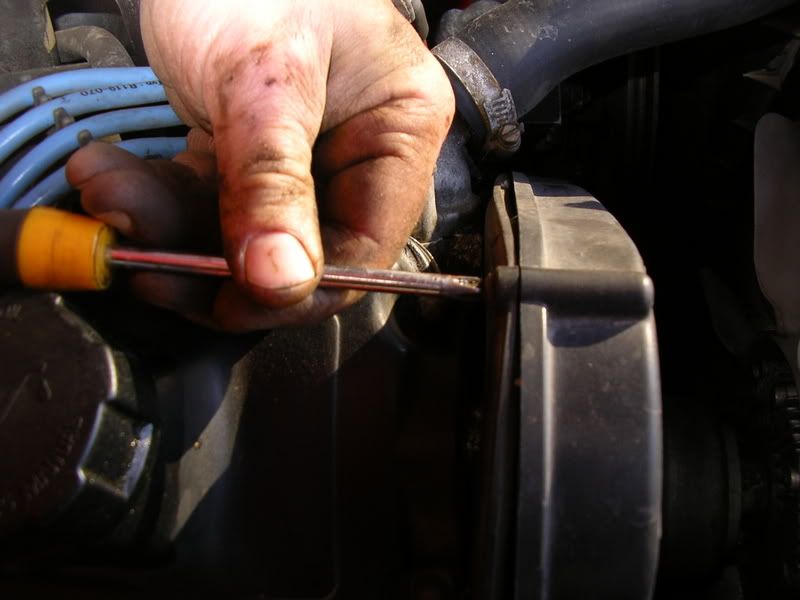 To undo the bottom cover it is necessary to undo the bottom pulley. This is the awkward bit as it is very tight. A long breaker bar should undo it but a lot easier with an impact wrench. 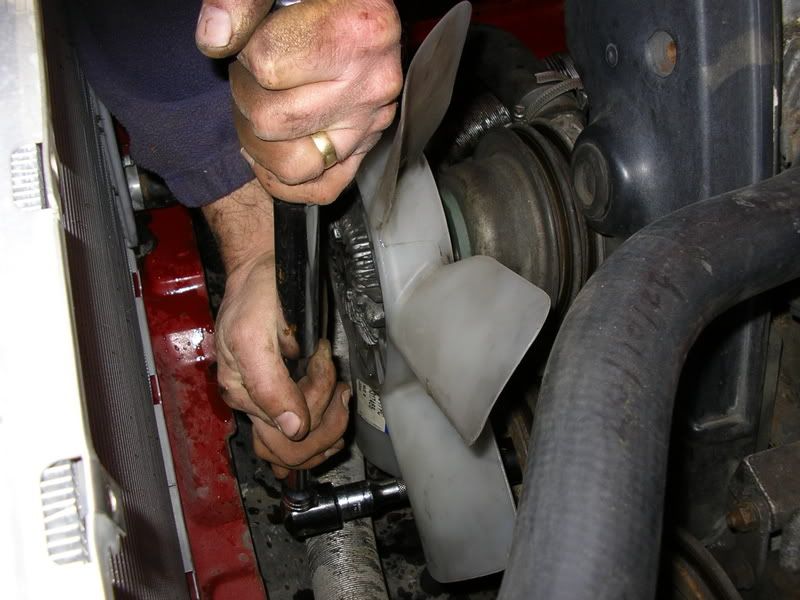 If using the breaker bar it is a case of locking the engine - sometimes putting in gear and firmly applying the footbrake whilst the bar is turned - there will a certain amount of give to overcome. Another way is to remove the and lock the flywheel. The bolt should be fully removed and then the bottom pulley wiggled off - it may be tight! 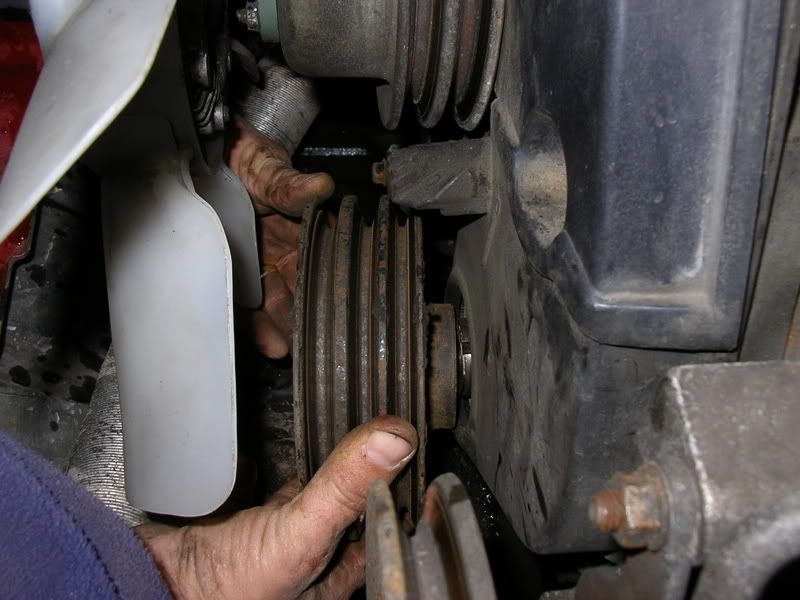 Next the fan assembly needs to come off. This is held on by four 10mm headed nuts. In our case one of the nuts was rounded and had to be chiselled off. 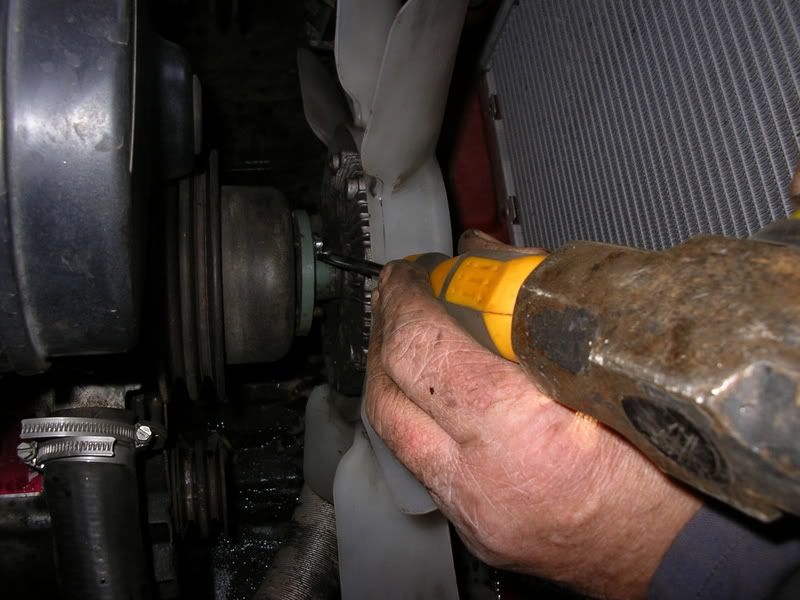 Never refit a damaged nut as it can cause problems next time it has to come off. The fan assembly is lifted off and the pulley removed. The bottom cover can now be unbolted: 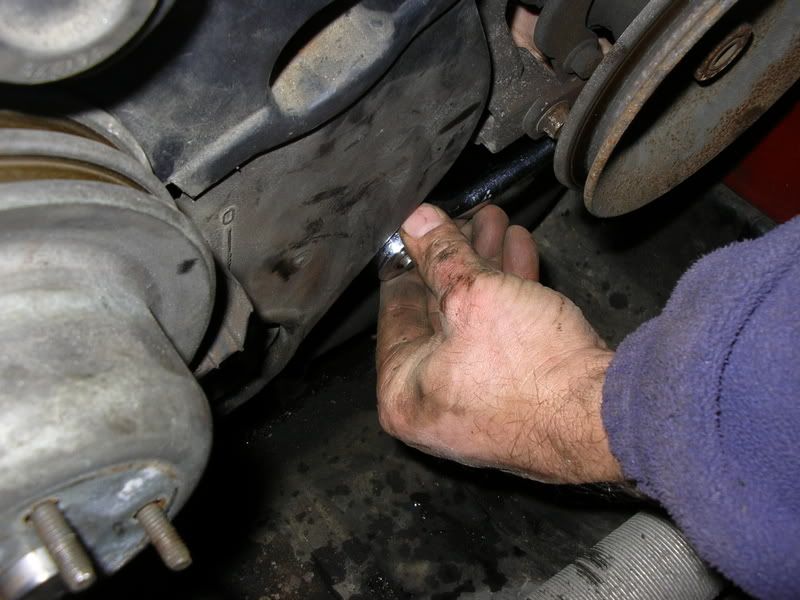 The top cover can now be lifted off 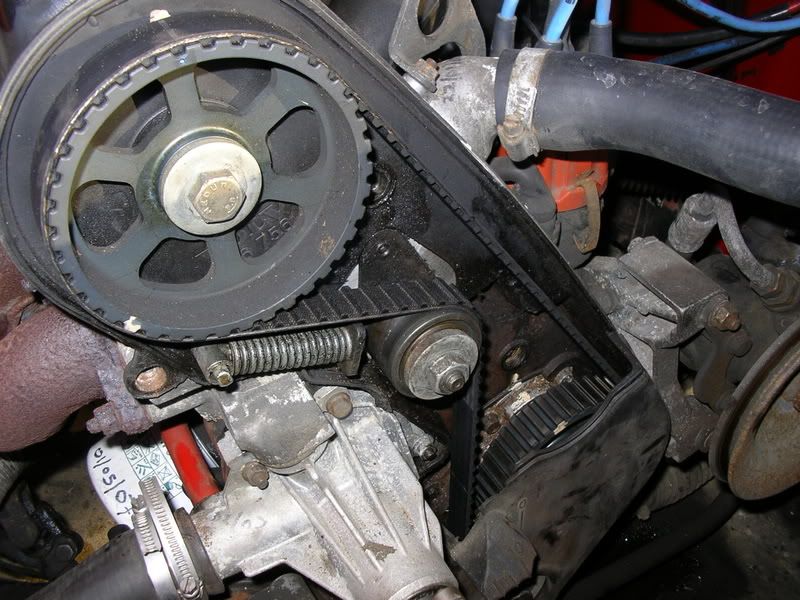 Then it is lift the bottom one forward and off 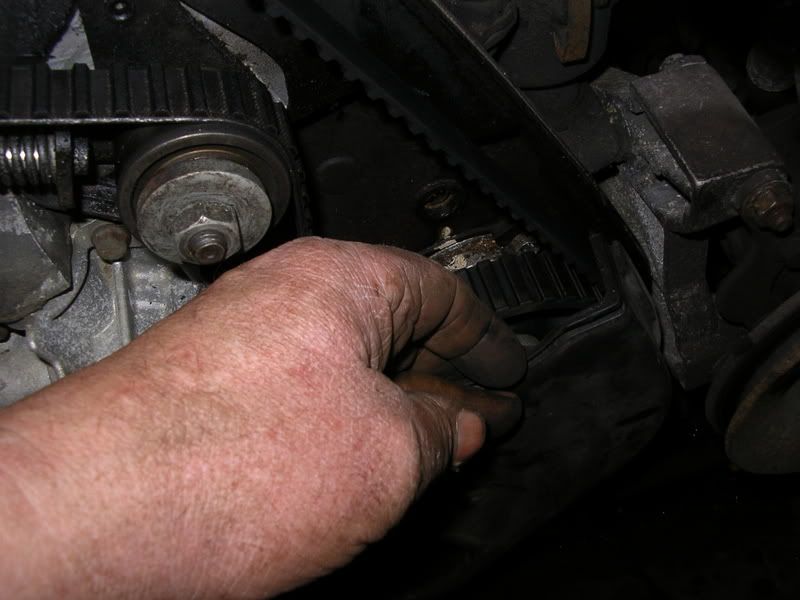 The next job is to set the engine to top dead centre. This can be done by moving the cam markings into position. There is a dot on the pulley which should align with the dot on the plastic casing. In this case there were also various tipex markings put on in incorrect positions (on the cover slightly to the right of the dot. 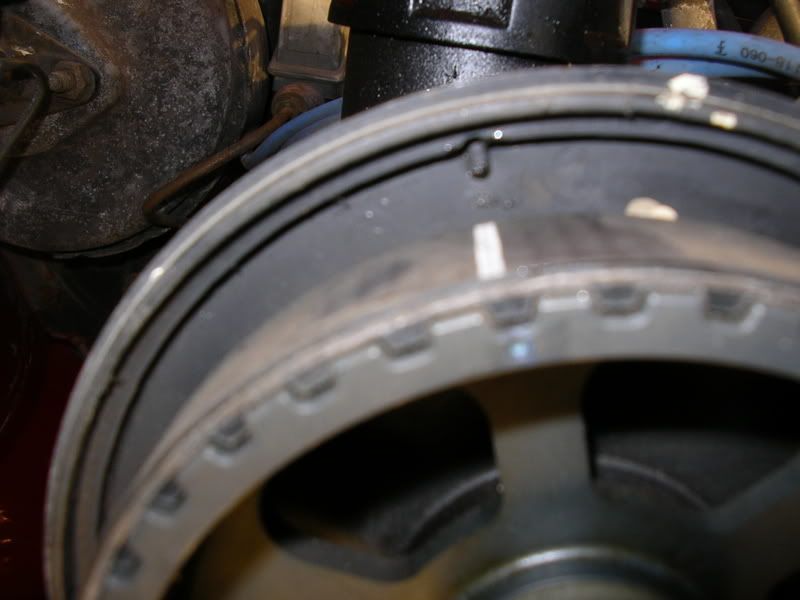 The line on the crankshaft pulley will line up with 0 degree mark on cover (These parts would have to be loose fitted to check which isn't necessary at this stage) 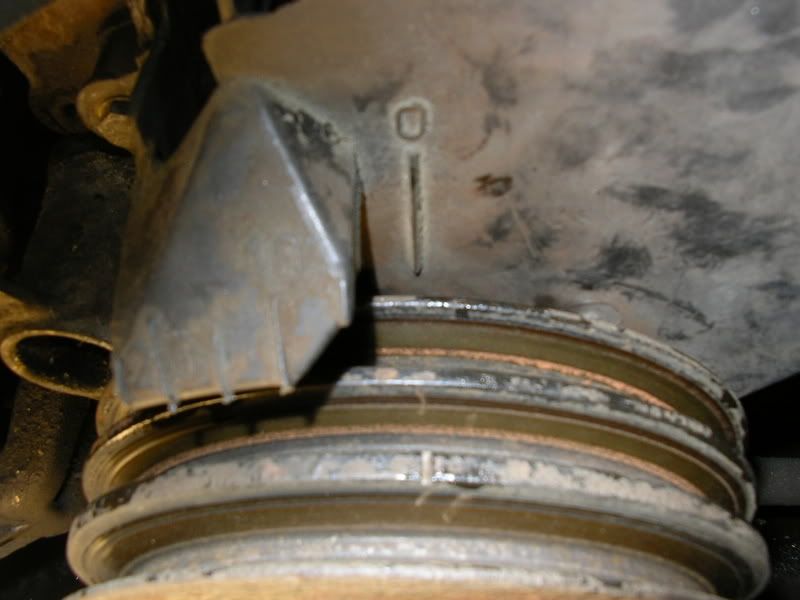 The belt is now ready for removal. The first thing is to slacken the tensioner bolt. 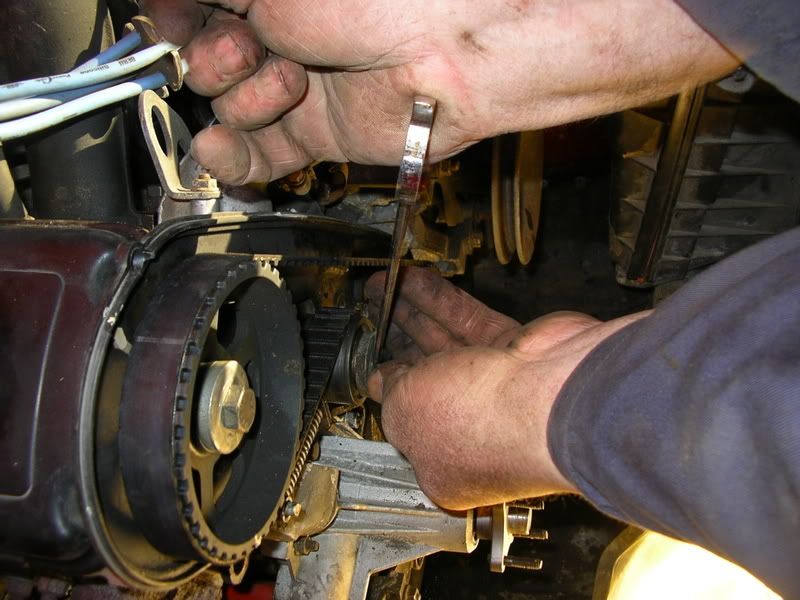 The tension now needs taking off the belt. To do this lever the tensioner back with a pry bar on the water pump and relock the tensioner bolt 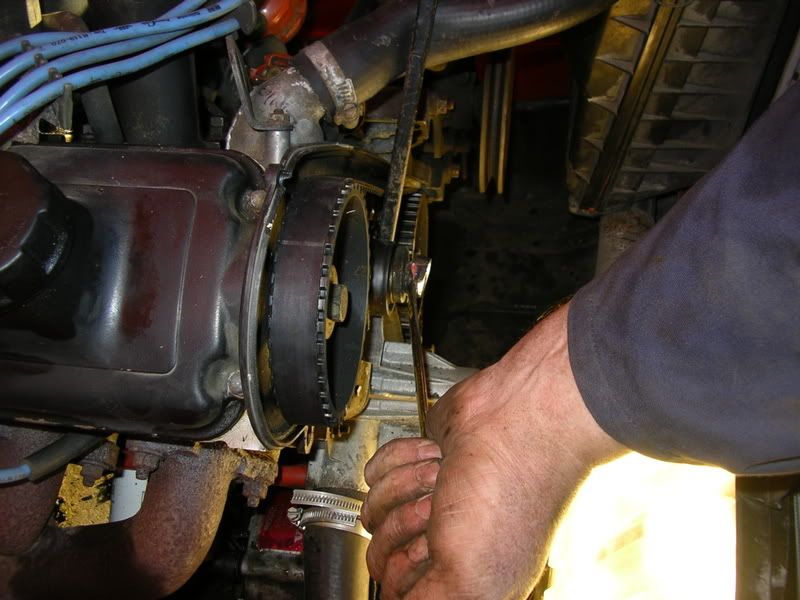 The belt can now be eased off ensuring the positions of the pulleys is not altered. This is also the stage that oil seals would be replaced if needed. I will try to cover this in a separate "how to" in the future. At this stage it is a good idea to take off the bottom cam belt pulley and check the locating lug is not damaged (see photo for good and damaged one) 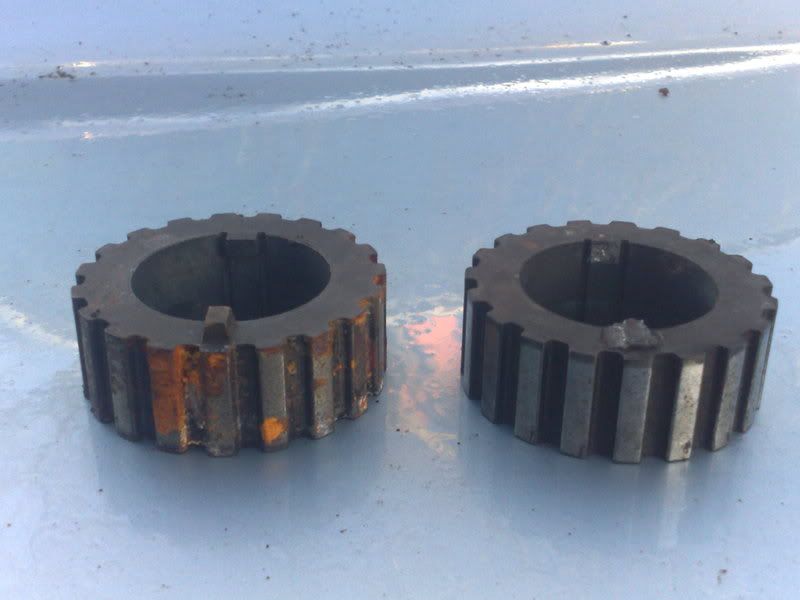 If it is damaged it must be replaced - this only happens very rarely. Refit this being carefully it is correctly located. The next job is to start refitting the belt. If you use the genuine Volvo one it has markings on it to line up with the markings on the pulley. With the Volvo name facing you there is a line to the left of it this should align with the dot on the cam pulley 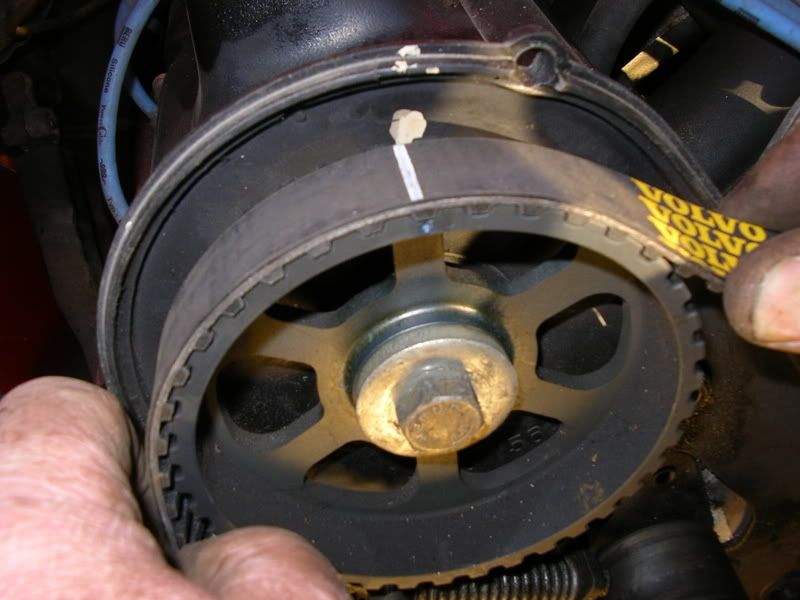 Keeping the belt held down on this pulley ease it under tension over the distributor pulley and the line will again align with that dot 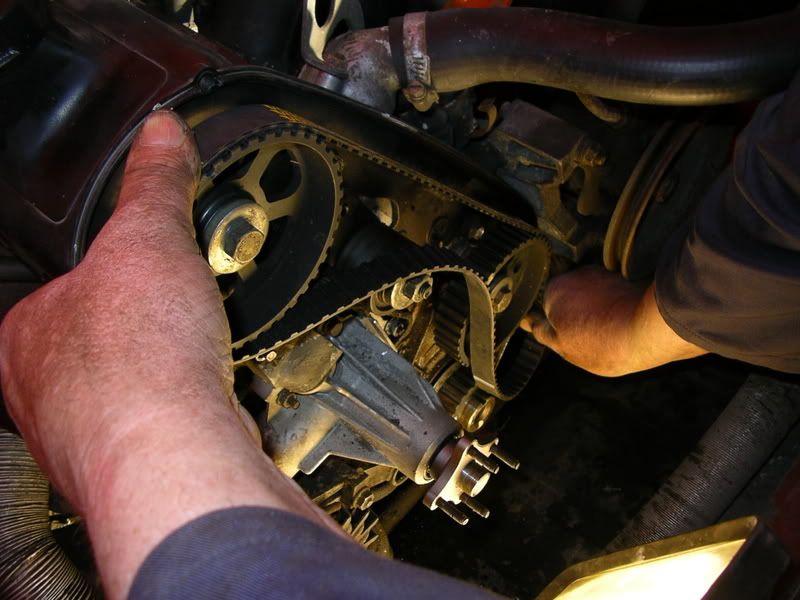 Then ease it over the crank pulley and the tensioner being careful to keep it tight and not move any positions. Again the dot will align with the line on the belt. 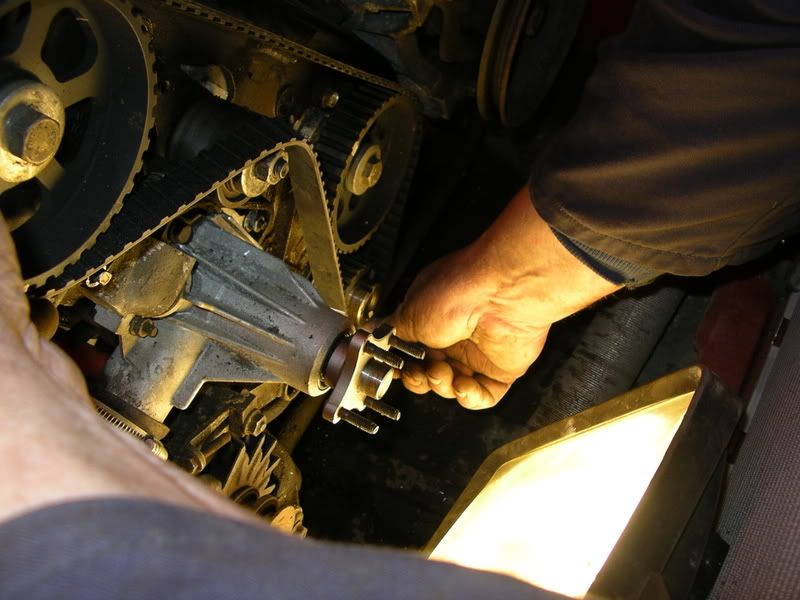 Ease it fully over the tensioner 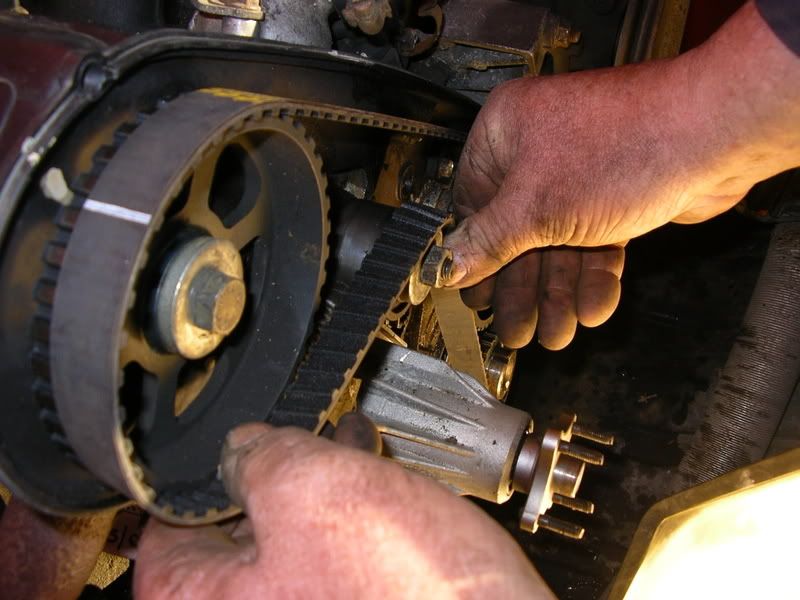 It should now be fully back all the way round: 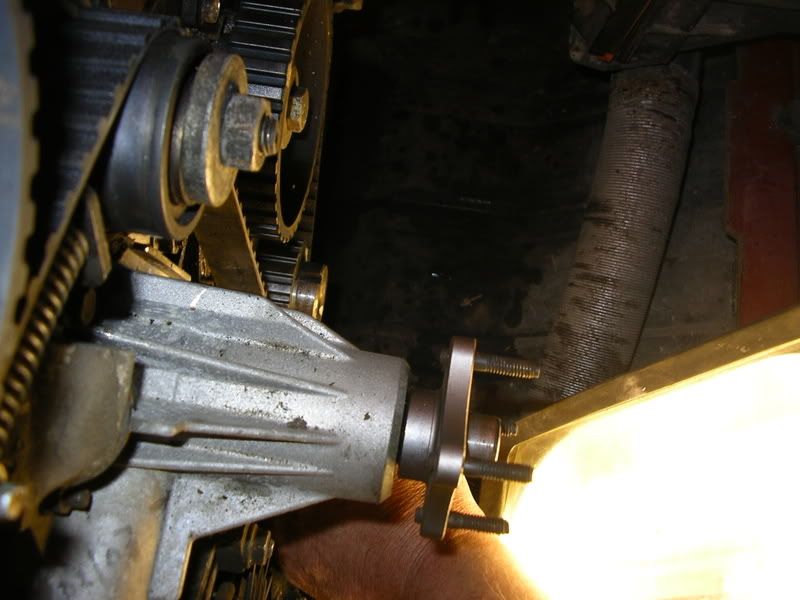 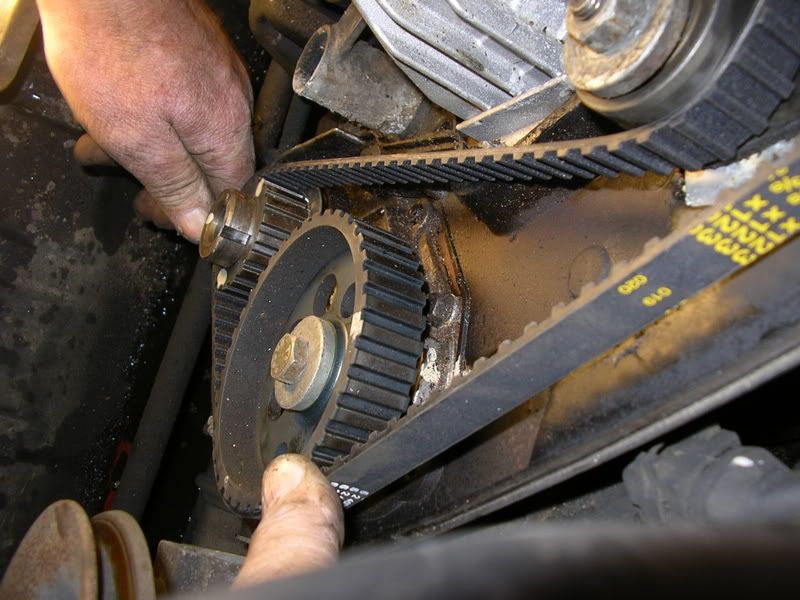 This next picture the screwdriver shows where there is a nick in the cover that aligns with the lump on the belt pulley. 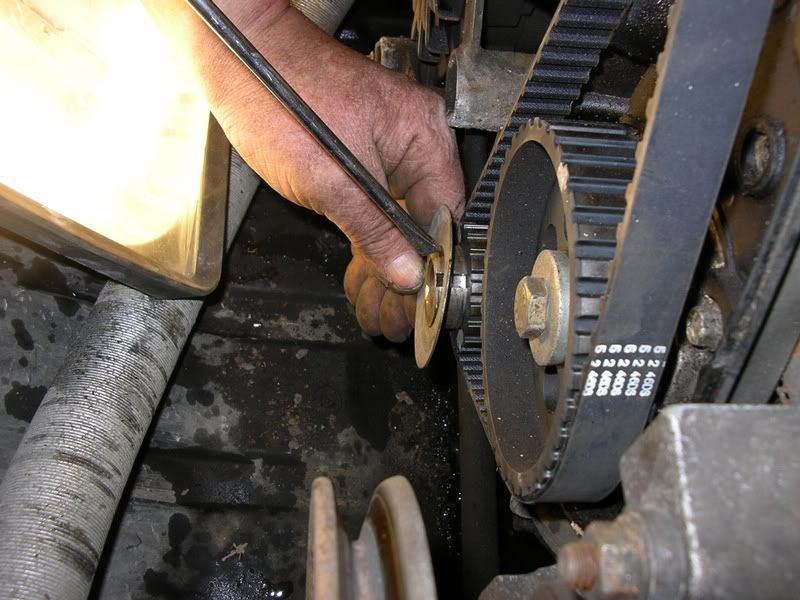 This should allow the plate to sit back properly like this - it is important it does. 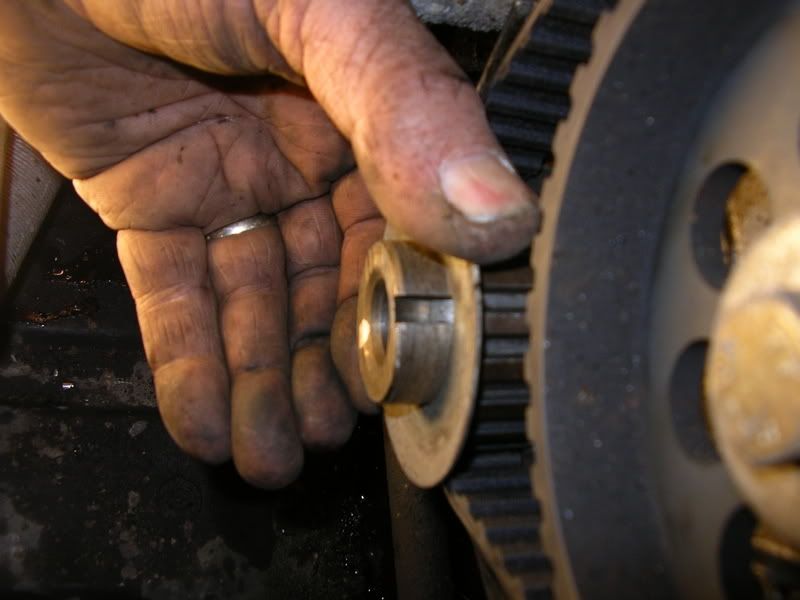 Now do a recheck on the belt to dot positions. If any are out go back and reposition. Now refit the bottom cover and hand tighten the bolt. Next refit the bottom pulley and use loctite on the bolt and tighten to prescribed torque. This bolt is a stretch bolt and theoretically should be replaced at each belt change. However, unless the vehicle has had a lot of belt changes the use of loctiite should ensures it stays done up ok. Now refit the top cover with the three bolts to hand tight. Now carefully turn the engine slowly over (important if it is an interference engine) by hand to make sure nothing is wrong. If the marks on the belt aligned correctly with the pulley dots there will be no problem but this is a sensible safety precaution. Now just start the engine and run briefly to check all is ok before tightening coverbolts and putting the screw in the back. 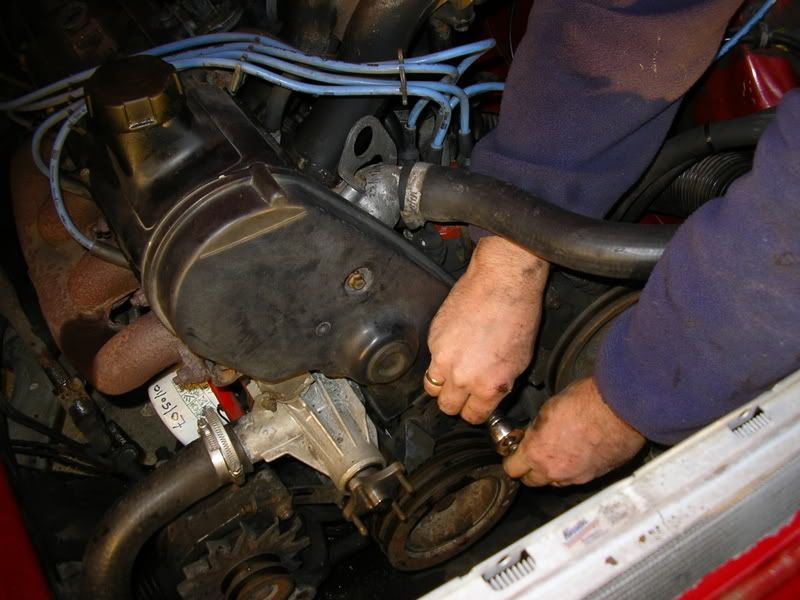 Now refit the water pump pulley loosely, refit the alternator and then power steering belts all loosely. 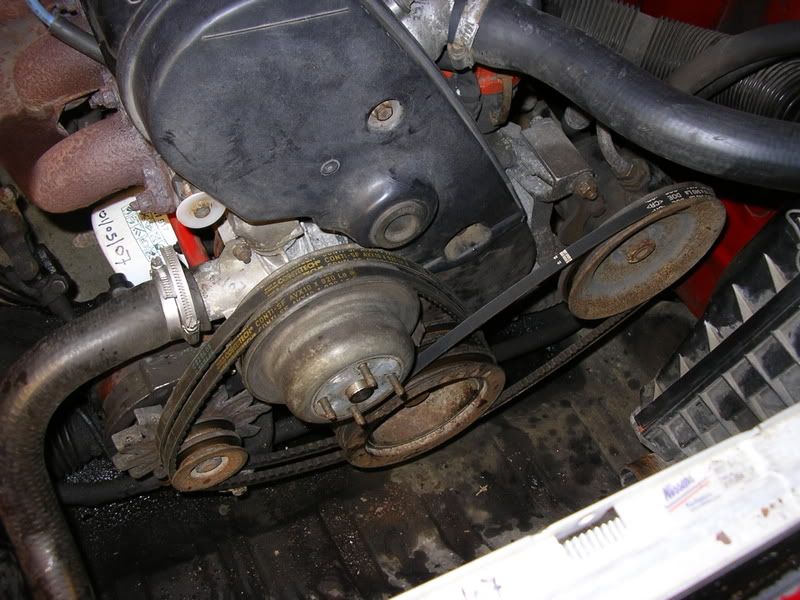 Now refit fan and shroud 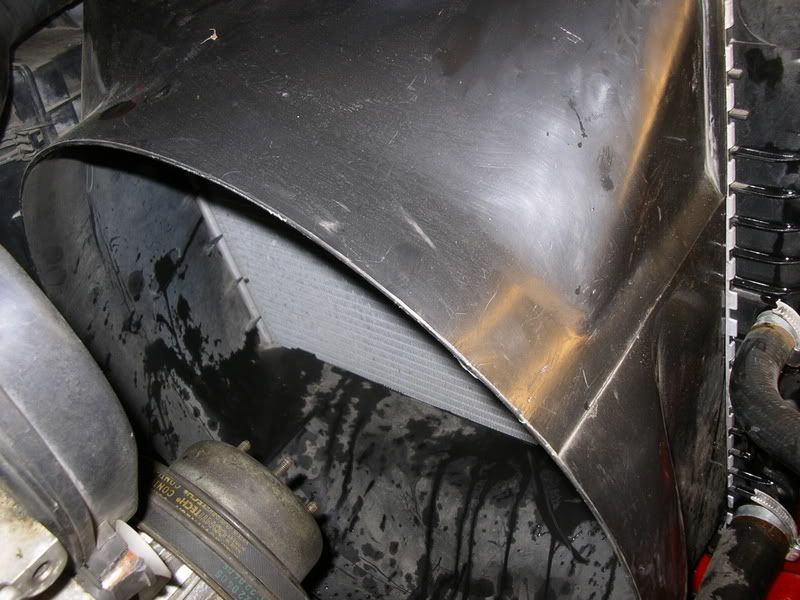 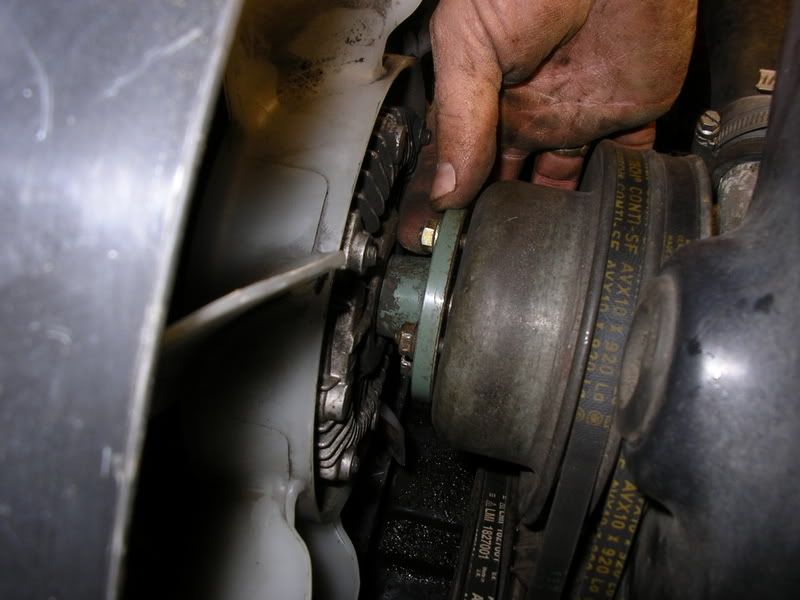 Retension the alternator and power steering belts. In our case the tensioner for the power steering belt sheared so we reverted to the old fashioned way of using a lever to hold the tension while the bolts were tightened (Note the pry bar being held with the arm as bolts are done up) 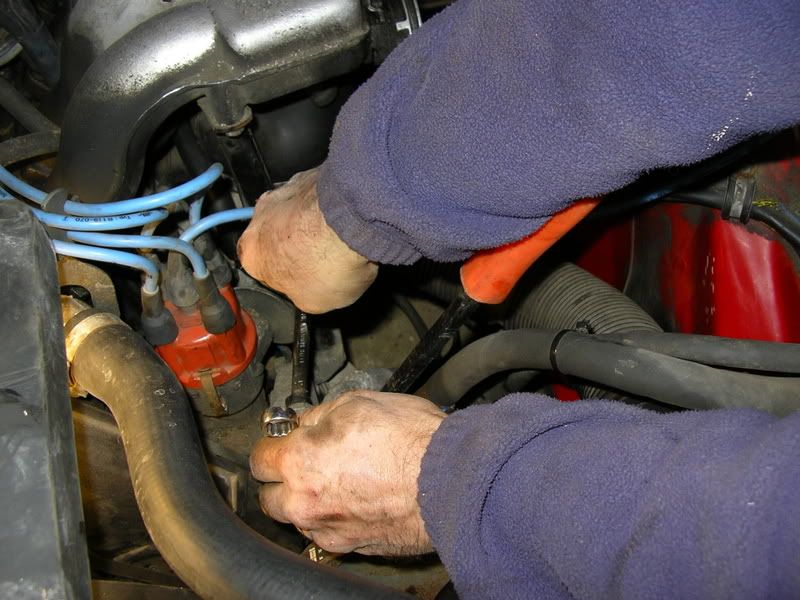 The car should now be ready to go. Just check that it runs smoothly as the belt may be slightly different in length and it may be necessary to slacken the distributor off and move it slightly to get perfect response. Don't forget to retighten after. Tip mark its position before moving so you can always go back to it. This can all be set accurately if you have access to a strobe light. Mike
__________________
A Volvo is for life not just for Christmas!  
|

|
| The Following 7 Users Say Thank You to Mike_Brace For This Useful Post: |
|
Feb 4th, 2008, 13:38
|
#2 |
|
Senior Member

Last Online: Jul 26th, 2010 09:55
Join Date: Dec 2003
Location: Taunton, Somerset
|
Great stuff Mike, just a final bit, after running the car up I usually release the spring tensioner a second time removing the rubber grommet in the cover gives access to the tensioner locking bolt, I slacken off and then retighten again, and put the plug back in.
BTW releasing the tension bolt allows the spring tension to work not the other way round. A bit belt and braces (no pun intended) but this is the one job on a 240 that is potentially expensive if not done correctly To any unsure persons out there, get some help to do this. Thanks for the stuff you produce Mike Richard
__________________
24 years of Volvo ownership 940 Sport 940 GLE HPT |
|
|
| The Following User Says Thank You to classicracing For This Useful Post: |
|
Feb 4th, 2008, 15:38
|
#3 |
|
Torquemeister

Last Online: Today 08:22
Join Date: Dec 2004
Location: Asgard, Cheshire
|
For those of us who are of a nervous disposition when it comes to this job (I speak from experience), removing the grille and radiator will let you look directly at the various timing marks; on my first, B21A-engined, example I got the distributor shaft out by a couple of teeth and it ran like a turkey. The next time I did the belt I took out the rad and could line everything up perfectly. It also lets you mark the pulleys for future occasions; the only downside is that you have to drain the cooling system and refill it afterwards.
__________________
loki_the_glt - Skipper of the Exxon Valdez, driver of Sweden's finest sporting saloon - and pining for another Slant-4. 
|
|
|
| The Following User Says Thank You to loki_the_glt For This Useful Post: |
|
Feb 4th, 2008, 15:59
|
#4 |
|
VOC20556
|
yes mike thats an excellent guide especially as my car is party through these steps.
ts actually quite depressing having the car sitting since early september not being run but its all for a good cause i had the intention of changing belt and then performing a service but now ive ended up sorting the little blisters on the spot welds aorund the engine bay even if nobody goes to the lengths im going then when this job is being performed i would advise some clear waxoyl or something along those lines and also may i add that i believe volvo belts are supposed to last 50k is this right? thanks again mike  nick
__________________
1989 Volvo 240 GLT "the fridge" - 1998 TVR chimaera 400 "the toy" - 2002 BMW 330CI Clubsport " the daily"
|
|
|
|
Feb 4th, 2008, 16:33
|
#5 |
|
Junior Member

|
Hi Mike, Great stuff & excellent ponography-sorry-photography. I have Vadis if anyone needs any help for later models. Cheery,JD.
|
|
|
|
Feb 4th, 2008, 18:13
|
#6 |
|
Former contributor
Last Online: May 15th, 2024 09:52
Join Date: Dec 2004
Location: Rhosgoch, Anglesey
|
Thanks for all the kind comments. I must say at times I do find these a little difficult to write especially at the end of a day (often the only time available) and always worry I may miss a relevant bit of info or tip. The great thing though is that there are quite a few of you on here who have quite a lot of knowledge and I know I can rely on you do add to what I have written and so provide further help for those tackling these jobs for the first time.
Mike
__________________
A Volvo is for life not just for Christmas!
|
|
|
|
Feb 4th, 2008, 21:46
|
#7 |
|
James

Last Online: Apr 4th, 2010 20:25
Join Date: Oct 2006
Location: Near Villedieu les poeles
|
Hi Mike, You wrote;
The next job is to set the engine to top dead centre. This can be done by moving the cam markings into position. There is a dot on the pulley which should align with the dot on the plastic casing. In this case there were also various tipex markings put on in incorrect positions (on the cover slightly to the right of the dot. Thanks for your excellent write up and the pics are extremely helpful. Being pretty well a novice i wondered how you moved the cam markings into position? I would certainly have a go at fitting a new cambelt if it was a non inteference engine. I did get someone to fit a cambelt to my old 740 with a B230K engine. I bought a volvo belt and paid 55 pounds to have it fitted. I thought the belt was very reasonably priced at about 10 pounds 3 and a half years ago. Many Thanks James. |
|
|
|
Feb 4th, 2008, 22:23
|
#8 |
|
Former contributor
Last Online: May 15th, 2024 09:52
Join Date: Dec 2004
Location: Rhosgoch, Anglesey
|
Hi James
Thanks for your query. It is these sort of questions that enable me to clarify any points which will hopefully make it clearer for anyone wanting to do the job. Normally before dismantling I turn the engine to the O degree mark on the bottom pulley. This can be done by turning it over using either the drive belts or the 24mm socket on the bottom pulley bolt. Individual pulleys can be moved back to position with a spanner on the bolt or by using the old belt wrapped over them to turn them (distributor one will turn easily by hand). I hope this clarifies. Mike
__________________
A Volvo is for life not just for Christmas!
|
|
|
|
Feb 7th, 2008, 21:37
|
#9 | |
|
VOC20556
|
Quote:
nick
__________________
1989 Volvo 240 GLT "the fridge" - 1998 TVR chimaera 400 "the toy" - 2002 BMW 330CI Clubsport " the daily"
|
|
|
|
|
Feb 9th, 2008, 22:03
|
#10 | |
|
240inNZ
Last Online: Jan 30th, 2009 08:07
Join Date: Nov 2007
Location: Christchurch
|
Quote:
I've actually been in the throws of deciding what to do about my fleet - seven cars now! - as Her Indoors is saying that I'm getting obsessed and going a bit over the top (is that bad?). So I offered my 240 to another local ex-UK 240 owner in case he would like it... Fortunately (for me) he came back saying he was short of space... so I GET TO KEEP MY 240 for a bit longer! The story now is that I should actually use it, rather than just look at it... which is what I tend to do with my classics... so I'll probably need to invest in a bit more catch-up maintenance before winter (is summer here now of course!)... but I'm really looking forward to getting it out there on road on a daily basis! On a separate note, you mentioned recently about how few 240s are seen these days on the roads. Funnily enough I saw THREE 240s locally within the space of a few minutes just last night! Normally I can go for weeks without seeing any - there were never many in NZ anyway. Maybe people are finally (re)discovering them... Would be wonderful, eh! All the best, John.
__________________
 1985 240GL Auto, 290,000km 1985 240GL Auto, 290,000kmAlso: 1997 (Aus) Ford Falcon, 1972 Citroen DS21 Pallas, 1968 Rover 2000, 1961 Fiat 1100 and 1955 86" Land Rover Series One. |
|
|
|
| The Following User Says Thank You to John Tancredi For This Useful Post: |
| Currently Active Users Viewing This Thread: 1 (0 members and 1 guests) | |
|
|


 Linear Mode

