
|
|||||||
| 700/900 Series General Forum for the Volvo 740, 760, 780, 940, 960 & S/V90 cars |
 Information
|
|
Chris1Roll's return to 700 ownershipViews : 11028 Replies : 137Users Viewing This Thread : |
 |
|
|
Thread Tools | Display Modes |
 Jun 9th, 2023, 09:27
|
#41 |
|
Senior Member
Last Online: Today 10:14
Join Date: Aug 2006
Location: Cannington
|
If the needle is out on the spindle then its out by a matter of minutes rather than by degrees - it looks identical to my eyes.
Given I would have to remove, dismantle and reassemble the cluster each time I adjusted and tested it, I think it is best left alone as is unless I absolutely have to take it apart again. The chance of an old bit of plastic snapping/threads stripping increases each time! The odo works now so I have at least some idea of whether I have fuel left so that's the main thing. Thinking about the fuel gauge: Previously most of the time it was the gauge at fault - I remember backing my GLE up to the back of my mates with a working gauge and connecting my sender to his car wiring. Incredibly his car got up to 24 years old and over 260,000 miles with a working fuel gauge. I see in an old thread you (I think it was you) made an LED bar graph to replace it at one point. I was thinking I could [well, my electronics skills aren't brilliant, so I would at least atttempt to haha] make one and fit it in a spare switch blank to the left of the steering wheel. That way the cluster stays standard and a switch blank is easily replaced if a NOS gauge ever turned up (one can dream, but every so often places will have a clear out so you never know). Or for an even more standard look perhaps it might be possible to get something to simply illuminate the soon-to-be-defunct trailer indicator warning light that is already fitted to one of the blanks when the resistance from the sender indicates it is down to say, 1/4 tank. Just an idiot light with a bit of latitude if one forgot to remember the mileage at the last fill up for example. Just some idle musings for the future. |

|

|
| The Following 2 Users Say Thank You to Chris1Roll For This Useful Post: |
|
Jun 9th, 2023, 09:56
|
#42 |
|
Premier Member
Last Online: Yesterday 11:32
Join Date: May 2012
Location: Lakenheath
|
As it's a 140mph speedo but doesn't start until 10mph, that's a 130mph sweep in ~240 degrees, that's ~18mph per 10 degrees. You may have refitted with precision accuracy but it's not uncommon to get the needle 3-5 degrees out when refitting - 3 degrees would be 5.4mph based on my hypothesis above.
It was indeed me that made the bargraph LED fuel gauge, i may have the circuit around somewhere but it's based on the LM3914 bargraph driver IC, the resistance (from memory) of the sender is ~30 Ohms when empty and ~300 when full so each LED will give ~1.3 gallons indication. The FSD for the 3914 is 1.25V so when full, it needs to develop 1.25V across the sender. I used a 7812 voltage regulator IIRC to stabilise the voltage so you need to drop 10.75V across a current limiting resistor to feed the sender and tap into the join between this resistor and the sender. This works out as 2580 Ohms for the current limiting resistor, i think i used a 2700 Ohm (2.7k) and it worked fine for me. 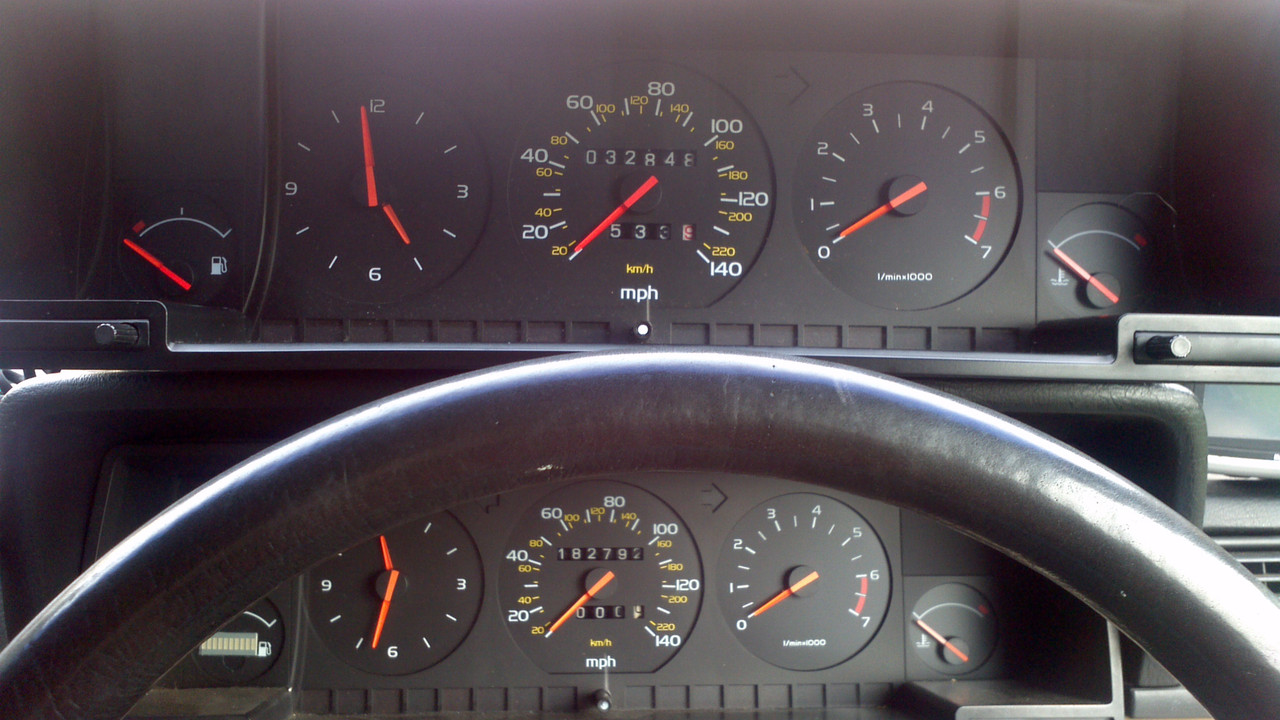 The gauge installed ^^^^^ 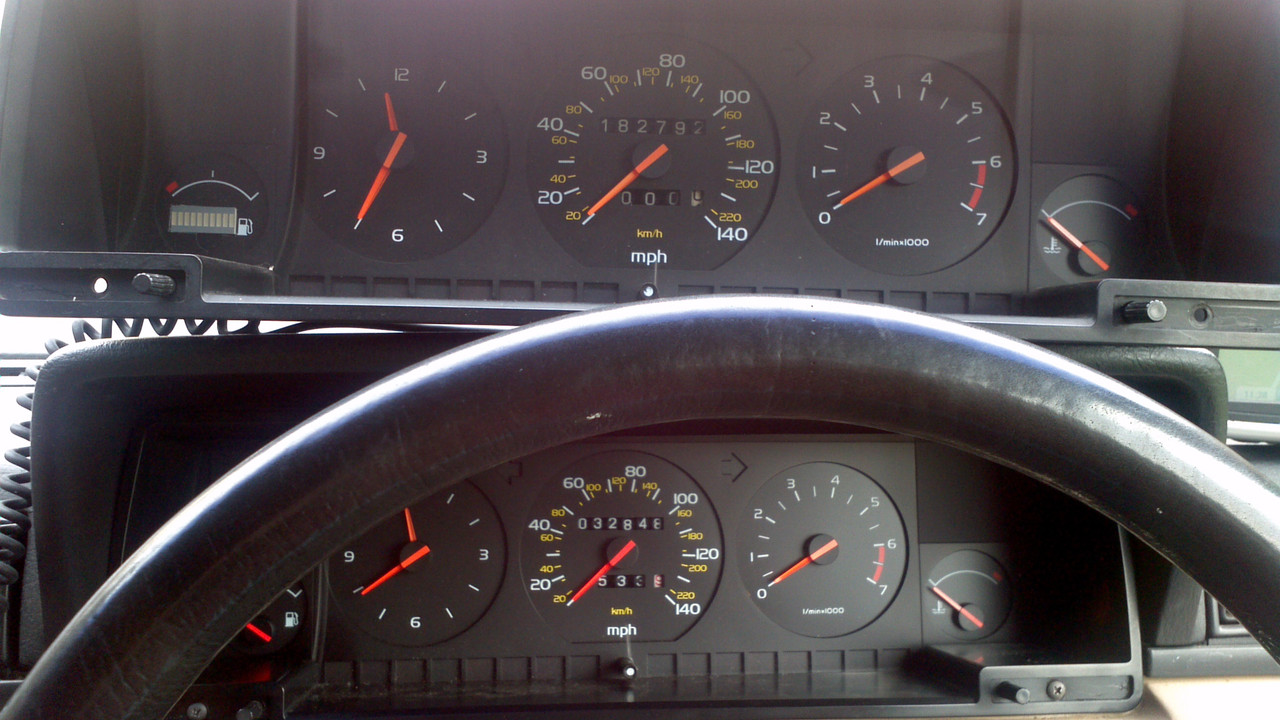 About 7 minutes later after swapping the instrument cluster for one with a working OE gauge and errrrrrrr............... much lower mileage!  That was 11 years ago now so the memory is a bit fuzzy, i can probably remember most of the details about the LED gauge though. To be honest, it would probably be just as easy to build the bargraph gauge as it would to build a "Feed Me" light, component count would be similar, just more LEDs to wire in but they're easily done using a 20-pin DIL socket for the bargraph display.
__________________
Cheers Dave Next Door to Top-Gun with a Honda CR-V & S Type Jag  Volvo gone but not forgotten........ Volvo gone but not forgotten........
|

|
|
| The Following 3 Users Say Thank You to Laird Scooby For This Useful Post: |
|
Jun 10th, 2023, 08:07
|
#43 | |
|
Senior Member
Last Online: Today 10:14
Join Date: Aug 2006
Location: Cannington
|
Quote:
 Seriously though, thanks. I searched for the driver chip and found a website with a good explanation and some example circuits. I'm sure it's something I could learn to work out. A good project for when it's wet and cold I think. More idle musings. Perhaps it might be possible to buy a smiths or similar analogue gauge, and and fit the guts from it behind the standard faceplate. I'd need to get a what might turn out to be sacrificial set of clocks to try it with first! |
|
|
|
|
| The Following 3 Users Say Thank You to Chris1Roll For This Useful Post: |
|
Jun 10th, 2023, 10:57
|
#44 | |
|
Premier Member
Last Online: Yesterday 11:32
Join Date: May 2012
Location: Lakenheath
|
Quote:
It would work but it would be backwards, reading full when the tank was empty and vice versa.I think your idea of building the LED bargraph gauge and fitting it into a switch blank is probably a good compromise - it would also be worth measuring a switch blank to check it is big enough to hold the display (25 x 10mm roughly) or alternatively, i have a 3-gauge panel that clips into a DIN size hole in the dash (i think i still have it), you'd be welcome to that for the cost of postage. Assuming i still have it of course!  That was it in my 760, when powered up they light up and the front becomes transparent ish - simple window tint film with a fairly high VLT (Visible Light Transmission) so if not backlit, it appears black, once backlit it becomes nearly clear.
__________________
Cheers Dave Next Door to Top-Gun with a Honda CR-V & S Type Jag Volvo gone but not forgotten........
|
|
|
|
|
| The Following 3 Users Say Thank You to Laird Scooby For This Useful Post: |
|
Jun 10th, 2023, 21:49
|
#45 | ||
|
Senior Member
Last Online: Today 10:14
Join Date: Aug 2006
Location: Cannington
|
Quote:
Now I see why this why this one has the option of 'European' and 'American' with them reversed to 240-30 Ohms. https://wema.co.uk/products/fuel-gau...nt=29703054791 It wouldn't work quite properly though as the range is off - Haynes says the sender works between 296 Ohms empty and 36 Ohms full, So it would say it was empty too soon and never quite peg the needle when full. Safe and better than most people's current situation though. Quote:

|
||
|
|
|
| The Following 2 Users Say Thank You to Chris1Roll For This Useful Post: |
|
Jun 10th, 2023, 22:04
|
#46 | |
|
Premier Member
Last Online: Yesterday 11:32
Join Date: May 2012
Location: Lakenheath
|
Quote:
  I checked and i still have that panel complete with gauges. One is air/fuel (never tried it but allegedly connects to the output from the Lambda sensor), second is voltmeter for checking the battery and last is a vacuum gauge - something in the back of my mind says the vac gauge read wrong which is probably why i didn't use it for very long. Drop me a PM if it's any use to you. :thumbs-up:
__________________
Cheers Dave Next Door to Top-Gun with a Honda CR-V & S Type Jag Volvo gone but not forgotten........
|
|
|
|
|
| The Following 2 Users Say Thank You to Laird Scooby For This Useful Post: |
|
Jun 10th, 2023, 22:21
|
#47 |
|
Senior Member
Last Online: Today 10:14
Join Date: Aug 2006
Location: Cannington
|
This mornings quick job before going out was to make a start on sorting the non-functioning washer jets out.
Earlier in the week I discovered they were non functional. Some prodding of the jets with a wire that evenong elicited a little dribble which soon blocked again. Additionally the T Piece non return valve was blocked up. I had dismantled it and removed the diaphragm and blown air through it with the stirrup pump which cleared it temporarily. Again they worked for a couple of seconds, I hooked the pump up again and they wouldn't clear with 50psi behind them. Today I removed the tank, the nozzles and all the hosing and it was clear why they are blocked, as expected the tank was full of black slime: 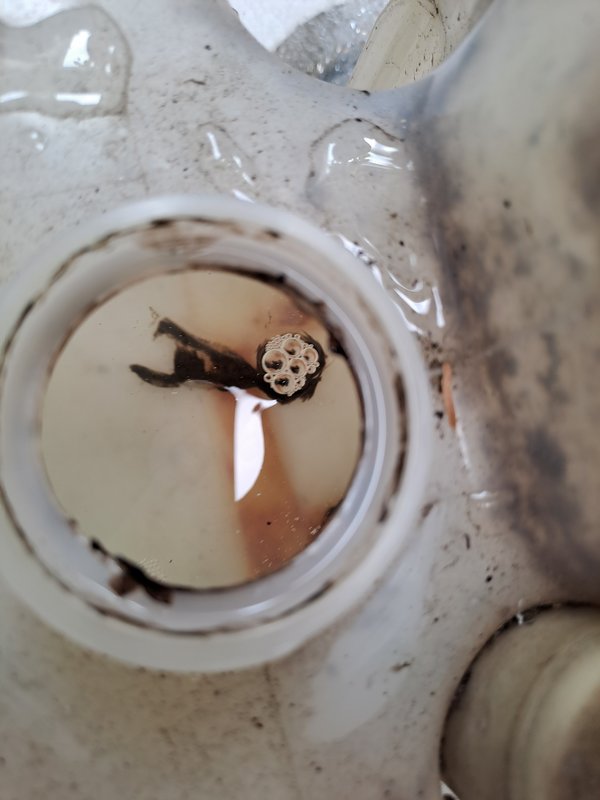 A common issue usually caused by being filled with plain water rather than screenwash and probably exacerbated by extremely low mileage and ths turnover of the water over 34 years. I didn't even bother trying to clean this filter  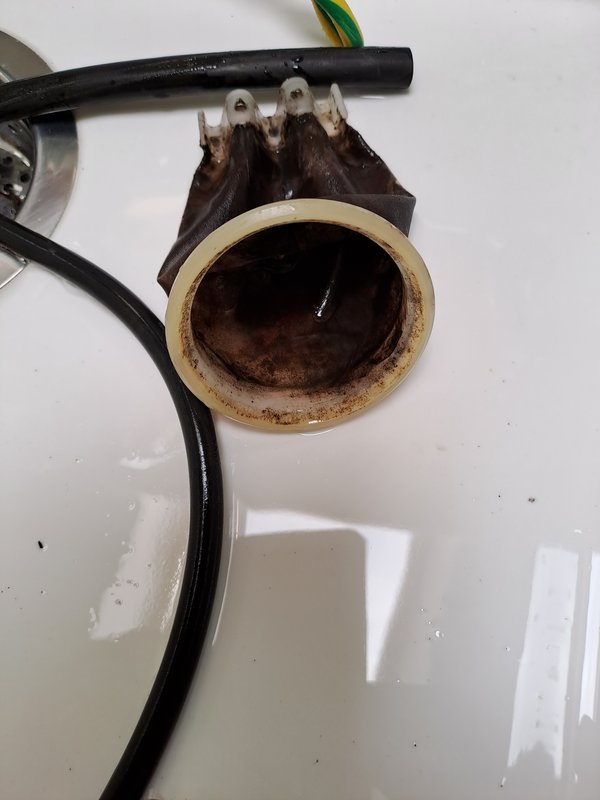 That went in the bin. If I'm the only one filling it up I can make sure I don't pour sand into it! It is good that Volvo apparently anticipated this and provided a second access hole for cleaning. Even then it was a bit awkward to get right into the corners. Thus, with pleasure I present the Chris1roll patented washer-tank-cleaner-outer: 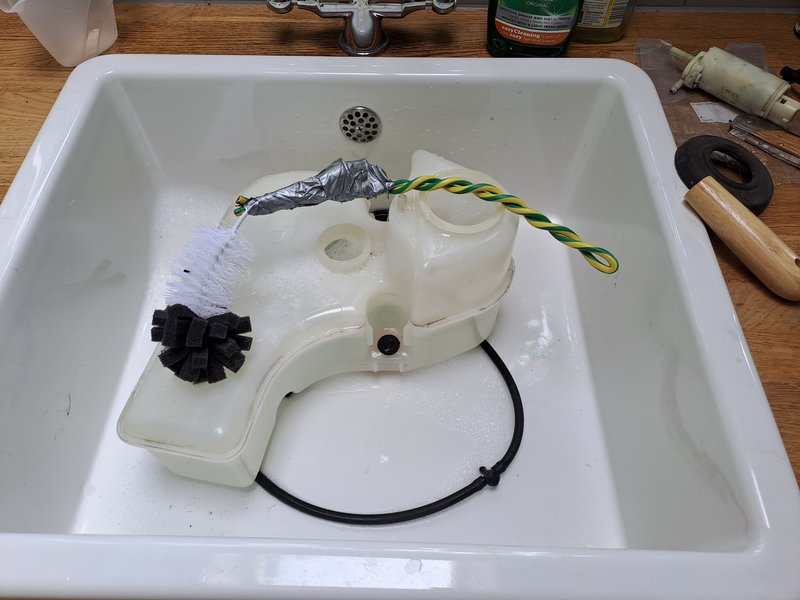 Ready to be refitted and filled with actual screenwash concentrate and not whatever had fed that mould before: 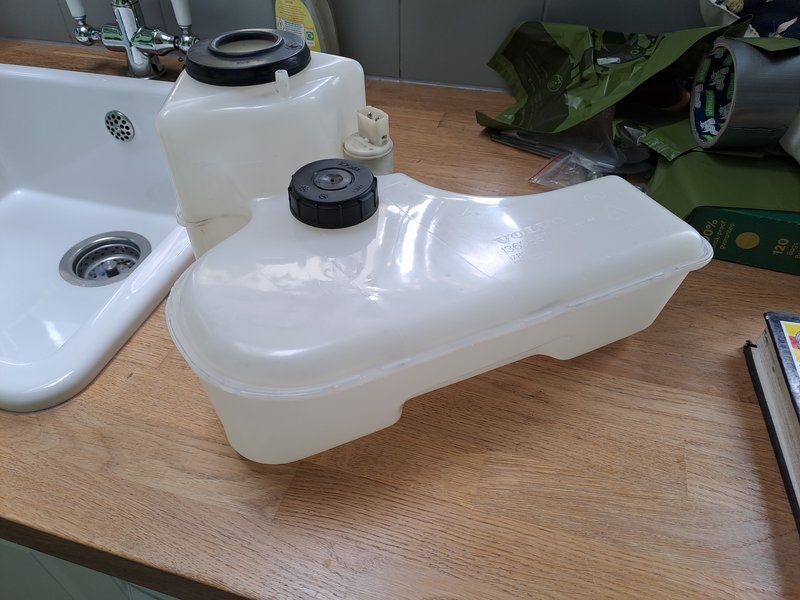 I gave up trying to clean the pipes out, I'm pretty sure they have a layer all the way through them too - every time I thought they were clean the next lot of water through them produced more slime. In the end I decided my time was more valuable than doing that for hours and ordered some silicone hose for a few pounds. Should be less likely to grow slime than rubber. One of the inlets snapped off the jet while cleaning so I also ordered some 'universal' fan type washer jets for the princely sum of £2.88. They were the only ones that actually gave the dimensions on them so I could tell if they would fit the holes. We wiill see what the quality is like and whether the fan type are adjustable enough to work with the steep windscreen of the 700 series when they arrive Failing that Brookhouse sell the standard ones for a few pounds. I'l just carry a bottle of water for the time being. I hadn't intended on spending any money on the car this month, just drive it and see what else I find to do, but I think I can make an exception to make sure I can see where I am going and staying road legal. |
|
|
|
| The Following 3 Users Say Thank You to Chris1Roll For This Useful Post: |
|
Jun 11th, 2023, 07:04
|
#48 |
|
Premier Member

Last Online: Today 10:14
Join Date: Jan 2020
Location: Corby del Sol
|
240s have the same issue with the washer jets. With the Barge I cleaned out the black slime in the bottle and changed the jets (from Brookhouse at £17/pair) and they work fine now.

__________________
... another lovely day in paradise. 
|
|
|
|
| The Following 3 Users Say Thank You to Othen For This Useful Post: |
|
Jun 15th, 2023, 22:03
|
#49 |
|
Senior Member
Last Online: Today 10:14
Join Date: Aug 2006
Location: Cannington
|
The self destructing entity that is Royal Mail finally delivered the piece of T304 pipe that I wanted to use for a tailpipe - who knows what they did with it for almost a fortnight on a 48 hour service.
Just a simple, standard sized, unpolished piece of stainless clamped on with a t-bolt clamp. I think that it looks quite tidy: 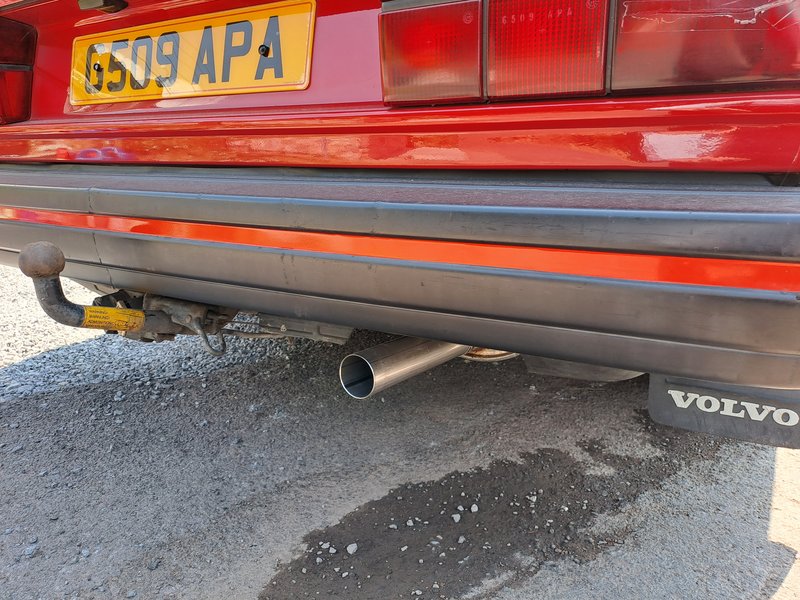 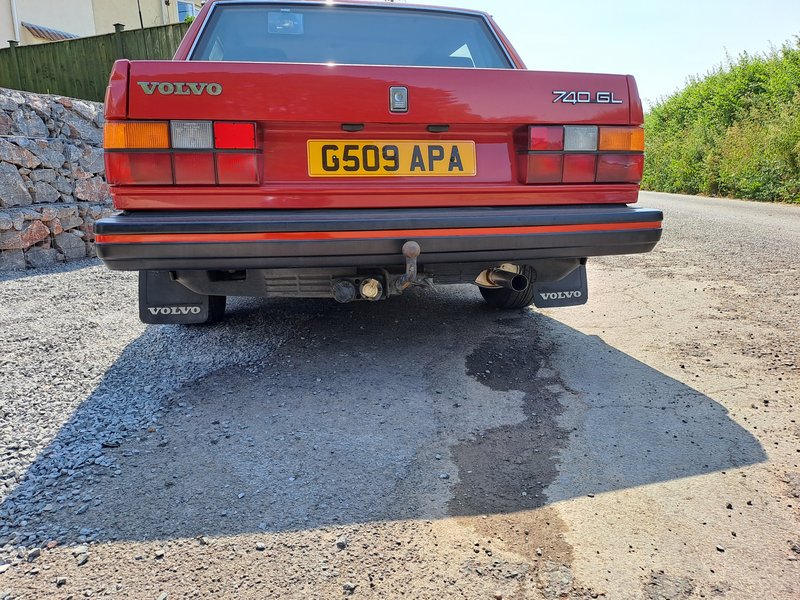 If I can remove the towbar and find an unmolested rear valance I think that will do just fine I also performed the first drain and fill of the transmission on Tuesday eve. It was pretty brown, but just smelled of atf, not burnt, and still had a slight red tinge on some paper. (it was better than what was coming out of the XC, thats for sure!) I had left it parked for three days to allow as much as possible to make its way out of the TC and into the pan, jacked it up (placed axle stands), removed the plug, then dropped it back down again to get the most out possible. I measured exactly what came out - 3.15 litres, and measured (in the same, but cleaned out, jug) exactly 3.15 litres back in. Took it for a 12 mile drive and checked the level - overfilled.  Either it was overfilled to start with, or the co-efficient of expansion of the new fluid is higher, but it was right up to the end of the plastic part of the stick Once it had cooled down the next day I used a 60ml syringe and some clean tubing to suck 250ml back out again. That turned out to be a good estimate, as once I had done the school run (just under 10 miles, some stop-start, some free-running) I checked the level again - bang on the top of the hot mark. I'll check it again in a week and then do a second drain and fill next month. In theory I'll only get 2.9 litres out at a time now. so it will take marginally longer to complete a full change. My word that pan feels ridiculously thin. I so gingerly snugged the plug up with my hand barely up the ratchet handle from the socket. It had a funny 10 seconds earlier - I started it after it had been sat for about 1 and a 1/4 hours and for a few seconds it only ran on three cylinders. Once i revved it to about 1200 rpm it cleared and was fine afterwards. I'll monitor, but for the moment, I shall put it down to just very old redblock kjet things I guess. My next tinker will probably be to investigate if the auxillary air valve is actually doing anything. The ~500 rpm idle on a cold start is OK now but might not be so great in the winter. Wouldn't, I don't think, explain the funny 10 secs above though. Still loving it so far - my daughter says she can tell which car I am picking her up in as she can hear the viscous fan roar as I pull away from the traffic lights outside the school. Prompted a discussion about 1) how we agree we both think it sounds awsome, and 2) how the viscous fan works which I think she may have been mildly interested in - or she could have been pretending, it is hard to tell with teenagers. I'm just debating whether to take it when I have a couple of business meetings next week. They are both approx 50 miles each way. 99% sure it'll be fine, but the trip home from buying it has given me the fear  so the 1% of me thinks I should probably first do some longer journeys and try the motoway on some days out, where a breakdown would just be an inconvenience rather than a very embarassing let down of other people. I haven't done any more than 15 miles in one hit with it yet. so the 1% of me thinks I should probably first do some longer journeys and try the motoway on some days out, where a breakdown would just be an inconvenience rather than a very embarassing let down of other people. I haven't done any more than 15 miles in one hit with it yet.
|
|
|
|
| The Following 3 Users Say Thank You to Chris1Roll For This Useful Post: |
|
Jun 15th, 2023, 23:15
|
#50 | |
|
Premier Member
Last Online: Yesterday 11:32
Join Date: May 2012
Location: Lakenheath
|
Quote:
 Thinking about the funny 10s after a semi-cold start that should really be a hot start, both the AAV and Warm-Up Regulator (WUR) in the fuel distributor are electrically heated. In the past, the best way of recovering a jammed AAV (usually get loads of gum deposited on in the closed/hot position) is to find a self-sealing bag (food bag type), remove the AAV and give it a seriously good bast from both ends into the pipes with carb/air intake cleaner and pop it in the bag and leave it in the freezer overnight. It should be open when you remove it, if so, give it a blast of carb cleaner again to further free the gum and fit it to the car, do a test start. If it's still closed, give it a blast with the carb cleaner and see if it moves any - sometimes a thin screwdriver can be used to help it open, the bimetallic spring doesn't always overcome the gum/gunge. If it starts to move, give it some more cleaner and put in in the bag, back in the freezer for another half hour to an hour Usually this time (after giving it a tweak with a screwdriver to start the movement) it will open. Then proceed from the "should be open when you remove it" above. Assuming this all works and you can recover the AAV, you should find that after 1 1/4 hours, a restart will give a raised idle speed for a few minutes until the AAV heats up again - it sounds like the WUR is working as it should as it gave a slightly richer mixture which you cleared by giving it some revs. If all else fails with the AAV, many other cars use the same or very similar one, find the Bosch 0 280 xxx xxx number on it and do a search online (including ebay) for it and also look at similar numbers that come up as they may be suitable but open/close slightly slower or quicker, depending on the application. On a totally different note, i recall you saying you binned the washer reservoir filter (the bucket/basket shaped thing that fits in the top, i have one of those going spare, i removed it to clean it and forgot to refit before selling the car.
__________________
Cheers Dave Next Door to Top-Gun with a Honda CR-V & S Type Jag Volvo gone but not forgotten........
|
|
|
|
|
| The Following 2 Users Say Thank You to Laird Scooby For This Useful Post: |
|
| Currently Active Users Viewing This Thread: 1 (0 members and 1 guests) | |
|
|


 Linear Mode

