
|
|||||||
| XC90 '02'15 General Forum for the P2-platform XC90 model |
 Information
|
|
Front Discs, Pads Replacement - GuideViews : 8690 Replies : 23Users Viewing This Thread : |
|
|
Thread Tools | Display Modes |
 Oct 2nd, 2010, 21:29
|
#1 |
|
Master Member

Last Online: Feb 3rd, 2024 18:39
Join Date: Sep 2009
Location: Sunny Scotland
|
Hi Folks
Having replaced the rear brakes a few weeks ago, I decided to replace the fronts too. They were not too bad, but would need doing in a few months, so doing them now, meant that they did not need doing in mid-winter! Anyway - firstly, getting the right partnumbers for genuine or aftermarket pads and discs for the front was tricky, as several conflicting numbers appeared for the VIN... and when looking at the diameters and size of pads, they did not agree! Anyway - I was told that all UK XC90s have the same front discs and pads - I am not sure if this holds true for the 17" wheeled vehicles (mine is 18") but suspect it is. This is further confused by the fact Volvo seem to state 16" or 17" wheel son the boxes and listings! Anyway - these are the discs and pads... 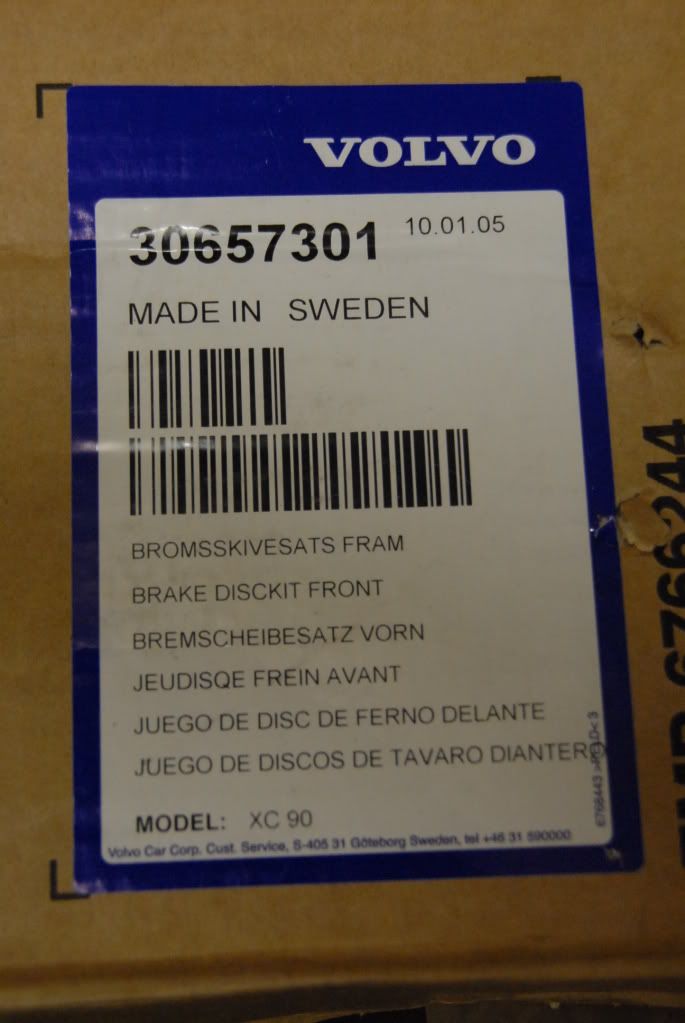 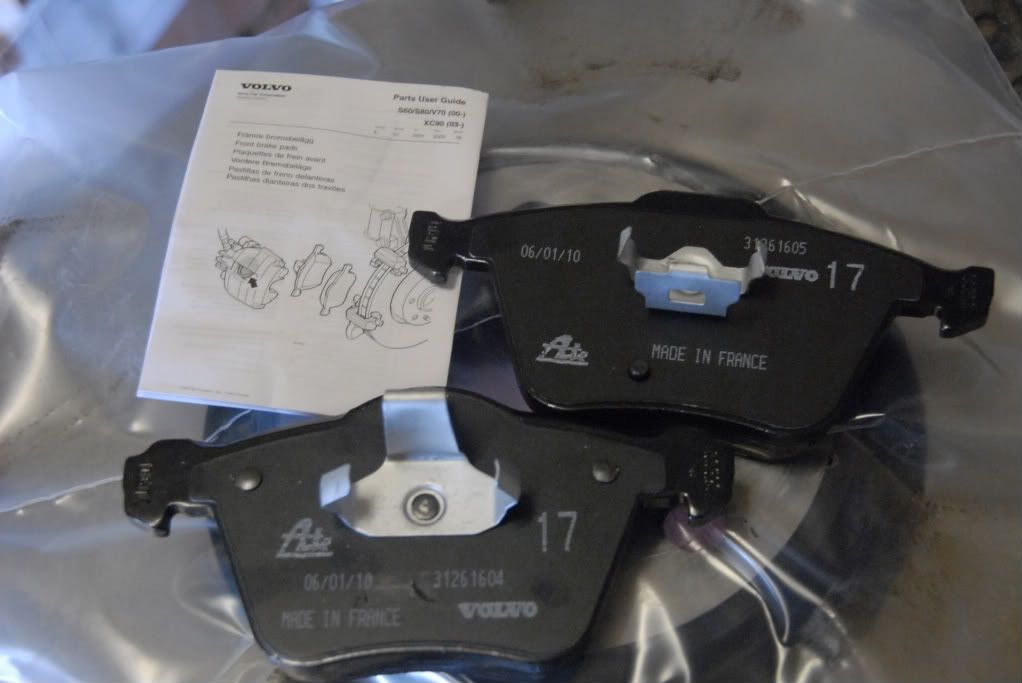 Have a close look at the pads - the upper pad (in the picture above) has a small rectangle cut on the pad bracket - this is the bracket that you see from the front of the caliper and it locks the caliper anti-rattle spring. 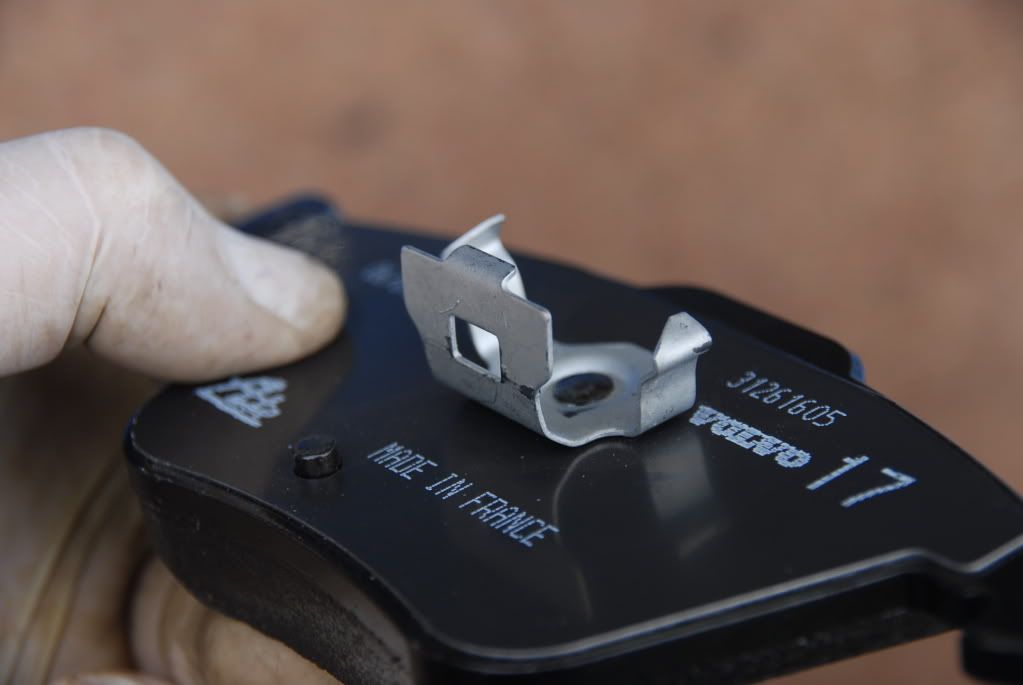 It is not obvious when you look, but you need to unclip the spring from this bracket when you start the job. The bracket you see below - at the left hand side is the pad bracket - this its easy to see how to release the spring. 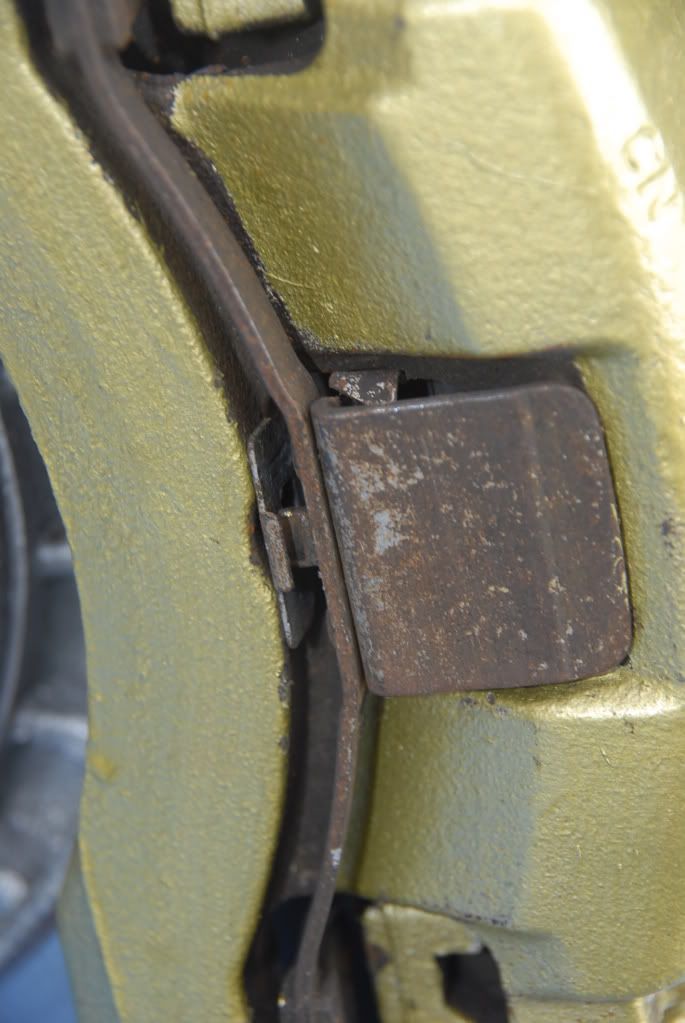 And..the spring when removed... 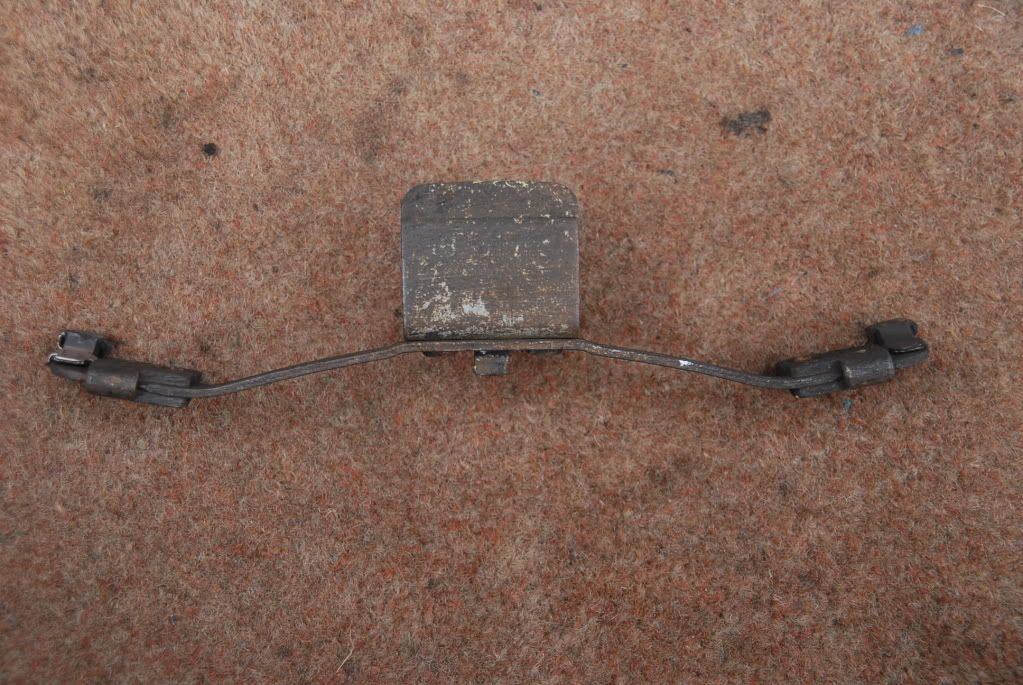 Anyway - when I first got the car, I thought it must have 2 or 4 pot calipers, given the size of the calipers - they are huge! They are however, single pot (piston), but are substancial. The good news is that removing them follows what has become standard practice on most modern cars. 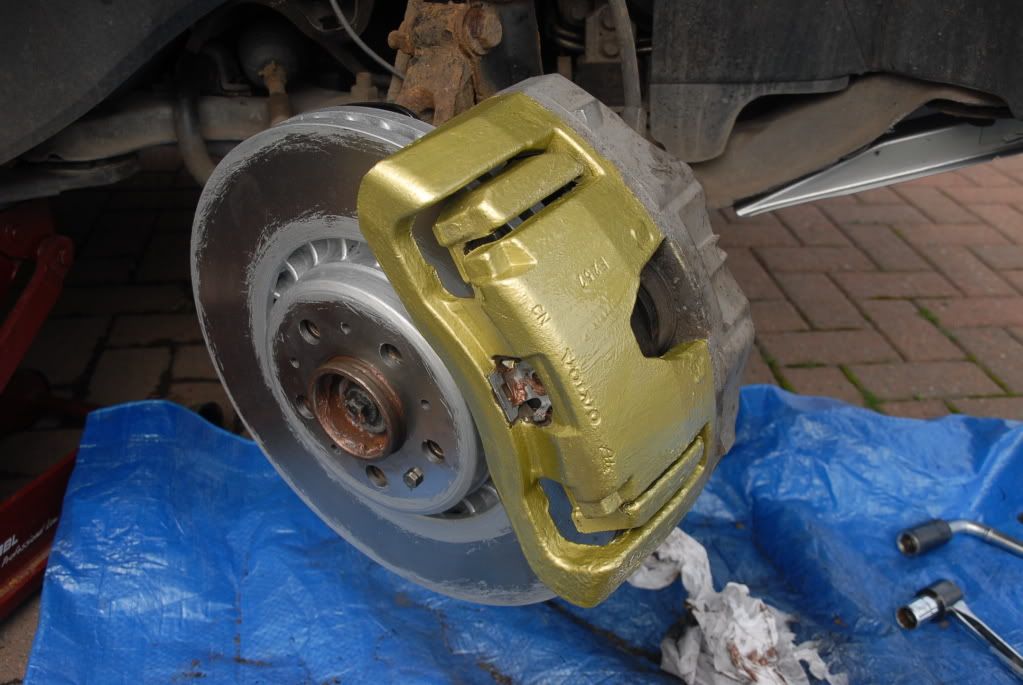 To remove the pads, you need to remove the two caliper slides. These are similar to the rear setup on this car - remove the two plastic caps (highlighted within the red ) then under them, two hex head pins - easy to remove and no threadlock so easy peasy. Take note - unlike the rears, these pins are of differing lengths - the longer one being fitted to the upper slide. 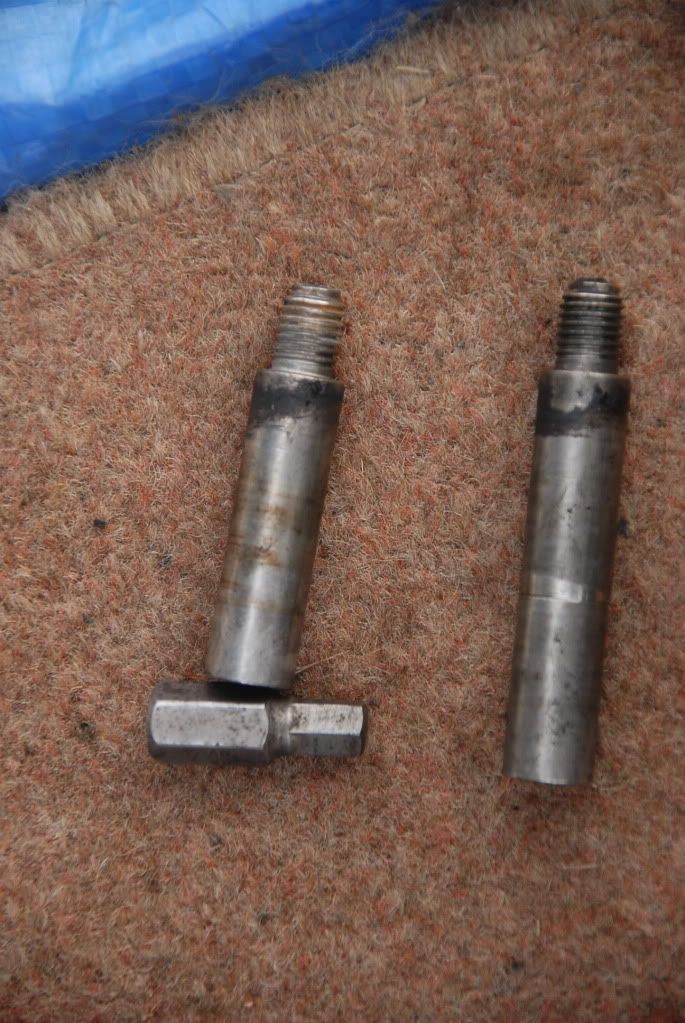 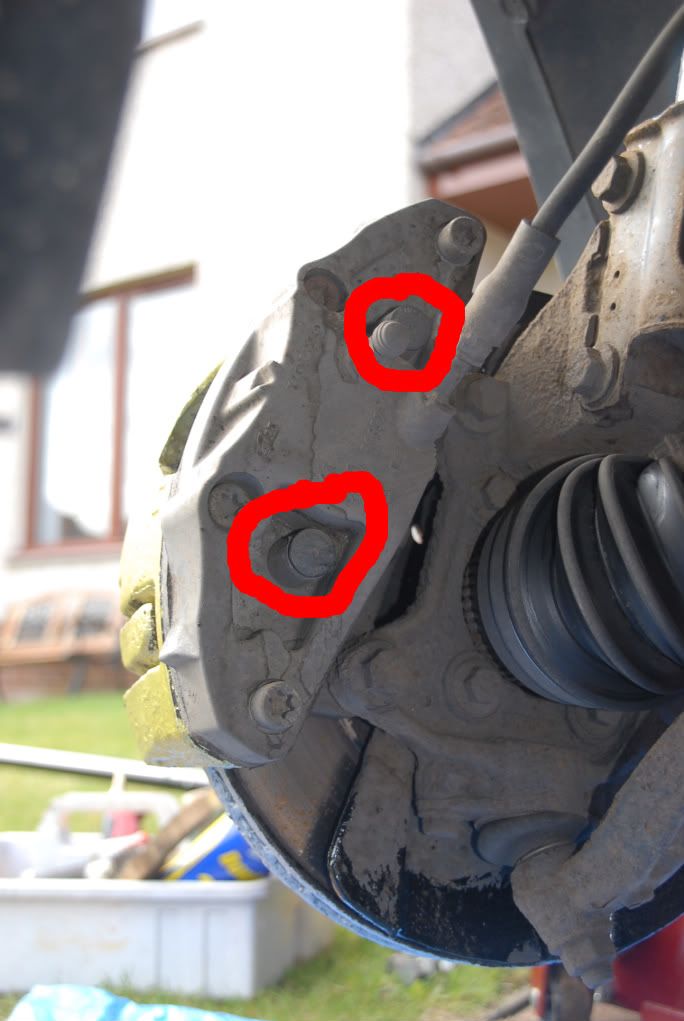 When the caliper is removed, remove the pads - one is clipped into the caliper front, and the other clipped into the piston. When removed, ensure that you support the caliper properly, and that the rubber brake hose is not being unduly twisted or under tension. Next - you need to remove the caliper carrier bracket. This is two bolts to the hub - shown below. These appear tight, but in reality, its just the threadlock holding them in.  Once the bracket is off, its a simple job of removing the centre 10mm bolt and removing the disc. If the disc is tight, give it a few hits from the rear to free it off. If its really stubborn, put some release oil through the wheel bolt holes aiming between the disc and hub - that usually does it. 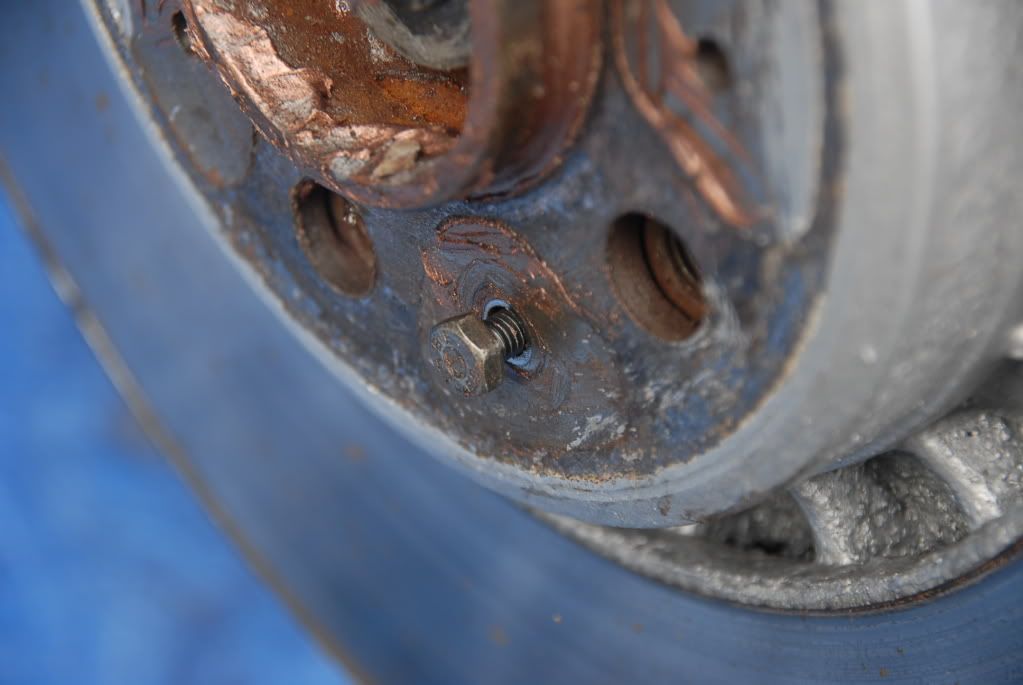 With the disc removed... 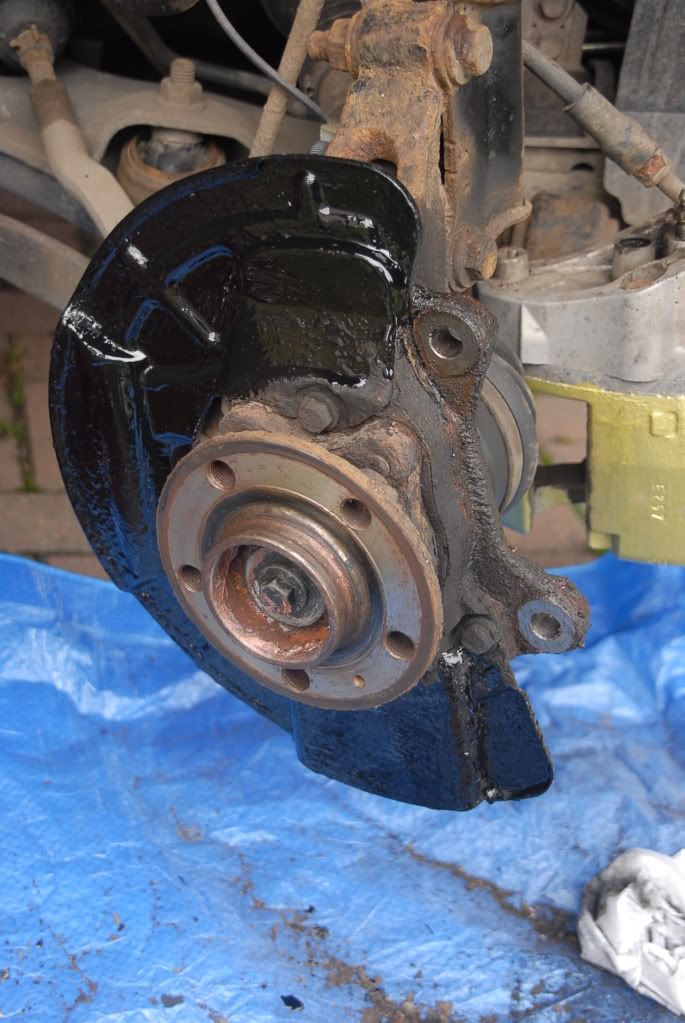 So - put it all back together! When refitting the disc, ensure that there is no debris between the hub surface and disc rear. Its usually advised these days, to loosen the bleed nipple on the caliper when pushing the piston back in to save any risk or reversing the direction of any seals within the ABS or master cylinder. Your call - just get it pushed back! Fit the pads to the caliper - both clip in. Refit the caliper carrier, having replaced the bolts or cleaned the threadlock out of the original bolts - remember to use threadlock when fitting (if the replacements dont already come with threadlock in the threads). 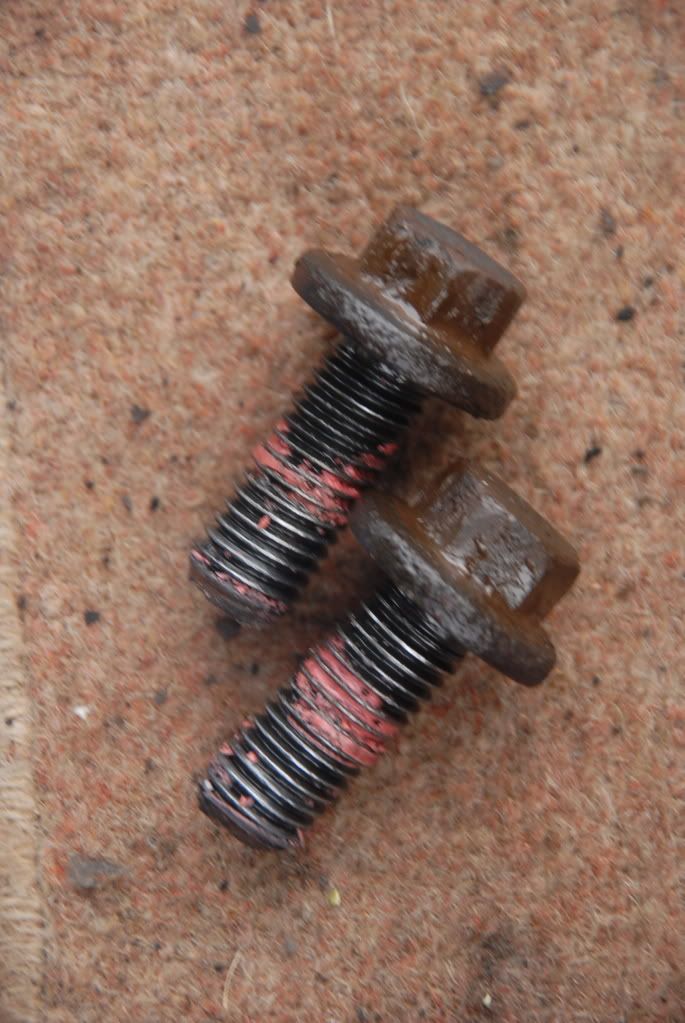 Now, get the caliper back on the disc and fit the two slide pins having cleaned them up first - remember to observe the long/short fitment. All that remains is to refit the spring - just the reverse of removal - this time clipping it into the pad bracket. Its sensible to put some coppaslip around the hub centre where the wheel locates, as they often corrode on. Thats it! David Last edited by BestGear; Oct 2nd, 2010 at 22:47. |

|

|
| The Following 17 Users Say Thank You to BestGear For This Useful Post: | 400-ascona, ascender, Balistaff, bobdabuilda, chb, DCO, Fika, galloot633, ianu, JIM C, JimG, Maxxypriest, mumblin, NCS XC90, Ron_XC90, staffy460, ted striker |
| Currently Active Users Viewing This Thread: 1 (0 members and 1 guests) | |
|
|


 Threaded Mode