

|
|||||||
| 850 / S70 & V70 '96-'99 / C70 '97-'05 General Forum for the 850 and P80-platform 70-series models |
 Information
|
|
New pride & joyViews : 75976 Replies : 301Users Viewing This Thread : |
 |
|
|
Thread Tools | Display Modes |
|
|
#261 |
|
Master Member
Last Online: Yesterday 14:52
Join Date: Nov 2001
Location: Evesham
|
I have just replaced the radiator on my 1994 850. I don't have an intercooler and was able to slide the radiator out WITHOUT removing any of the fan assembly. That made the job a whole lot easier. I just had to undo the two screws that attach the fan cowling to the radiator.
I also had one radiator securing nut shear off the body while trying to undo it - despite using copious amounts of penetrating oil. . In my case I used a pad saw to cut through the shaft of the bolt and then simply used a new bolt and a normal nut to replace the sheared off circular nut. |
|
|

|
| The Following User Says Thank You to volvo2 For This Useful Post: |
|
|
#262 |
|
Premier Member
Last Online: Today 08:51
Join Date: Jan 2011
Location: Horne (Nr. Horley)
|
OK, so the old flying brick has been good as gold for ages now, and not really needed touching. However, recently my wife complained that the air from the vents was a bit whiffy, so I thought I'd remove the scuttle cover and clean out any dead leaves etc. that I found there. Doing this exposes the ventilation air intake, and so as my car doesn't have a pollen filter I thought that this would be a good opportunity to fit one.
So, I ordered the filter and the filter holder assembly from our good friends at FRF in Swansea, they arrived quickly and efficiently, £43 delivered. They arrived today: 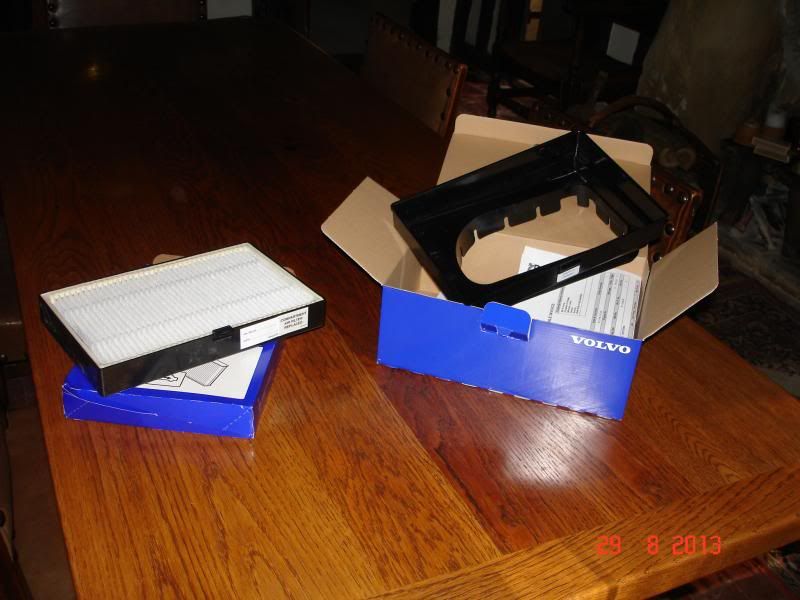 So, I thought I might as well get on with the job. Here's the car showing the scuttle cover, ready to go - you can see a ready supply of dead leaves even on top of the cover!: 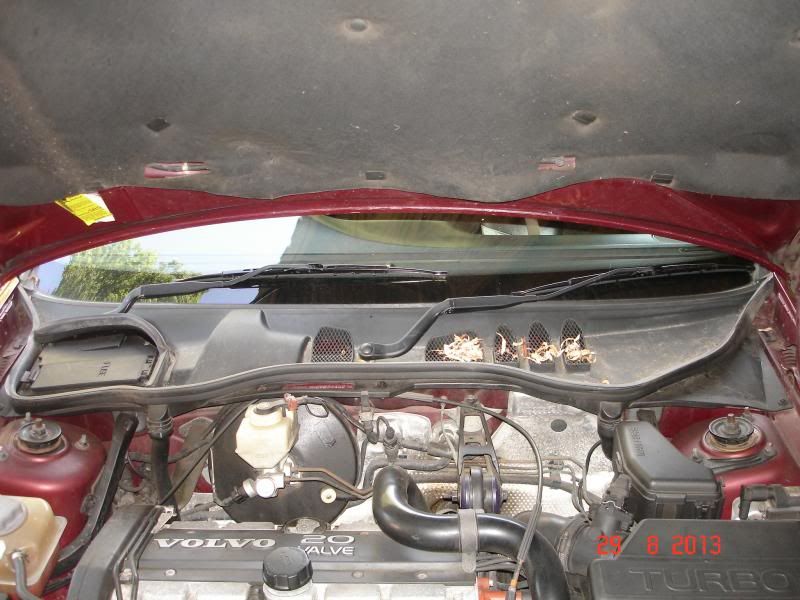 First thing is to remove the wiper arms (13mm socket) and then the weather sealing strips around the lower edge of the cover, and around the fuse box, then remove the 5 x torx screws (T25 torx). Here's the car at this stage: 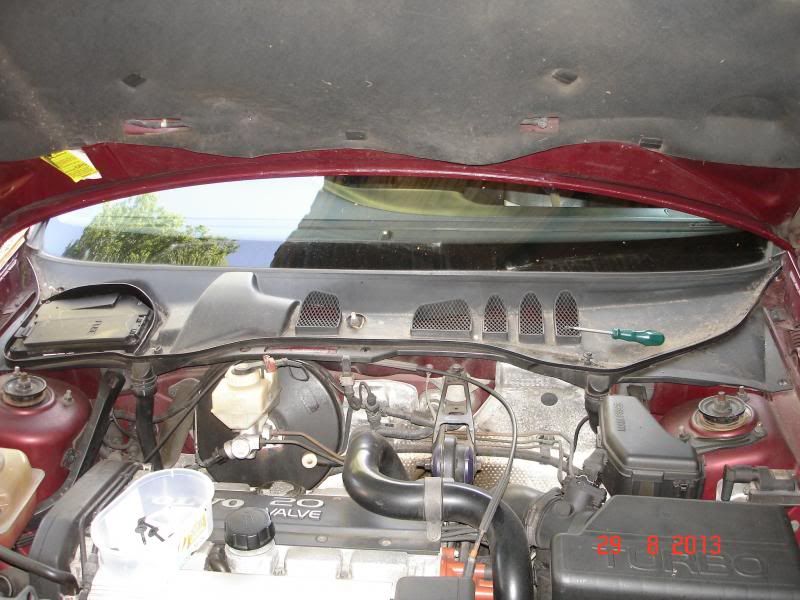 Next job is to undo the electical connector in the middle, and then undo the two drain pipes at either end of the cover - these have squeezy hose clips, a large pair of pliers soon had them released and the pipes slip off easily. Now the cover can be wiggled free: 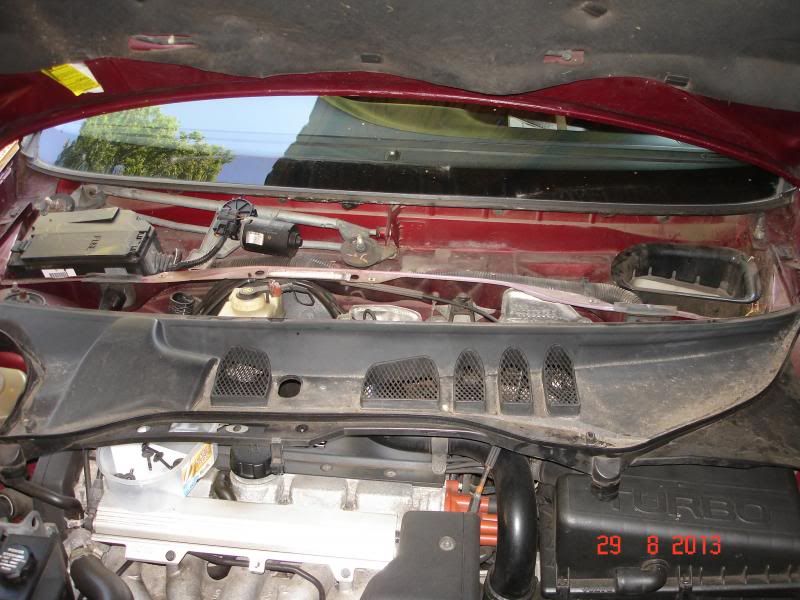 This reveals the ventilation air intake. The non-pollen filter cars have a rain-deflector cover like this, which has to be removed: 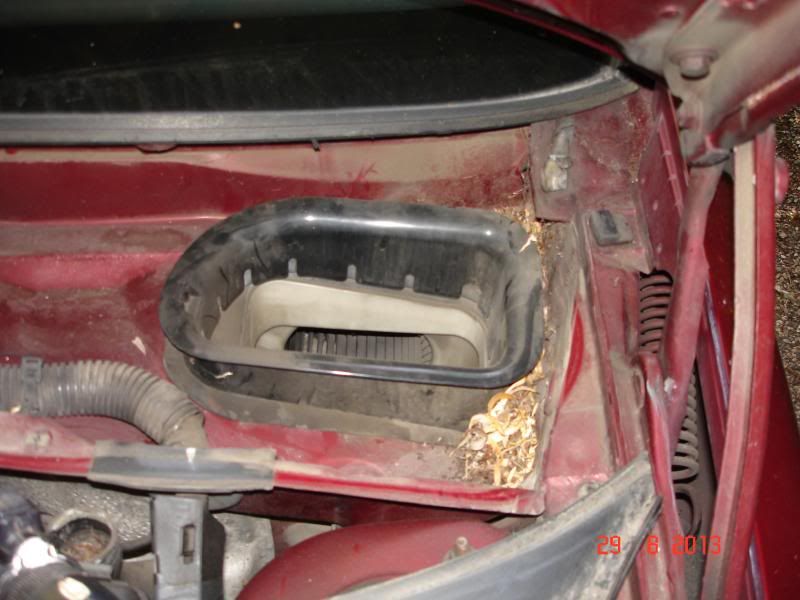 Next job was to clean it all up - this probably took longer than the rest of the job did, but I wanted to make sure there wasn't anything smelly down there, or anything that would trap water and cause rust. I used a bucket of hot soapy water and some Cif and here we are nice and clean: 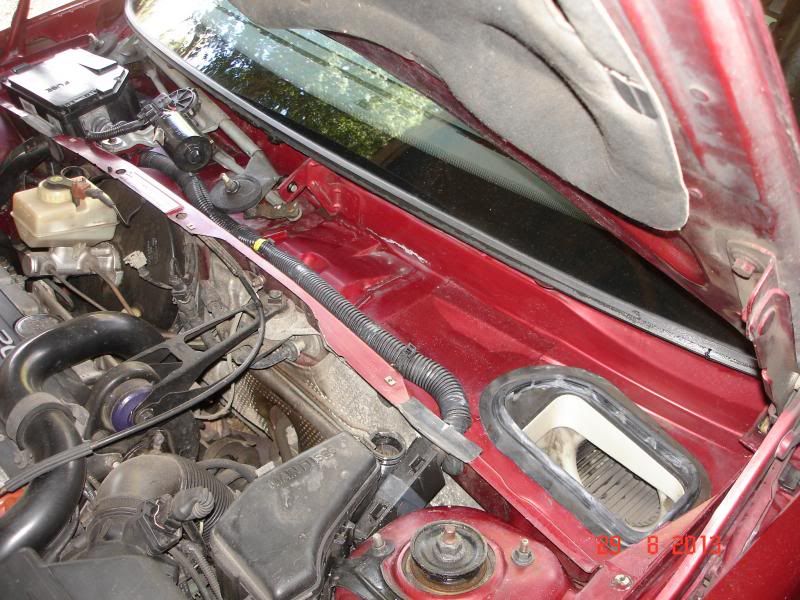 Cleaned the scuttle cover at the same time of course: 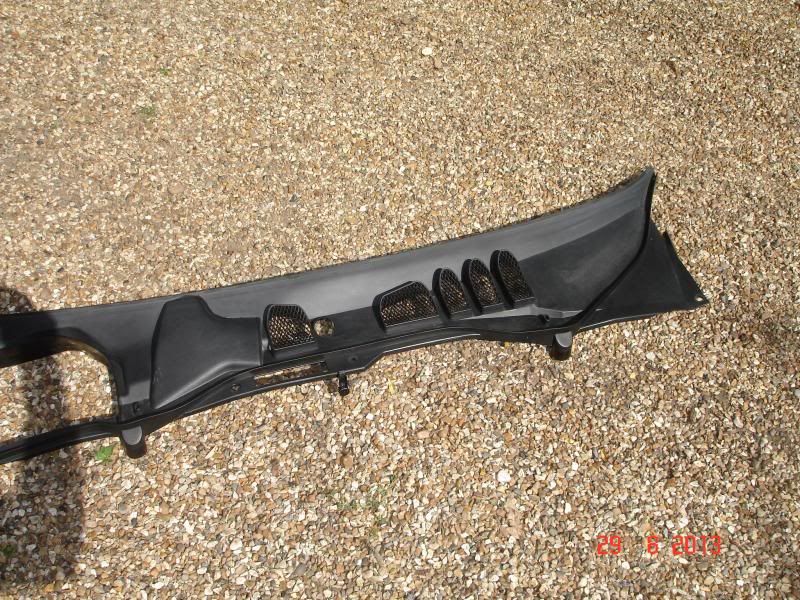 Dried this all out with an old towel, and next job was to fit the new filter housing. This is just a press fit, but needed quite a firm push to get it seated properly: 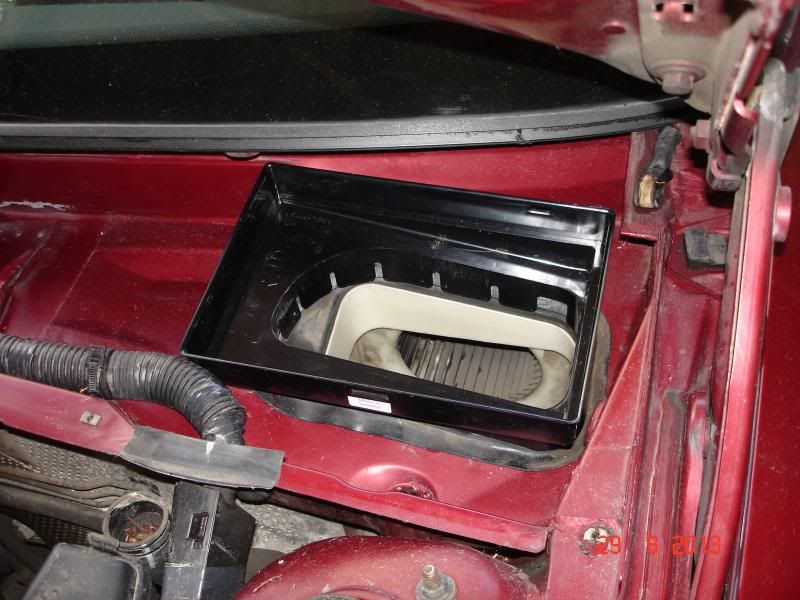 And here with the filter fitted: 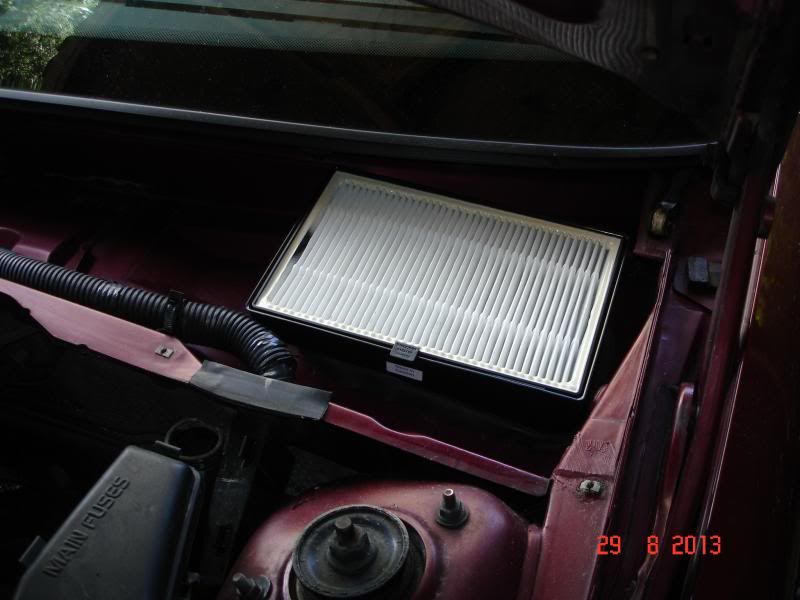 Then - re-assembly is the reverse of dismantling, as they say. Well, not quite... Taking the scuttle cover off was quite a fiddle to get it off aroudn the fuse box, but with a decent tug it came free. However, putting it back proved to be too fiddly for my patience so I just whipped the top off the fuse box (4 x T25 torx again) and re-fitting it was MUCH easier: 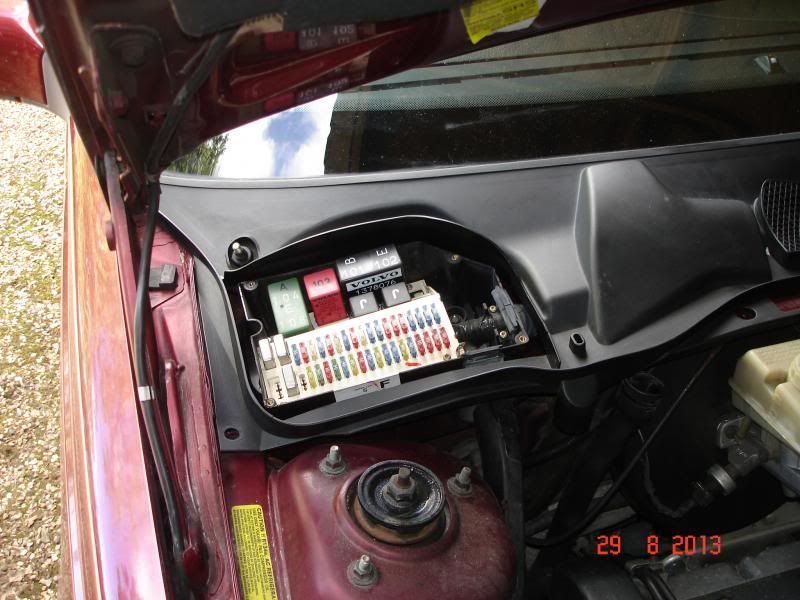 Then back on with the fuse box cover, and replace the 5 x T25 torx screws holding the scuttle cover, re-connect the sensor and re-fit the drain hoses. Squeezing the hose clips to get them back on was a fiddle, but a bit of persistence (and sore fingers) won out in the end: 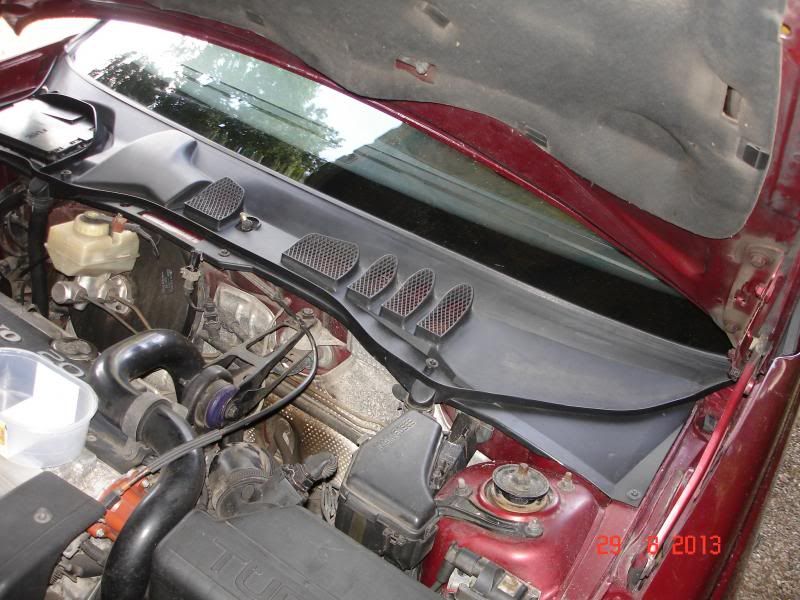 I then re-fitted the wiper arms, after brushing a little copper grease on the splines, to make sure they don't seize on too badly in the future. Finally, re-fitting the rubber draught strips saw the job done: 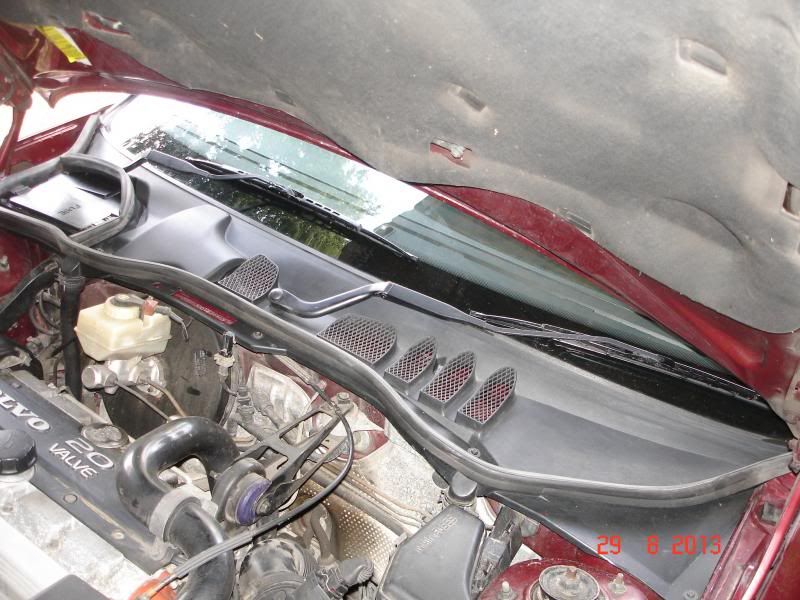 All in all about an hour to do, as I said at least half this time was doing a thorough job of cleaning it all up, but overall a VERY easy job! Theoretically you could do this without removing the wipers, and just lifting the nearside end of the scuttle panel up a bit, but you wouldn't be able to clean it all out very thoroughly and it'd be quite a fiddle, and taking the cover off completely is really easy so I'd recommend doing this. Now I should be in better shape next hay-fever season, and the smell of dead leaves should be gone too! Cheers 
__________________
Some people are like Slinkies, they serve no useful purpose but they still bring a smile to your face when you push them downstairs. Last edited by Luxobarge; Aug 29th, 2013 at 16:42. |
|
|

|
| The Following 5 Users Say Thank You to Luxobarge For This Useful Post: |
|
|
#263 |
|
Ovlovnut
|
I cleaned mine out, not too long back. Tho I didn't think about adding a filter. My reason for investigation was that the fan motor was a tad noisy. Once dismantled, I ran the fan and then gave it a good spray of silicone. It shut the fan up immediately and it's been quiet ever since. Worth doing if you have the scuttle off I reckon.
__________________
2004 V70 2.4SE Auto 'The Welshmobile’ 2002 Laika Ecovip 400i ( Motorhome on an Iveco 2.8TD) http://www.gitessouthbrittany.com/ http://moncopainmonchien.jimdo.com/ |
|
|

|
|
|
#264 |
|
Senior Member
Last Online: May 24th, 2016 14:11
Join Date: Dec 2002
Location: Romford, U.K.
|
Hi Luxobarge
Thanks for that superb tutorial - has just got to be the best one! I bought this one from ECP: as you can see it does not have the hard plastic surround and tray: will I still be able to do it properly? Thanks very much. Reevo Quote:
__________________
Reevo Anders 1994 2.0L 20v 850SE Manual, 206000miles, no mods (EX!!) 1994 2.4L 10v 850SE Auto, 47000miles, no mods 2009 Renault Clio III, 1.2 16V, 52000 miles (ex: 1985 2.3L 740GL, 266000miles, no mods) |
|
|

|
|
|
#265 |
|
Premier Member
Last Online: Today 08:51
Join Date: Jan 2011
Location: Horne (Nr. Horley)
|
Reevo - you'll be able to replace the filter if yours has already got one, but if it's not fitted with the filter holder (as mine wasn't) then you'll need to get that from Volvo.
Cheers 
__________________
Some people are like Slinkies, they serve no useful purpose but they still bring a smile to your face when you push them downstairs. |
|
|

|
|
|
#266 |
|
Ovlovnut
|
Or from here :
http://www.partsforvolvosonline.com/...oducts_id=5589 Not sure which is best value ...... 
__________________
2004 V70 2.4SE Auto 'The Welshmobile’ 2002 Laika Ecovip 400i ( Motorhome on an Iveco 2.8TD) http://www.gitessouthbrittany.com/ http://moncopainmonchien.jimdo.com/ |
|
|

|
|
|
#267 | |
|
Aged Volvo Lover
Last Online: Sep 16th, 2021 10:19
Join Date: Jan 2011
Location: A place in mendip-land famous for its cheese - and its gorge
|
Quote:
 I've had that scuttle cover off a couple of times to tighten the dash retaining screws (creaky dash!). But I don't recollect an electrical connector! What have you got on yours that I ain't got on mine that needs a connector?
__________________
Our children don't inherit the world from us. We are borrowing it from them. |
|
|
|

|
|
|
#268 | |
|
Premier Member
Last Online: Today 08:51
Join Date: Jan 2011
Location: Horne (Nr. Horley)
|
Quote:
If your car doesn't have one then I'd not worry - just one of those things!
__________________
Some people are like Slinkies, they serve no useful purpose but they still bring a smile to your face when you push them downstairs. |
|
|
|

|
| The Following User Says Thank You to Luxobarge For This Useful Post: |
|
|
#269 |
|
Aged Volvo Lover
Last Online: Sep 16th, 2021 10:19
Join Date: Jan 2011
Location: A place in mendip-land famous for its cheese - and its gorge
|
Hmmm... can't say I've noticed if I have one or not!
Does look like it might be some sort of retainer. I'll have to look the next time I've got the lid up!
__________________
Our children don't inherit the world from us. We are borrowing it from them. |
|
|

|
|
|
#270 |
|
Forum Support Team
Last Online: Today 00:29
Join Date: Aug 2009
Location: Watford
|
I too have one of those plugs ... and no idea what it does!
If you ever find out, let us know! James |
|
|

|
 |
| Currently Active Users Viewing This Thread: 1 (0 members and 1 guests) | |
|
|