
|
|||||||
| 200 Series General Forum for the Volvo 240 and 260 cars |
 Information
|
|
Super chuffed with my new hi-spec 240 GLT!Views : 60324 Replies : 204Users Viewing This Thread : |
 |
|
|
Thread Tools | Display Modes |
 Jul 1st, 2012, 15:43
|
#181 | |
|
VOC Member
|
Quote:
John
__________________
XX 
Last edited by john h; Jul 1st, 2012 at 15:47. |
|

|

|
|
Jul 1st, 2012, 15:43
|
#182 |
|
VOC Member
|
The 240 has been working hard lately, and not getting much attention, but with the MOT coming up, and me having about to have my hernia repair done again (first operation failed), I decided it was time to deal with some some known issues. My good friend Steve (of Thor fame) helped with this - including doing all the welding - many thanks mate!
We serviced the car, replaced injector seals, fitted new front discs and pads, and repainted all 4 calipers. (They are working fine but had gone to look crusty). No photos of that work, it's been covered before on the forum. We also dealt with some rust in an important structural area of the car; the floor and chassis rail under the rear seat. In my experience 100 and 200 saloons rarely rust here, but estates often do. Perhaps the estate body-shell flexes a bit more, allowing water to get in the joint past cracked underseal? Once rust has started, it can flex more and you have a viscous circle. Anyway, from the inside it could be tempting to do a 'cover-up job' or a simple patch on the floor, but in reality it is much more important than that. This is a natural 'pivot point' for the rear of the shell, and the mountings for the rear suspension trailing arms and torque rods are nearby - not to mention the lower seatbelt bolts. I'd advise all owners of 100/200 estates in particular to check this area, and invest in a strong welded repair if there is any sign of corrosion. Onto the action: with the car fully supported and the rear seats and carpets removed, we began hacking away at the rust on the left side of the car 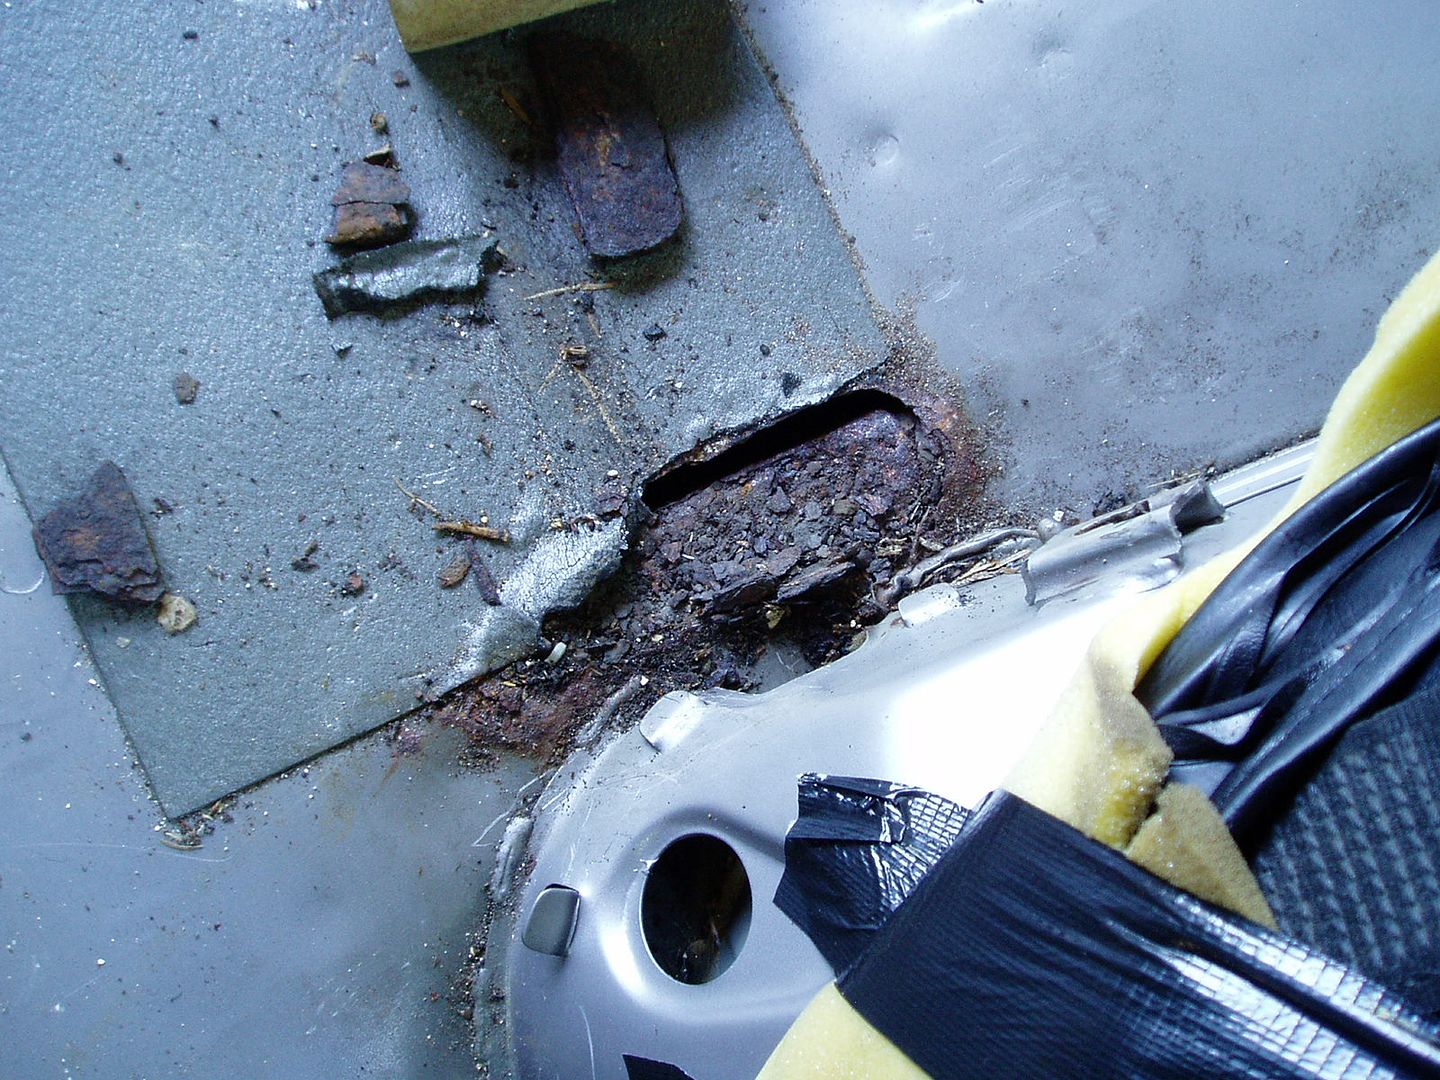 Higher up on the left, there was a rusty spot weld. Much less serious, but we decided to deal with it at the same time 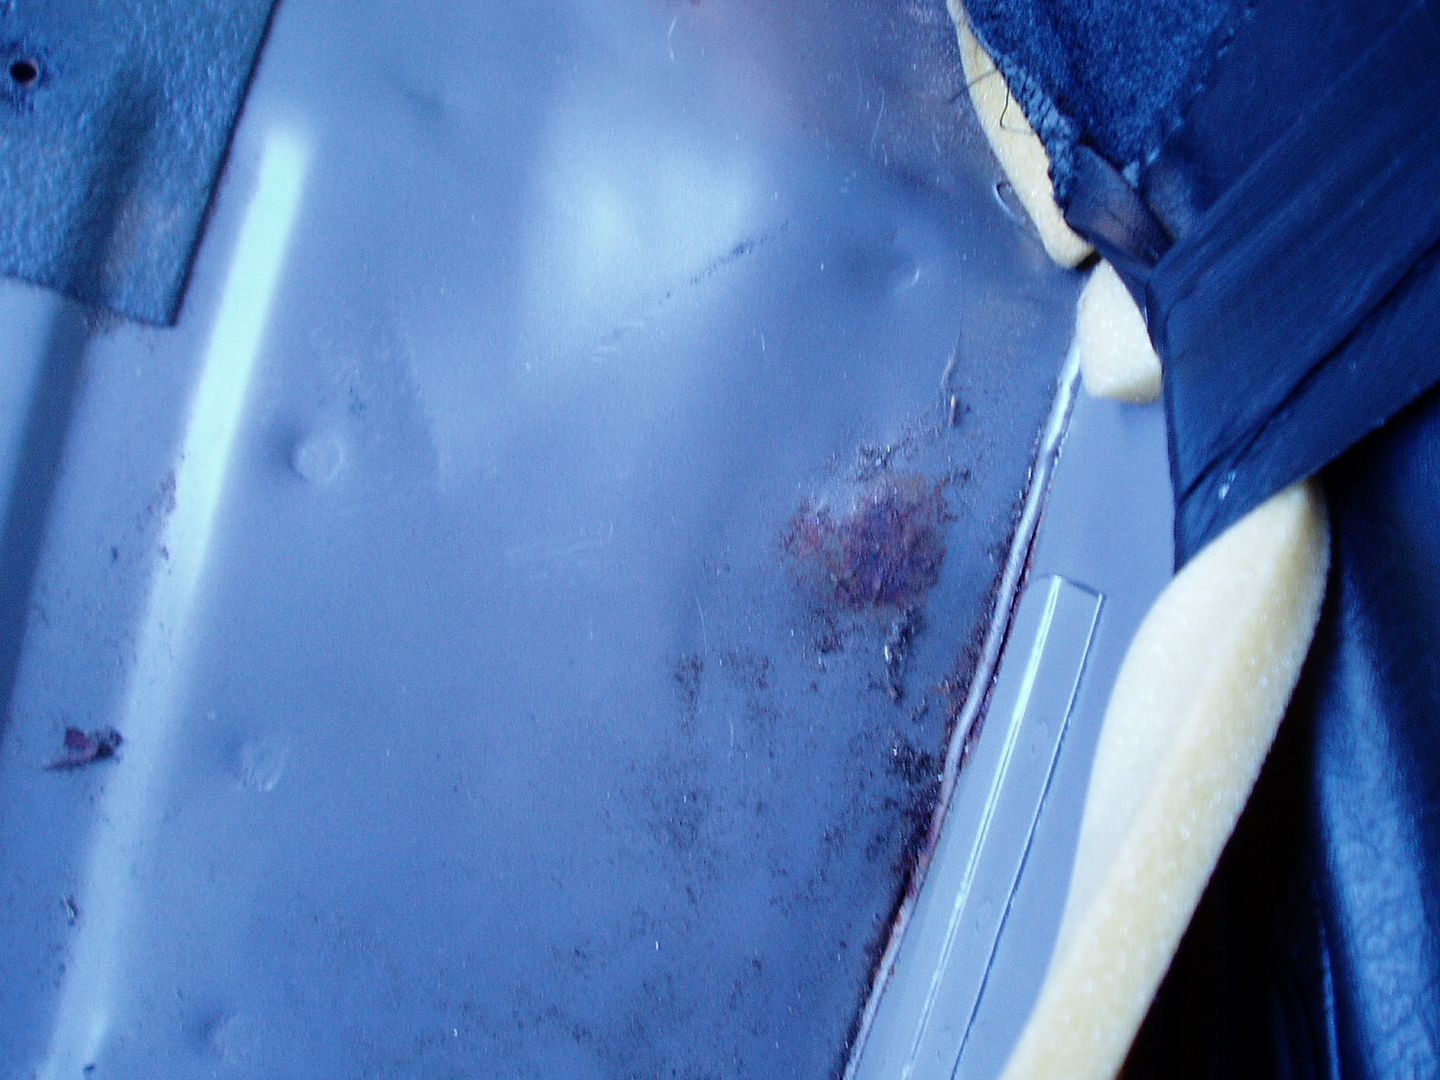 On the right floor, there was rust in the same place, but less 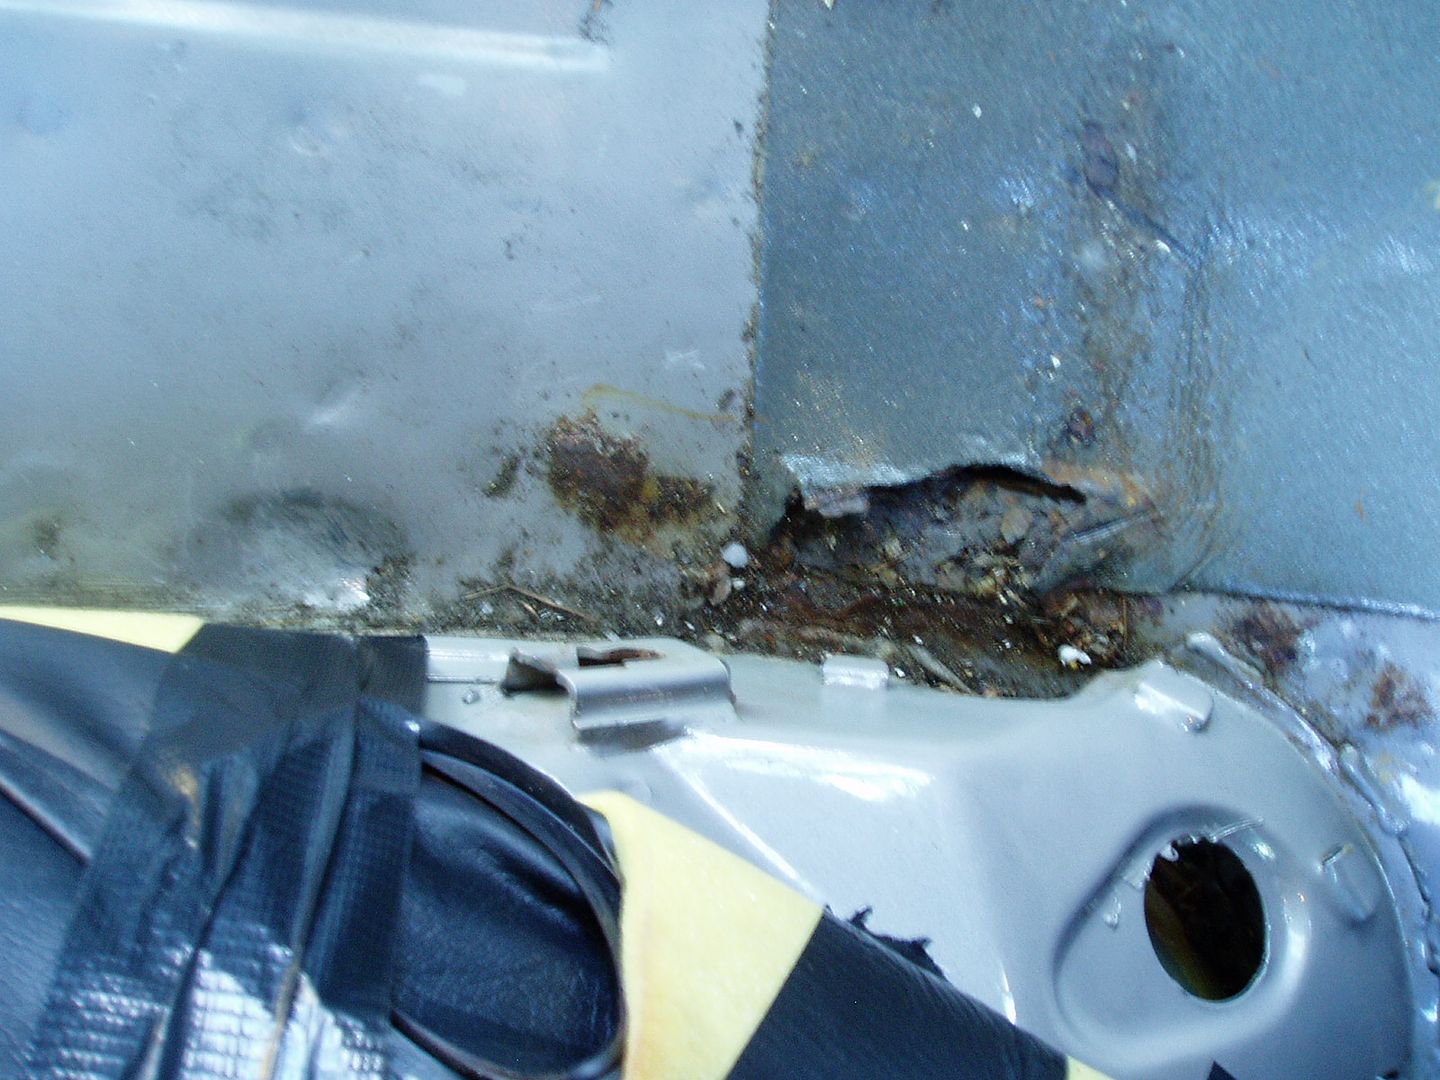 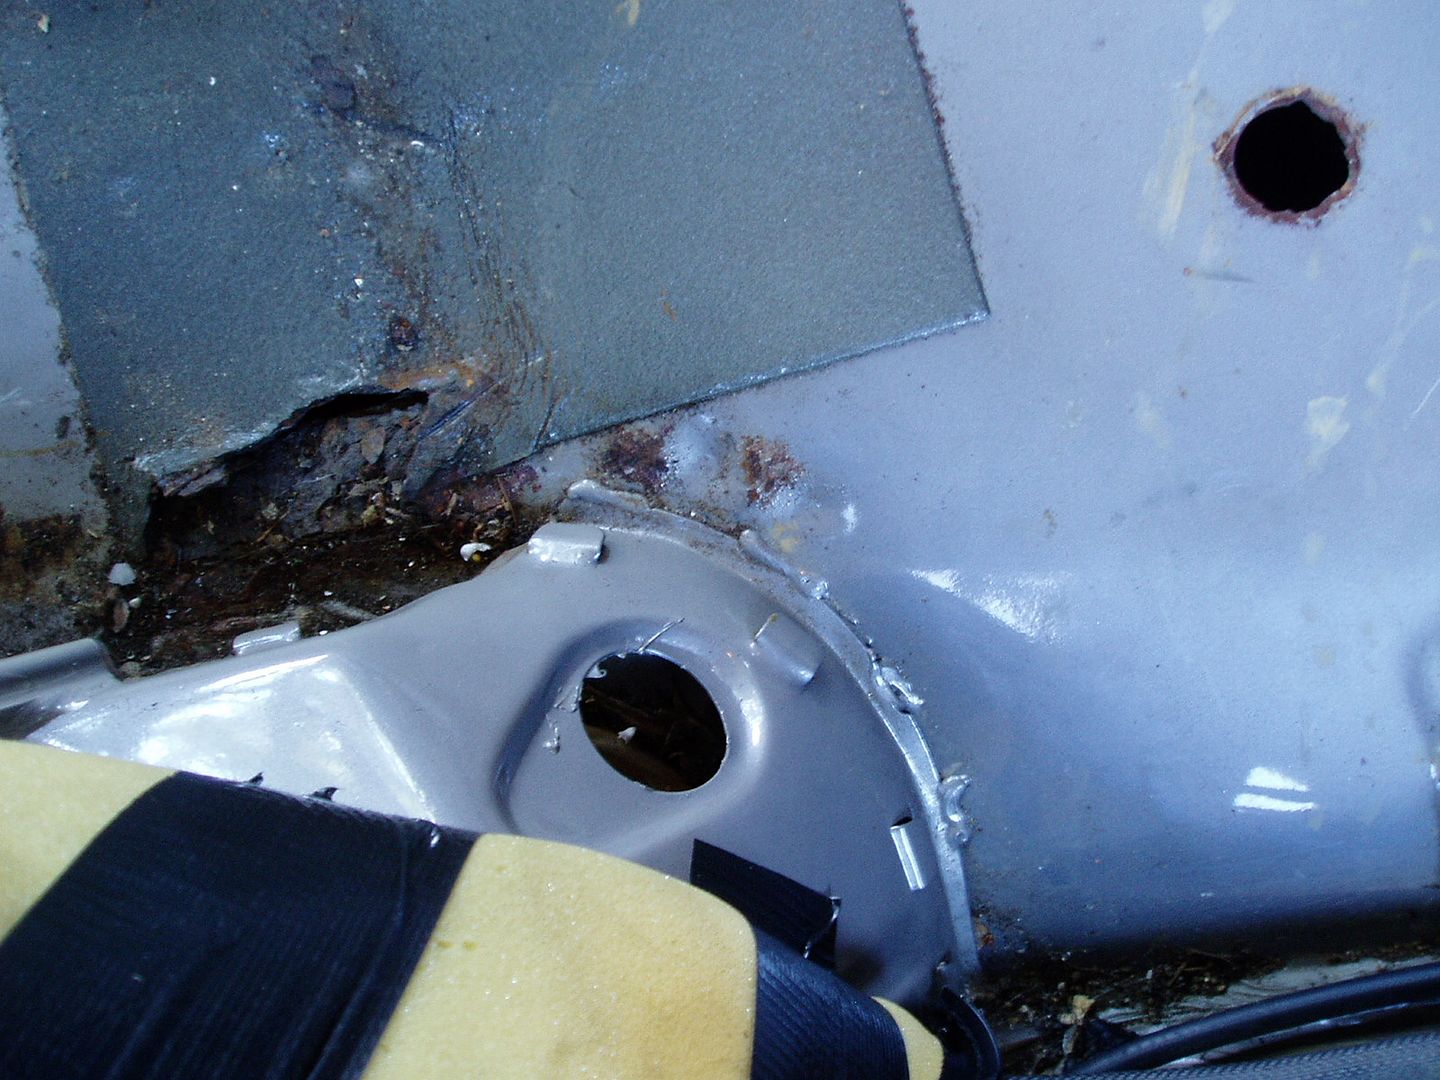 Two rules of bodywork - there is always more rust than you think; and it needs to look worse before it looks better! The metal section below the floor is the outer edge of the chassis rail. The good news for me was that the rust was very localised and contained. The rail itself was still strong, but you can imagine the corrosion spreading if the floor above was just patched or covered up. 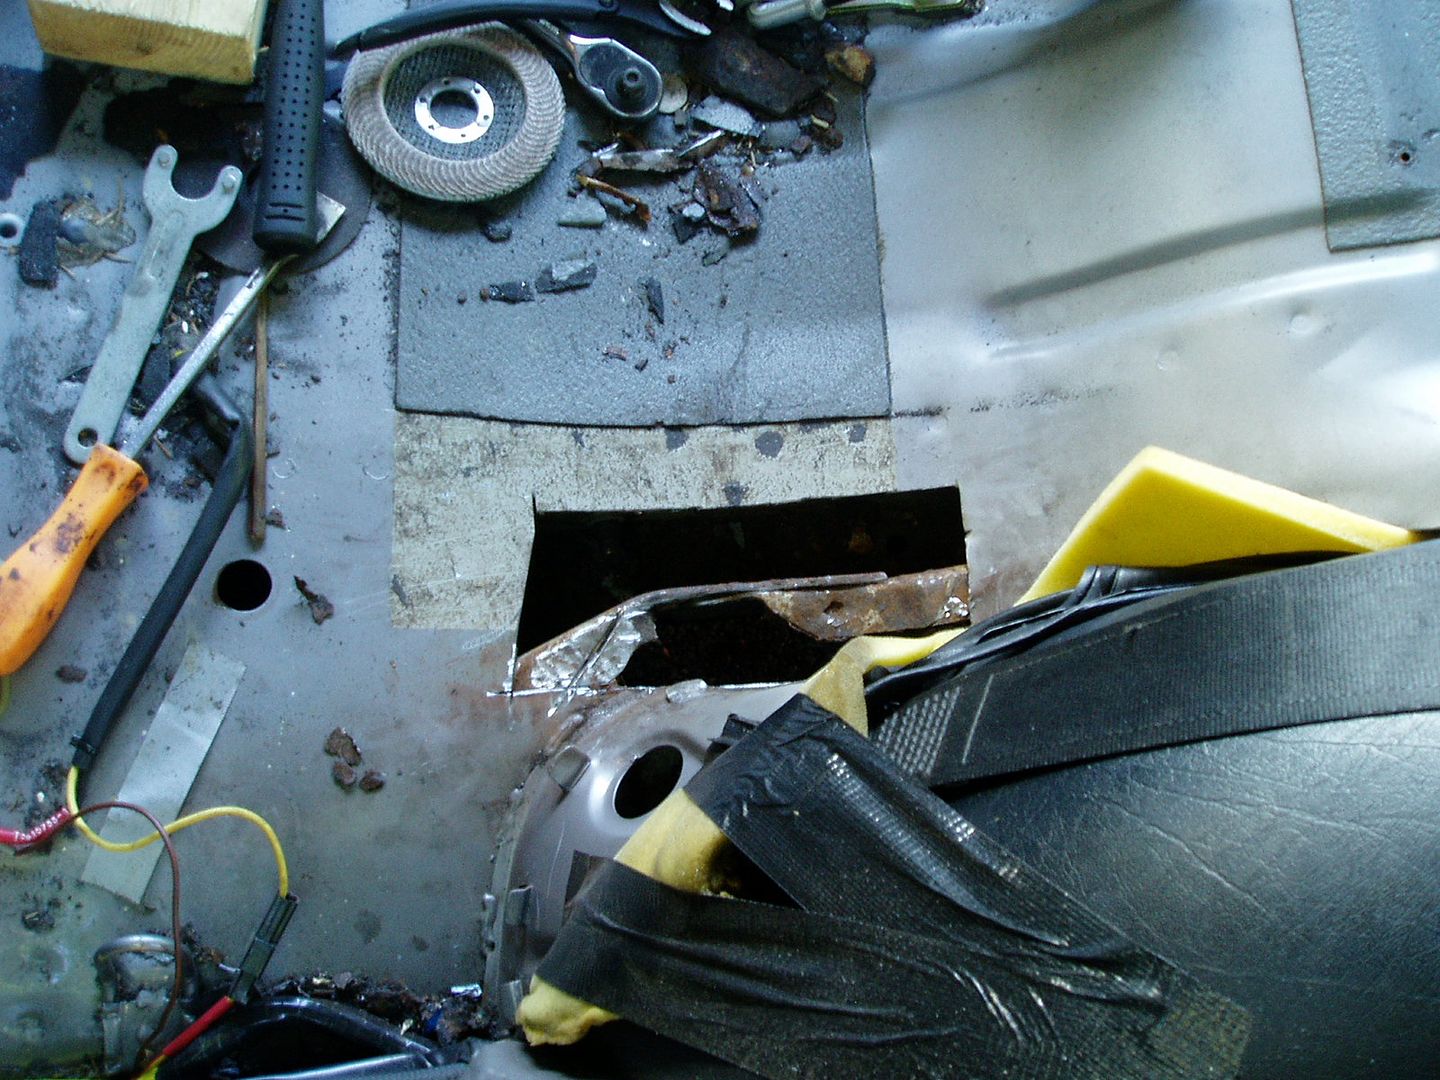 Similar story on the other side 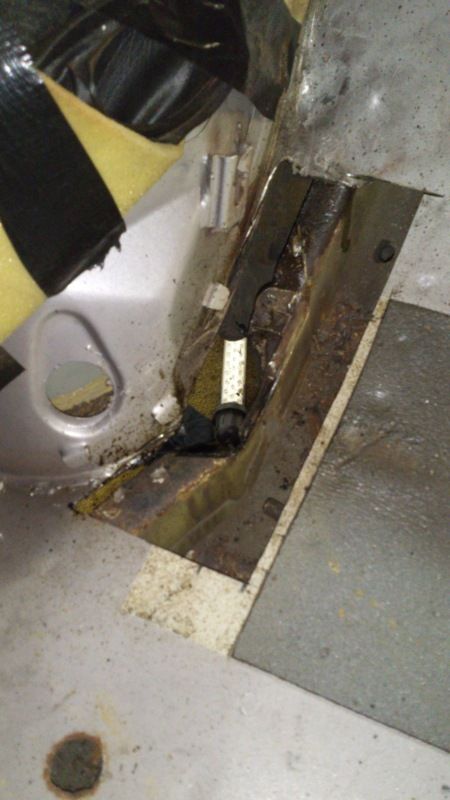 To make this area really strong, I decided to continue the thick chassis rail repair section right across to the inner wheelarch. To get access with the welder, we had to cut away the bottom inch of the box section infront of the inner arch, to be reinstated later on.  Cleaned up ready for welding 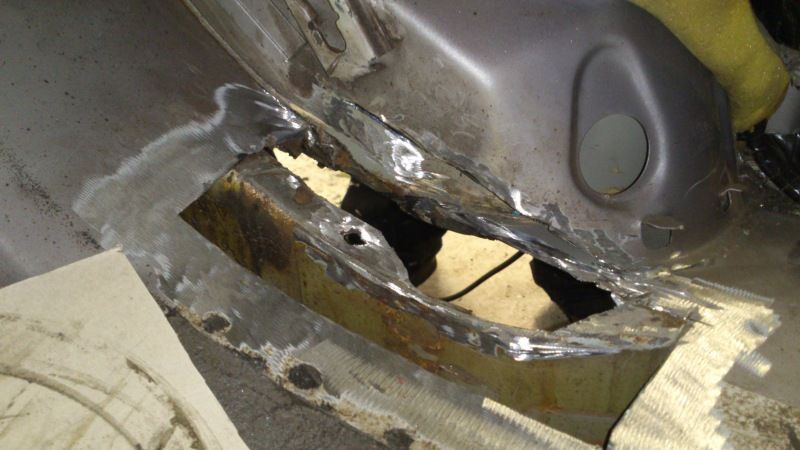 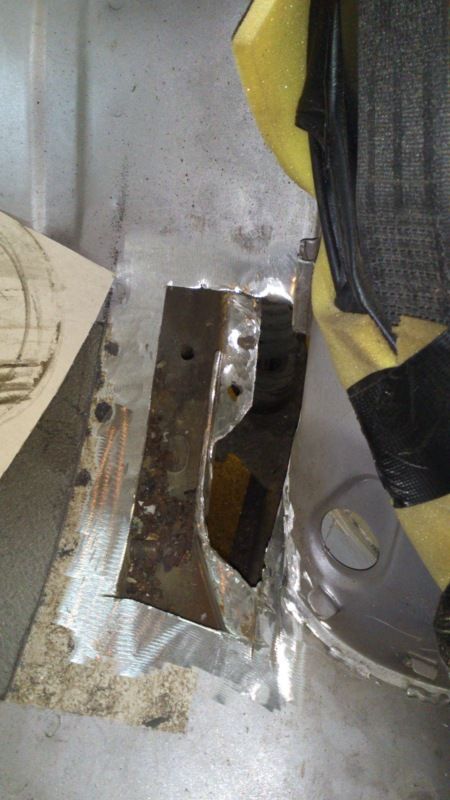 I made a repair section from very thick steel - it was hard to bend into shape even with the vice and a big hammer! Steve seam-welded this to the vertical part of the chassis rail, also tying it into the floor and the wheelarch 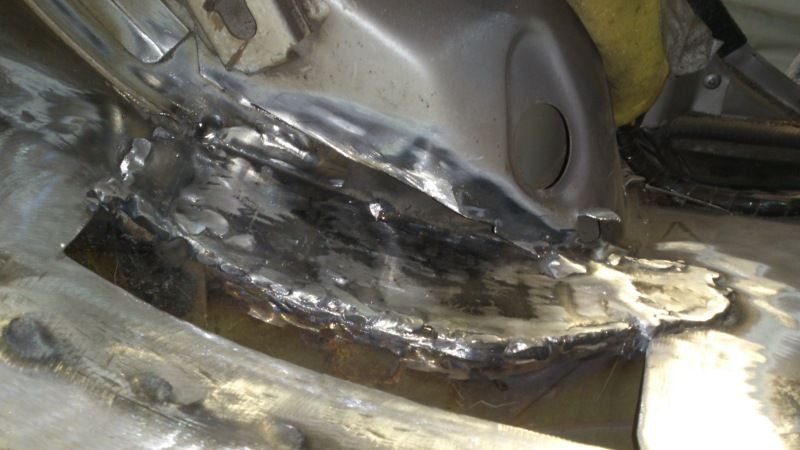 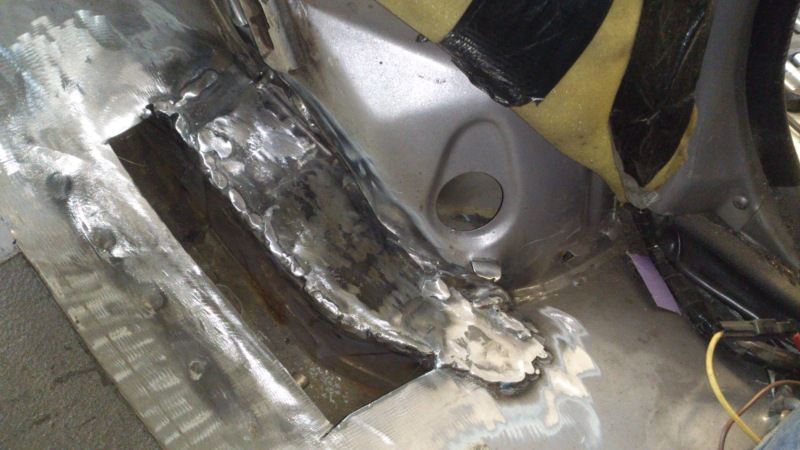 We made sure that the welds on the repair section penetrated right through the inner wheelarch panel - this is the view from inside the arch. 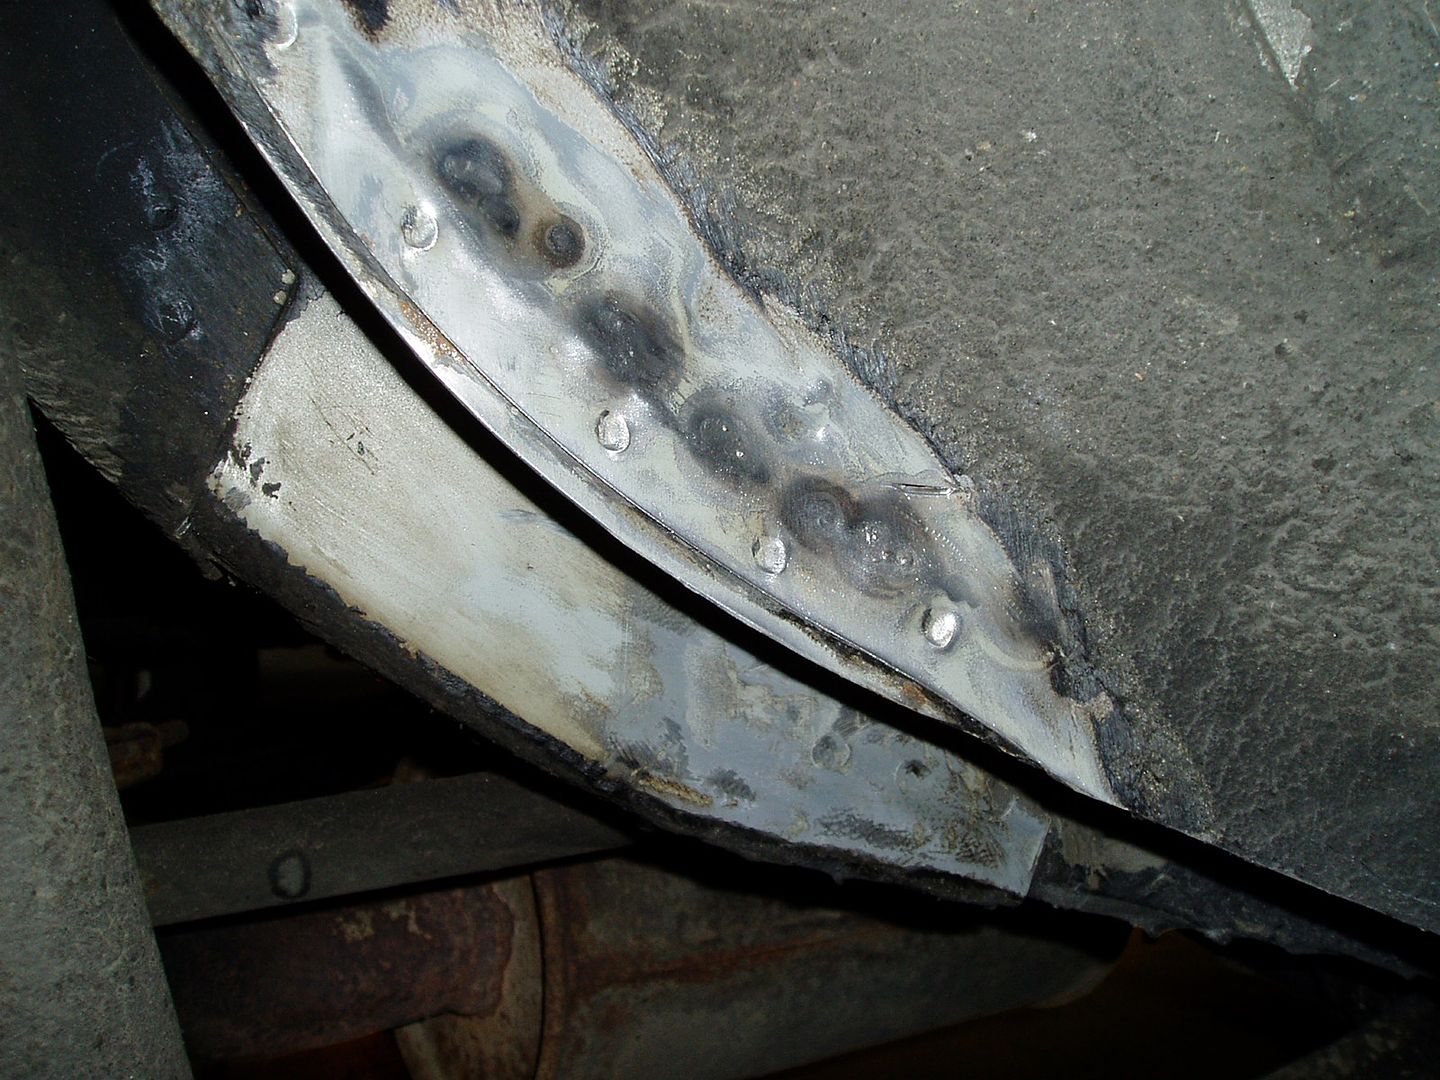 At this stage, the repaired area felt very strong, but Steve also added some welds underneath 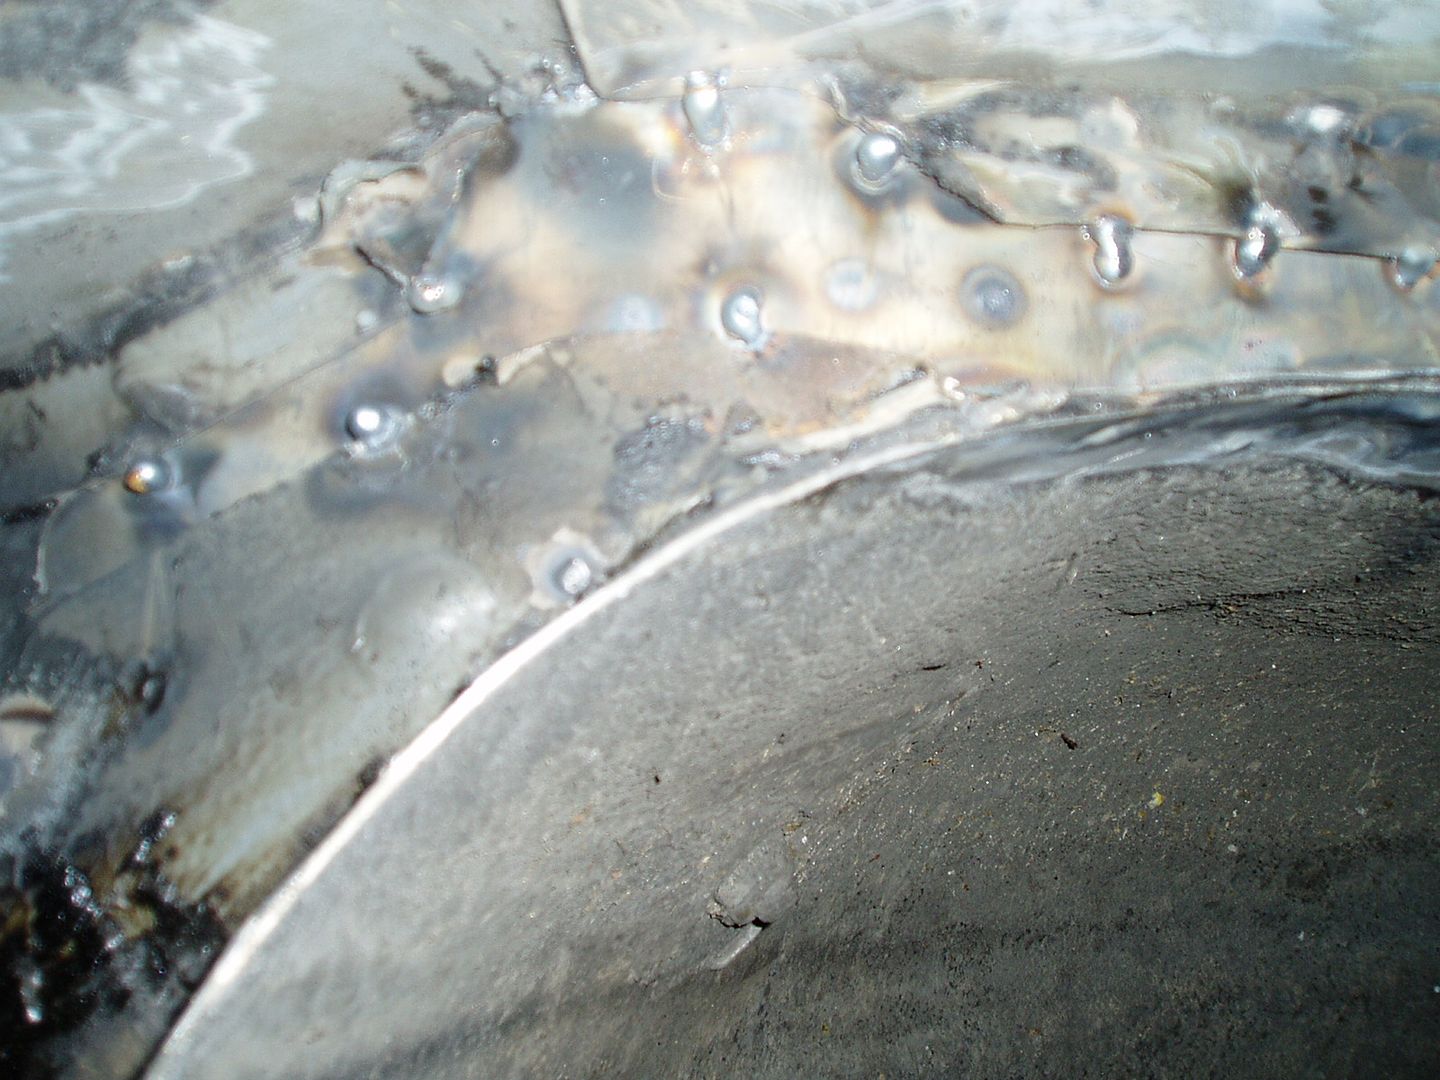 I painted the inside of the chassis rail with red oxide primer (no photo) but if fact it didn't want to stick because the rail had a good coating of wax inside it already. The next stage was a closing section (cut from the old roof panel we took off Steve's car!). This overlapped on all sides; the overlap area had weld-through primer put on first. I drilled holes to line up with the original inner spot welds on the chassis rail. Steve pooled the weld here to ensure all layers would be firmly attached 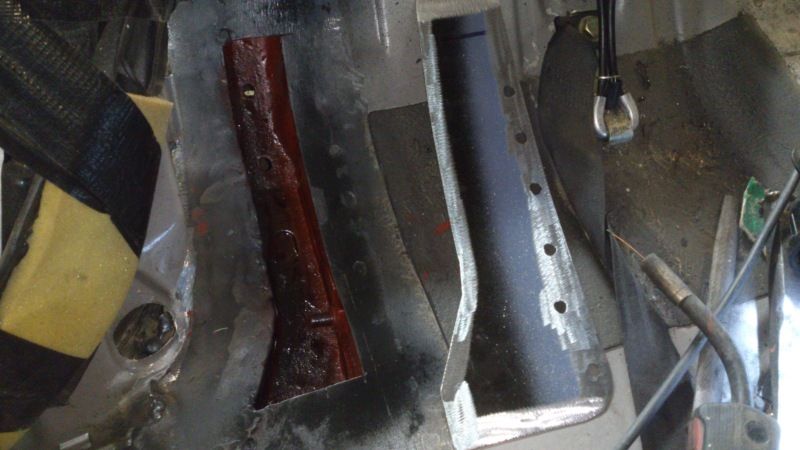 We made and fitted a repair to the box section 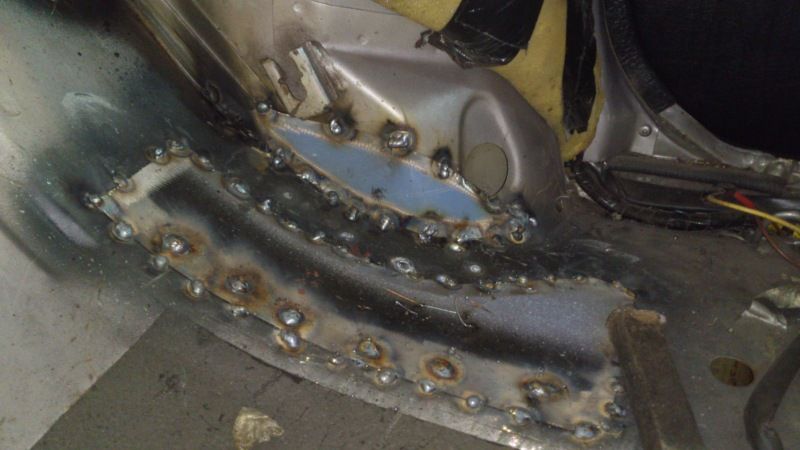 Welds tidied up with the grinder 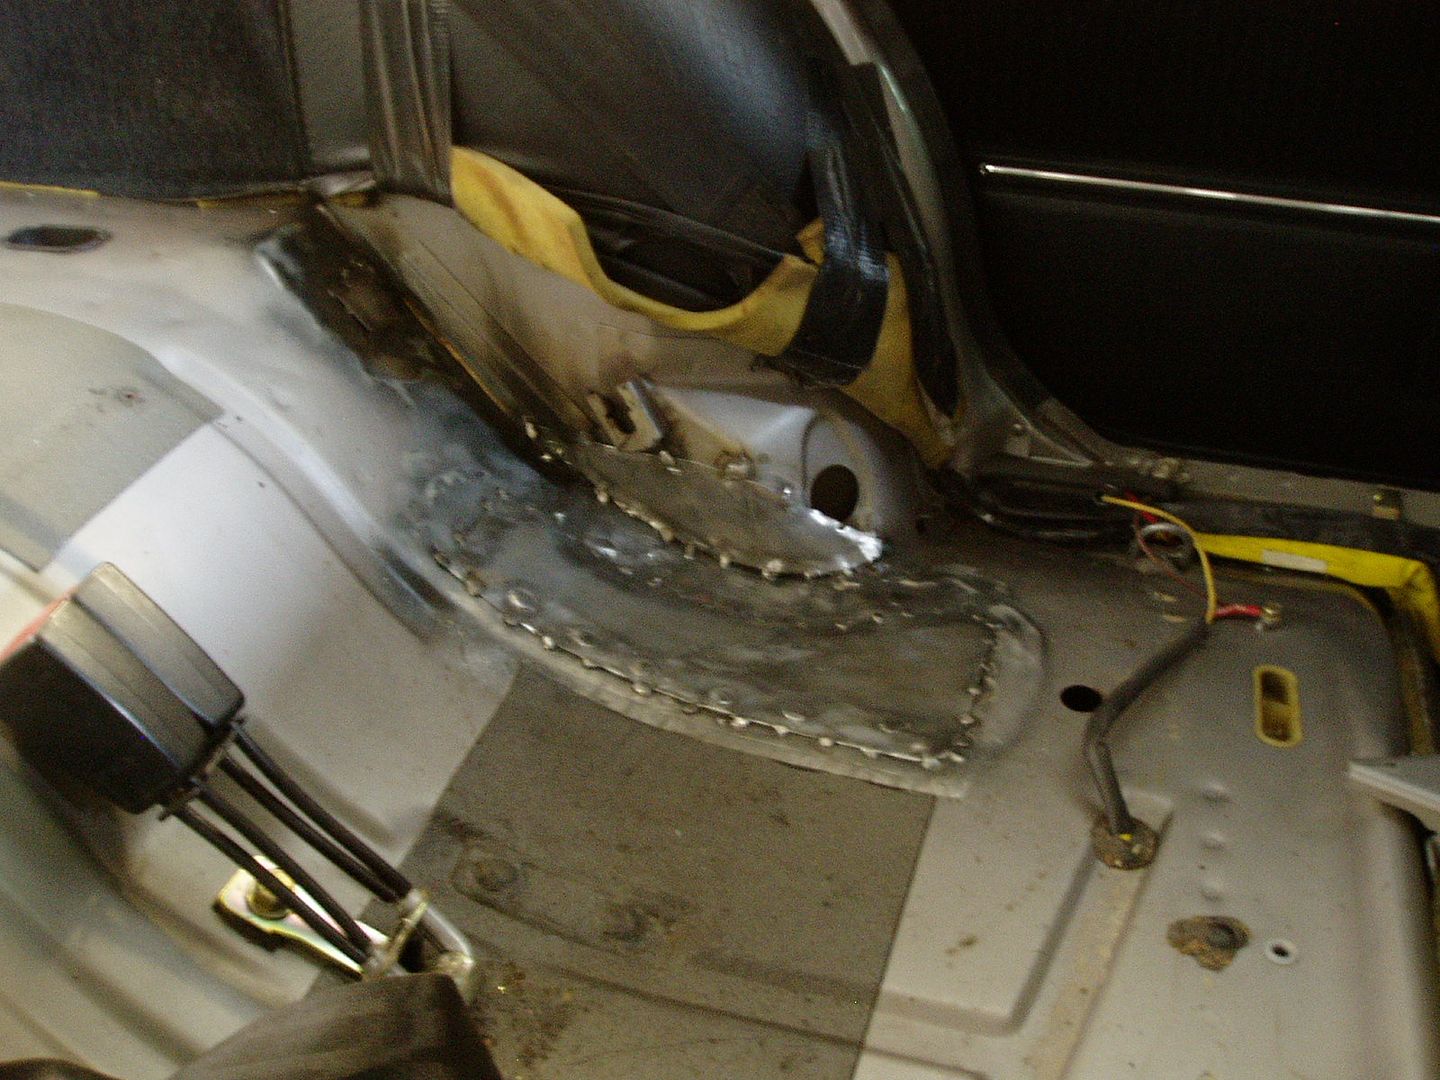 I etch primed the repairs 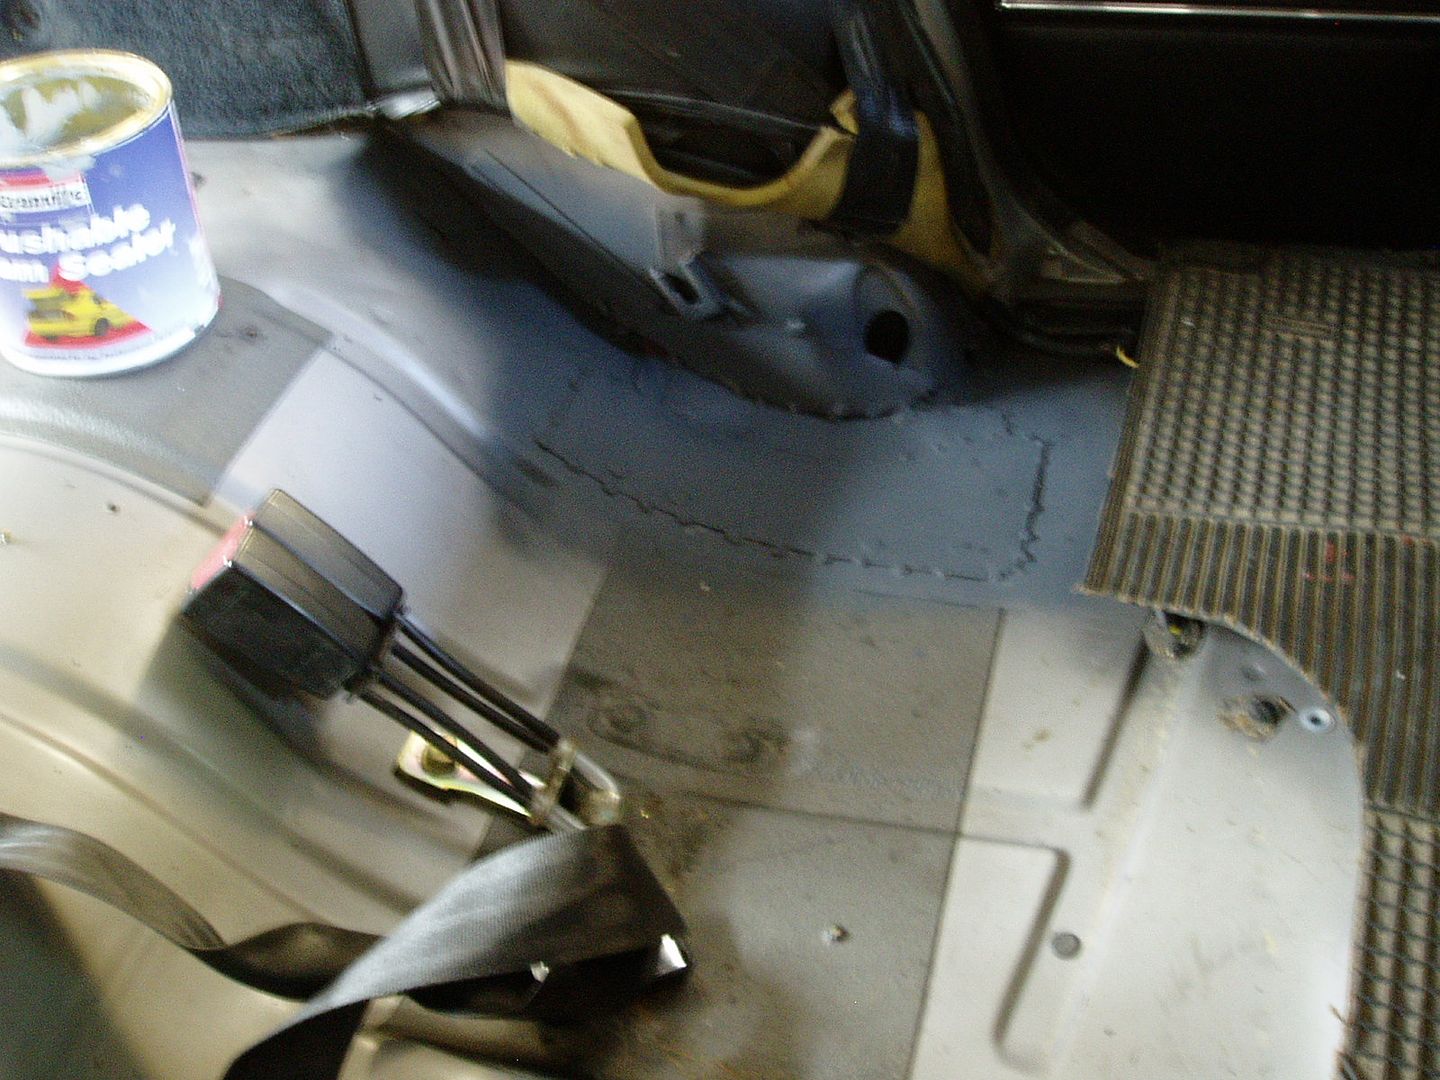 Then seam-sealer was carefully applied around all the edges, above and below (photos didn't save). Painted 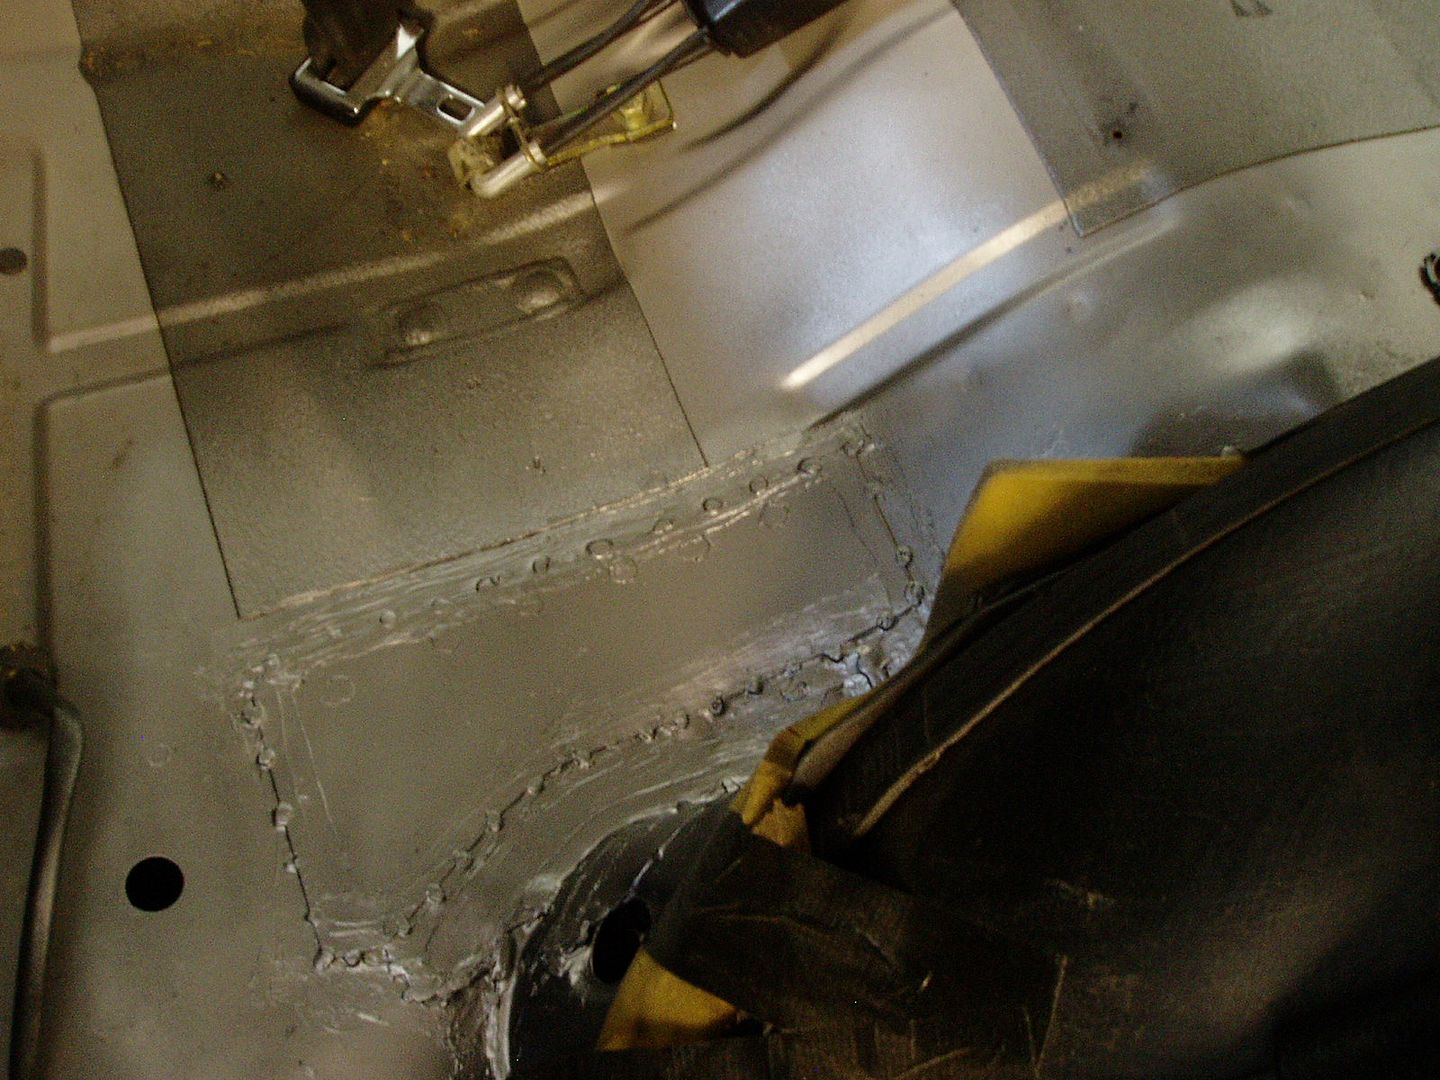 Plenty of Dinitrol was applied inside all the box sections and over the top, in case I missed a pinhole gap somewhere  Underneath the car, I put Dinitrol stonechip protection wax, over the primer and paint 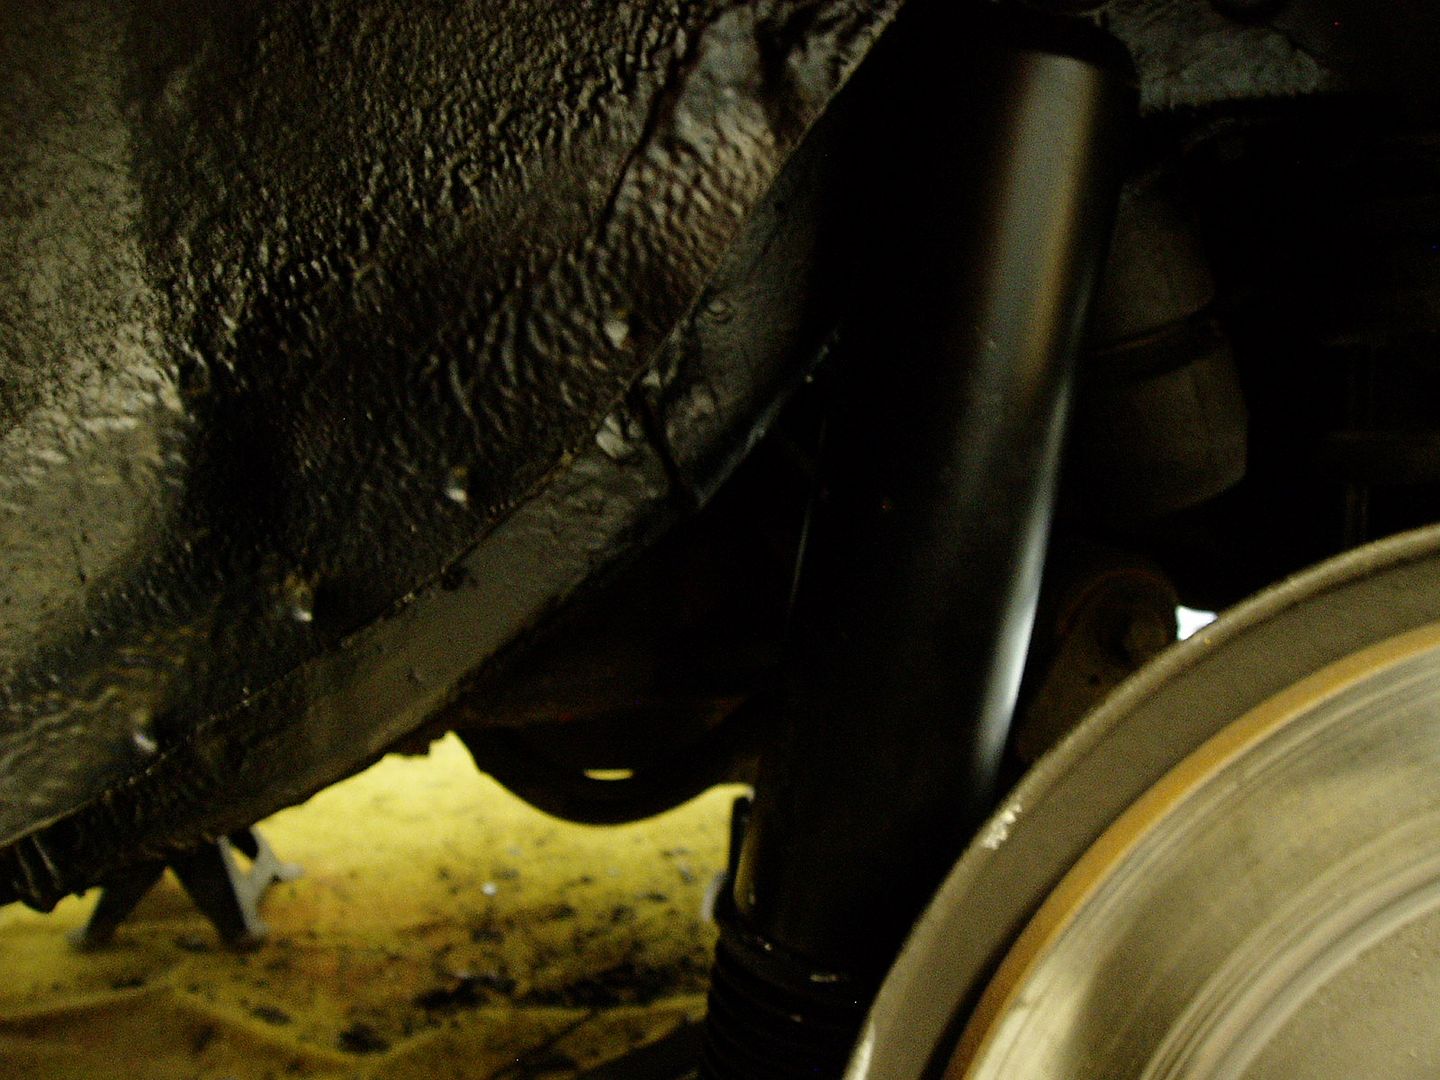 It took a good few hours to fix this, but I feel happy that we did it. The car passed it's MOT test I'm happy to say! No car action for me for a few weeks now, due to the hernia op (I'm typing this from my sick bed, dosed up with codeine!). But I will be keeping an eye on the forums and researching future jobs on the cars. Need some advice about rich running on the 240, but I'll post a separate thread about that. Cheers
__________________
XX
|
|
|
|
| The Following 5 Users Say Thank You to john h For This Useful Post: |
|
Jul 1st, 2012, 22:39
|
#183 |
|
Senior Member

Last Online: Apr 21st, 2024 21:01
Join Date: Jun 2010
Location: North West
|
Nice work gents.
My saloon needs pretty much exactly this repair, I will be going along to my favourite welders for a quote this winter. I'll print off what you have done here, it may be helpful in them making up a number  All the best for a speedy recovery John. |
|
|
|
| The Following User Says Thank You to rusty244 For This Useful Post: |
|
Jul 2nd, 2012, 09:25
|
#184 |
|
Ovlovnut

|
Nice work John (& Steve). I had exactly the same issue on 'Tank'. The 1st thing I did was to clean the 'wounds' and painted the areas with some 'Kurust' which turned everything black, used loads of the stuff everywhere I could find tin worm!
The repair done by my (then) mec' (went back to blighty) was no where near as thorough. He cleaned & 'Dinitroled' (well with a French equivalent) the under side(he did the whole car underside after a jet wash & good dry out in the French sun for a day or two). Then cleaned up inside and applied the same stuff 'from above'. Then put a plate over the biggest hole. The smaller holes I ended up 'plugging' with that instant metal stuff. Then went for a couple of coats of Hammerite. This was the finish:   As I say not any where near the standard of your repair, but I guess it bought me some time...... if putting off the inevitable...... Over 2 years now since I reckon & I have the 2 yearly Controle Technique later this year, so I'll see what that shows up before investing further! Good luck for a quick return to good health John 
__________________
2004 V70 2.4SE Auto 'The Welshmobile 2002 Laika Ecovip 400i ( Motorhome on an Iveco 2.8TD) http://www.gitessouthbrittany.com/ http://moncopainmonchien.jimdo.com/ Last edited by Paul240480; Jul 2nd, 2012 at 09:27. |
|
|
|
| The Following 2 Users Say Thank You to Paul240480 For This Useful Post: |
|
Jul 2nd, 2012, 10:50
|
#185 | ||
|
VOC Member
|
Quote:
Quote:
However, it is a vital structural area. Whether or not the tester finds it Paul, I strongly recommend that you get all the rust cut out and repairs welded in. (Even if the work 2 years ago has slowed down the rust in the floor, the corrosion could be merrily chomping through your chassis rail, which is the important part of course). With the shell weakened here, hitting a big bump in the road, or a very light tap from behind when parking or from a following car, could bend the shell and write it off. If you want to keep the car, I'd say it's time to bite the bullet and get it done. John
__________________
XX
|
||
|
|
|
| The Following 3 Users Say Thank You to john h For This Useful Post: |
|
Jul 2nd, 2012, 21:35
|
#186 |
|
Missing the point

Last Online: Feb 5th, 2023 23:12
Join Date: Nov 2001
Location: Stoke-On-Trent
|
Should that patch not be seam welded in? (sorry, it was bugging me and I had to ask!)
__________________
Tim 1968 Volvo 145 long term project. Currently without a Volvo daily driver. |
|
|
|
|
Jul 2nd, 2012, 23:13
|
#187 |
|
VOC Member
Last Online: Jan 5th, 2020 18:09
Join Date: Aug 2009
Location: Preston
|
I thought for the MOT any "patch" had to be seam welded but it if it was a genuine replacement panel then it can be "dot" welded as it was in the factory.
But I would like to know the line on this one
__________________
Andrew... 244T '90 740 GLT: Standard car '80 240 DL: Lots of bits and bobs inc turbo intercooler etc etc |
|
|
|
|
Jul 2nd, 2012, 23:32
|
#188 | |
|
VOC Member
|
Quote:
__________________
XX
|
|
|
|
|
|
Jul 8th, 2012, 04:06
|
#189 | |
|
VOC Member
|
Yesterday, we set up the K-jet using my new toy, an air/fuel meter.
(Actually, Steve did all the work and I just stood around basically - still recuperating from my hernia op last weekend). I was told that the car was running rich, which tied in with fuel consumption higher than other GLTs I have owned. I did a separate thread (link below) asking for help on that. Wooble helped out with an excellent K-jet guide and Clan nailed the issue, linked to our recent replacement of duff injector seals. http://www.volvoforums.org.uk/showthread.php?t=156904 The K-jet guide: http://www.lukesandel.com/auto/delor...kiel/bosch.htm Quote:
I researched options and the Innovate Motorsport kit seemed well regarded and good value. 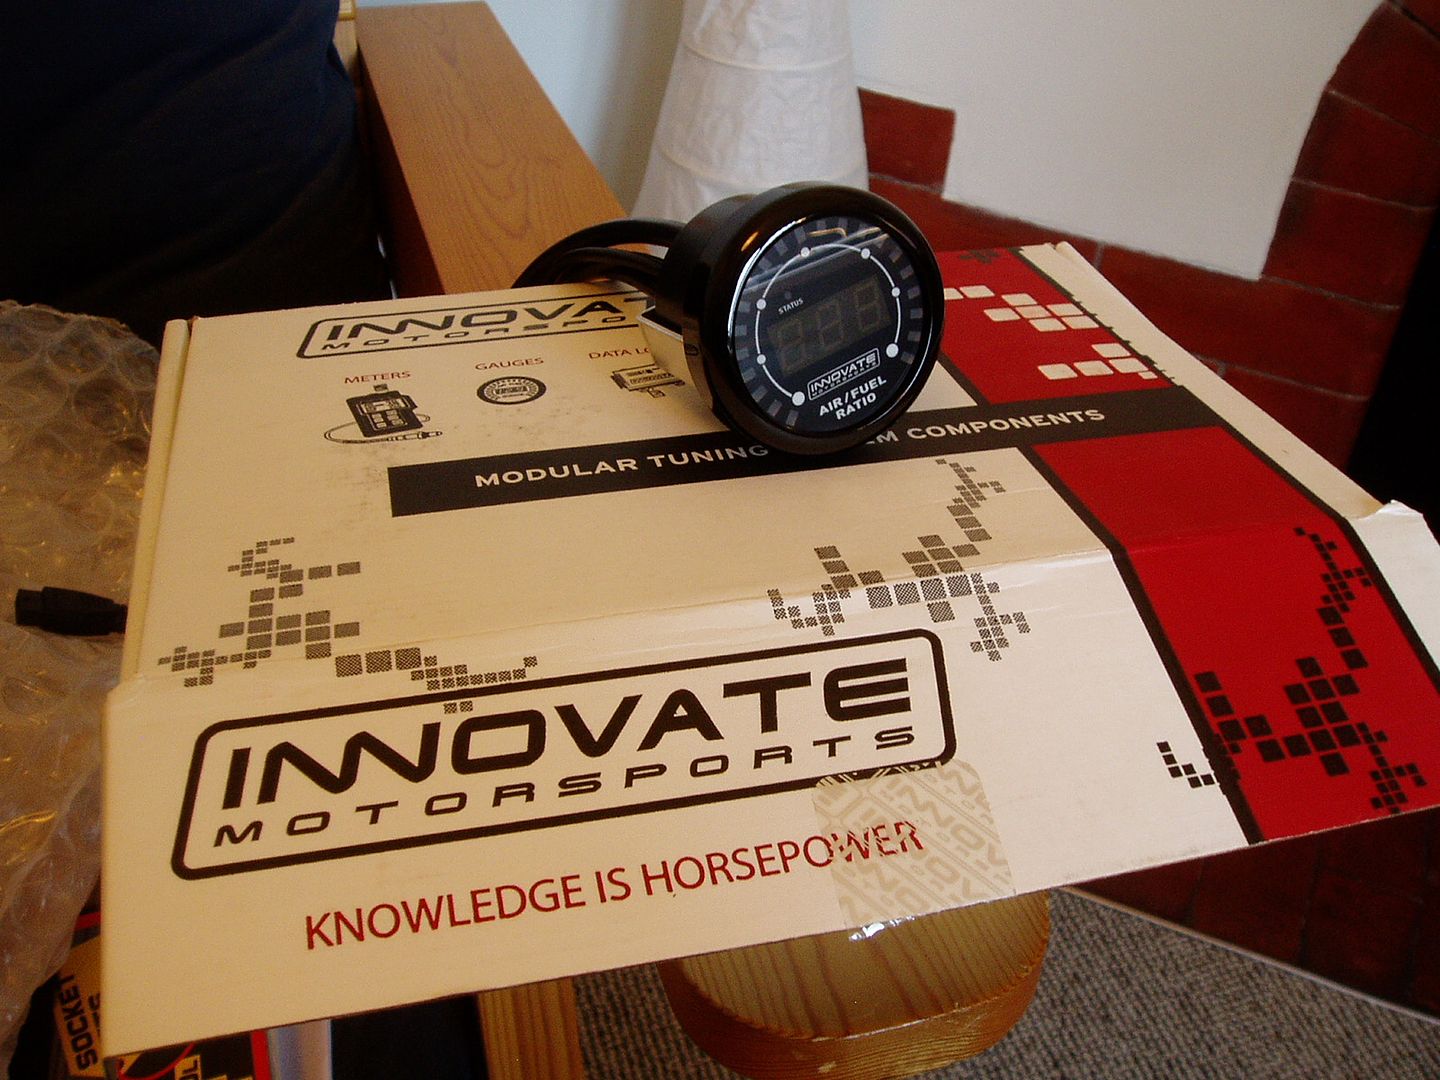 The kit comes with a Bosch wideband lambda sensor. On a car like the K-jet 240, where no lambda is originally fitted, a threaded mounting boss (also supplied in the kit) needs to be welded into the exhaust. The steering link blocks the view, but here Steve has drilled a hole in the downpipe and is using a long socket to centre the boss prior to welding. Before this, we had shaped the end of the boss with the grinder to give a good flush fit onto the exhaust. 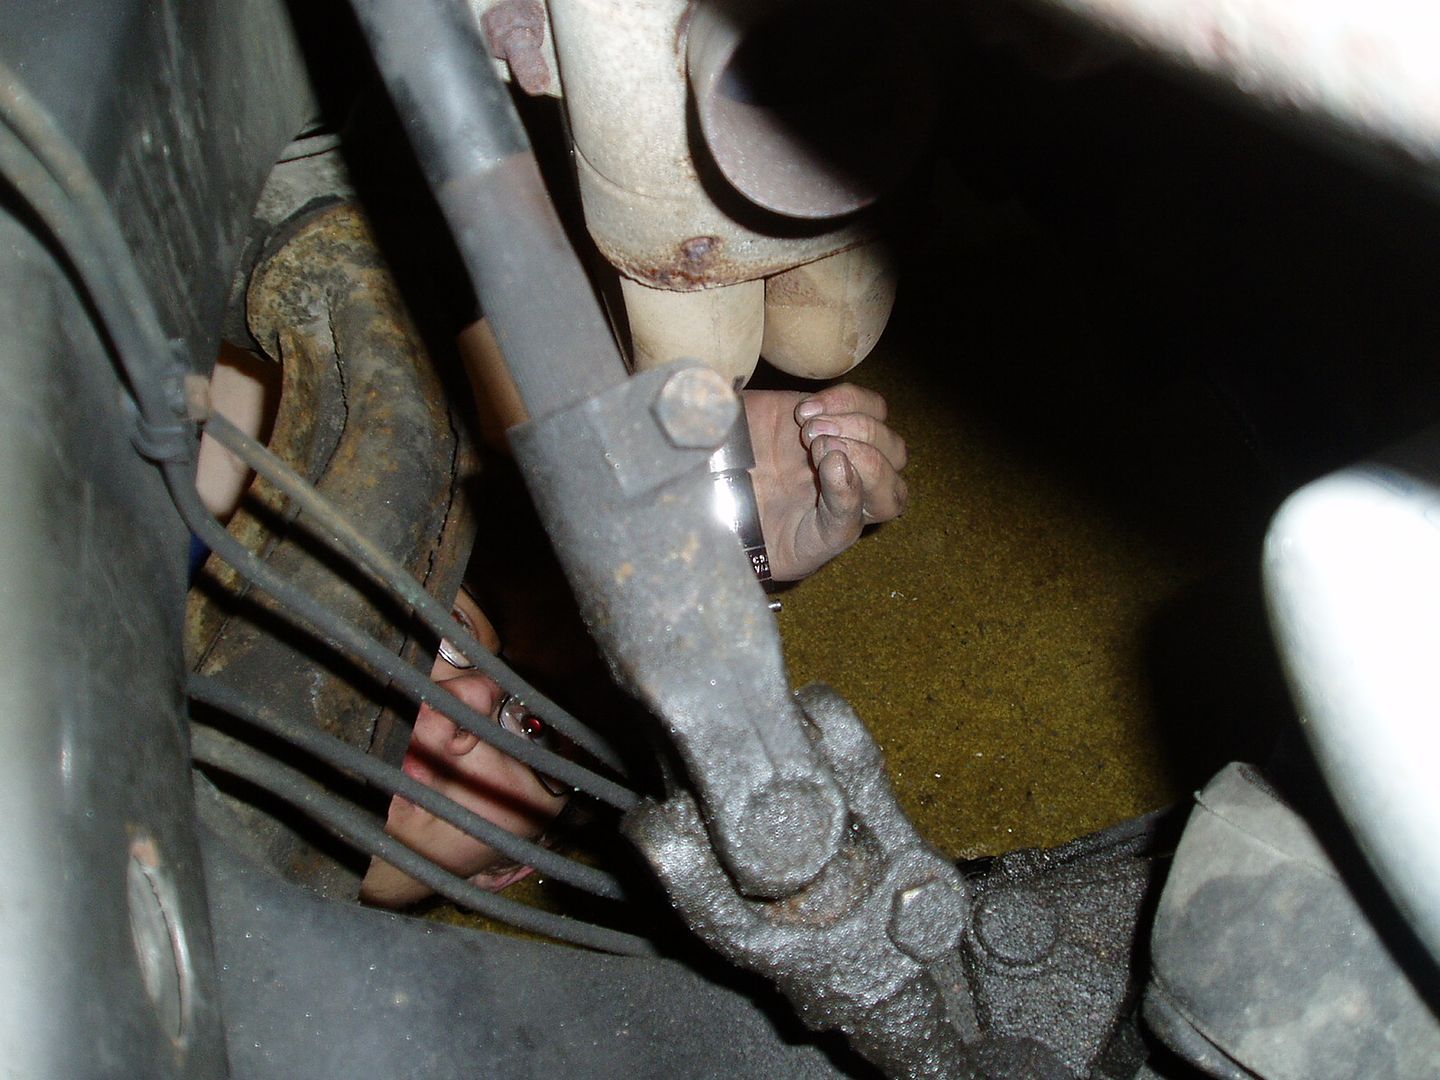 Boss fitted, and credit to Steve's welding, there is no exhaust blow when the sensor is fitted. (When the set-up is finished, a bolt of the correct thread will seal the hole until we need to fit the sensor again). 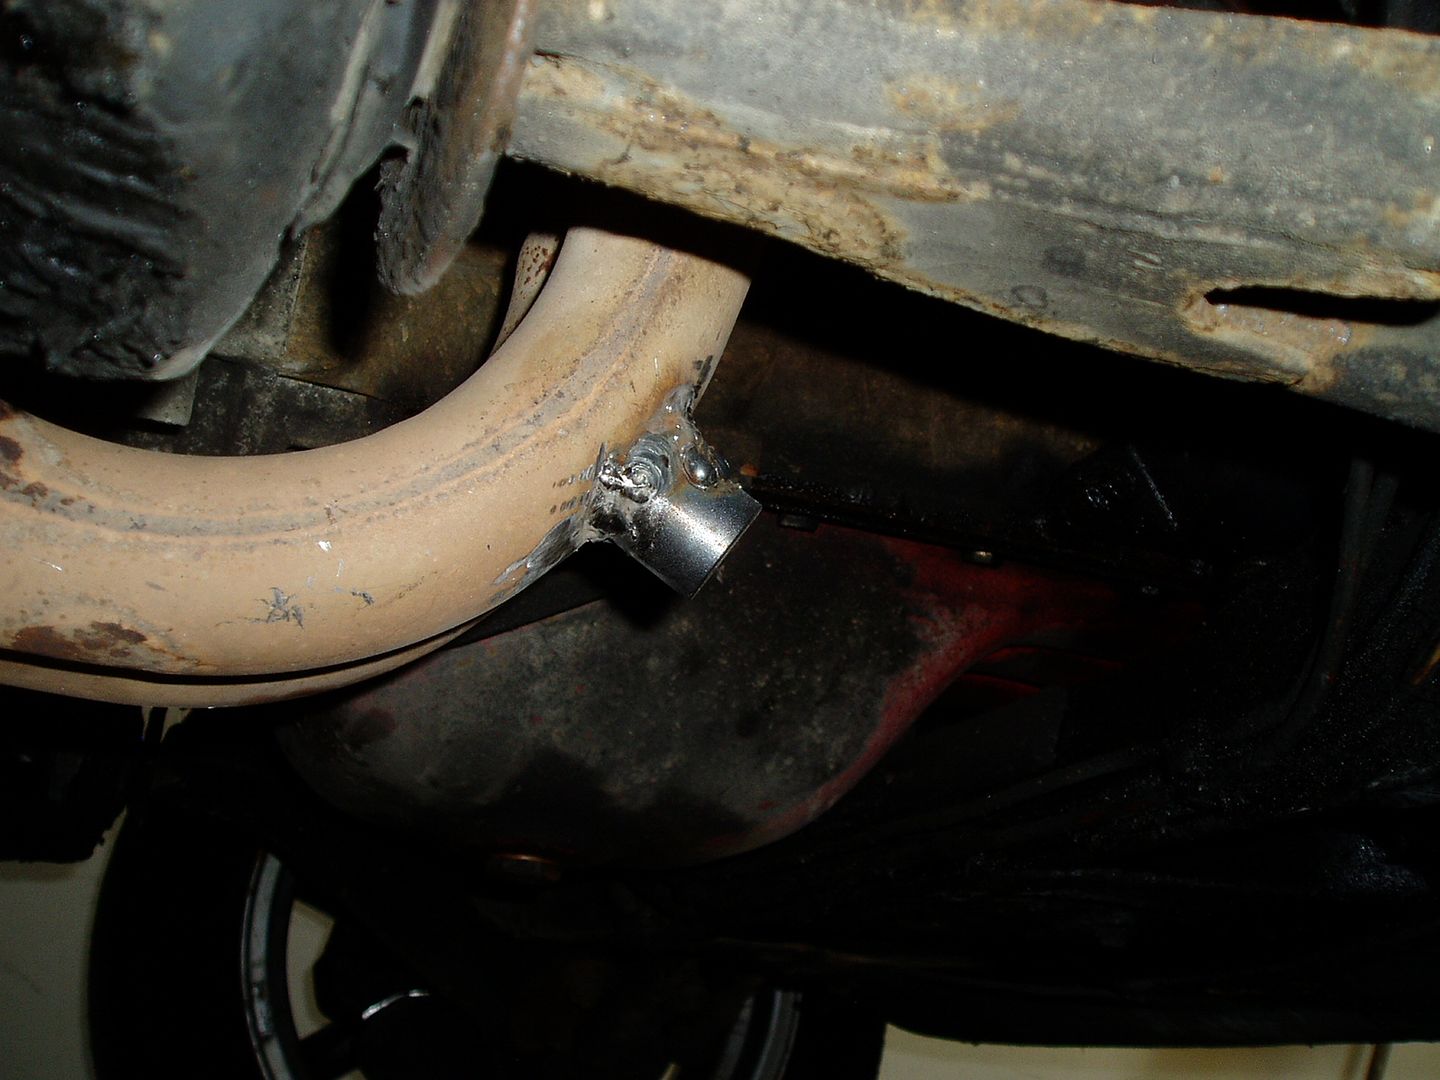 Wiring up the gauge is simple. There are other options provided for (e.g. to link to an ECU or data logger) but for our purpose all we needed was a switched, fused power feed, an earth and the cable from the sensor. This was purely a short-term temporary set-up, so we fed the sensor cable through an open window. The kit comes with a choice of gauge faces and surrounds. To keep the black ones in mint condition for eventual installation in the 164, we fitted the silver/white alternatives. 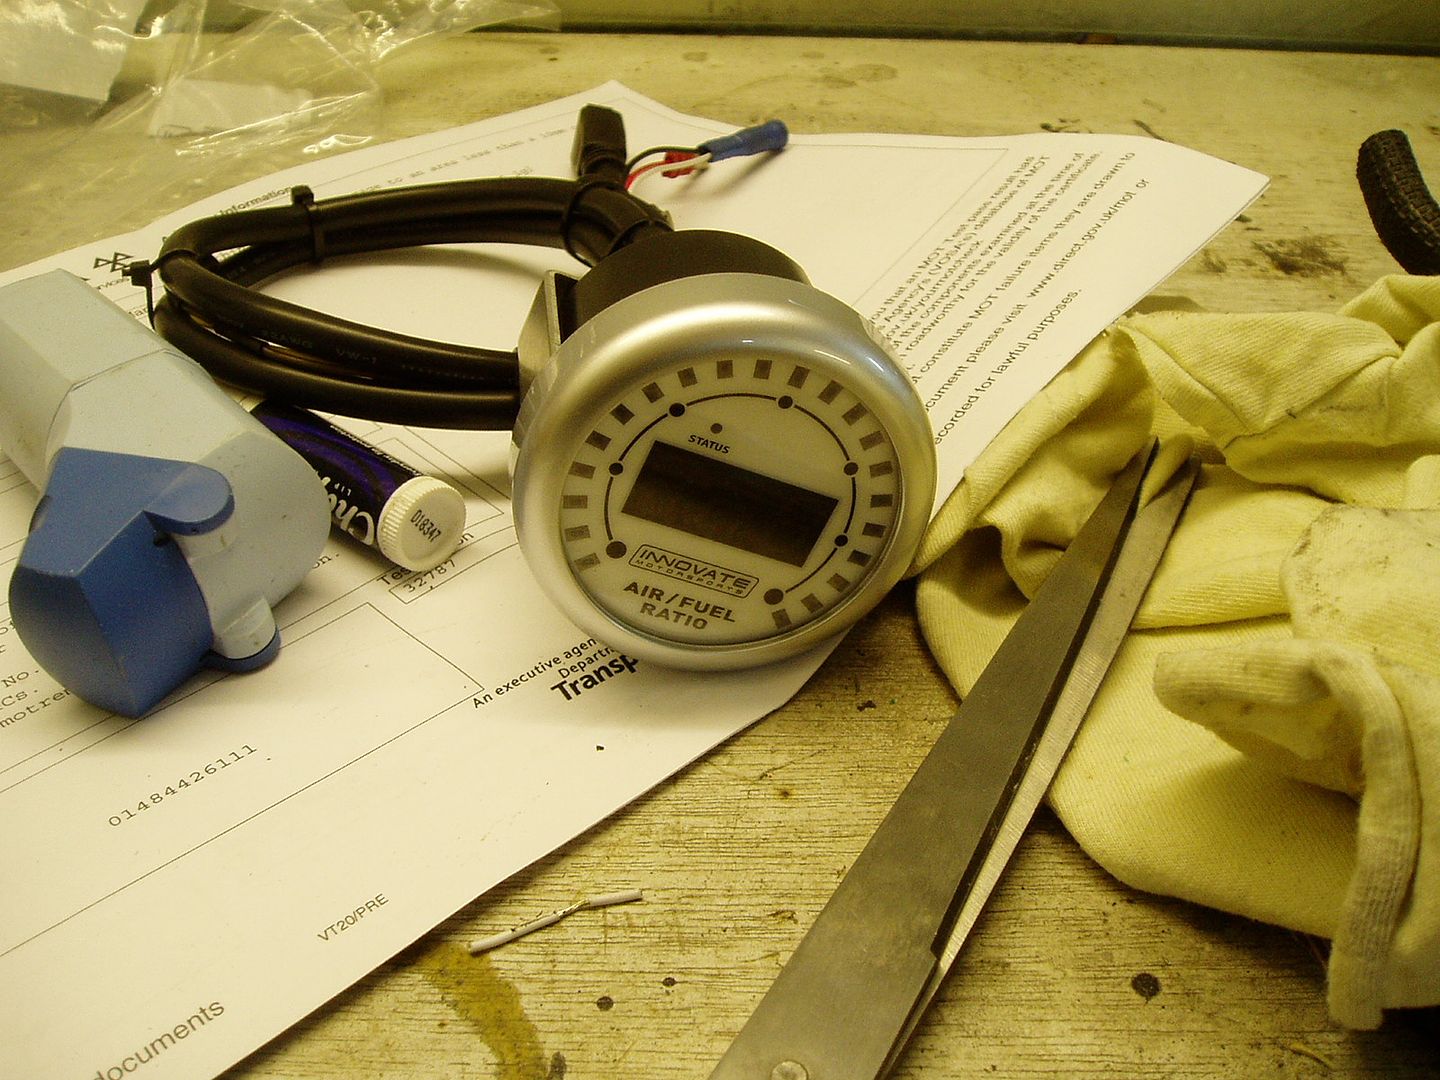 With the gauge working, it showed that the mixture was rich, in all driving conditions and especially at idle. The reading for a petrol engine is supposed to be 14.7, known as the stoichiometric ratio. Here's the physics explanation if you want it: http://moodle.student.cnwl.ac.uk/moo...tricratio.html 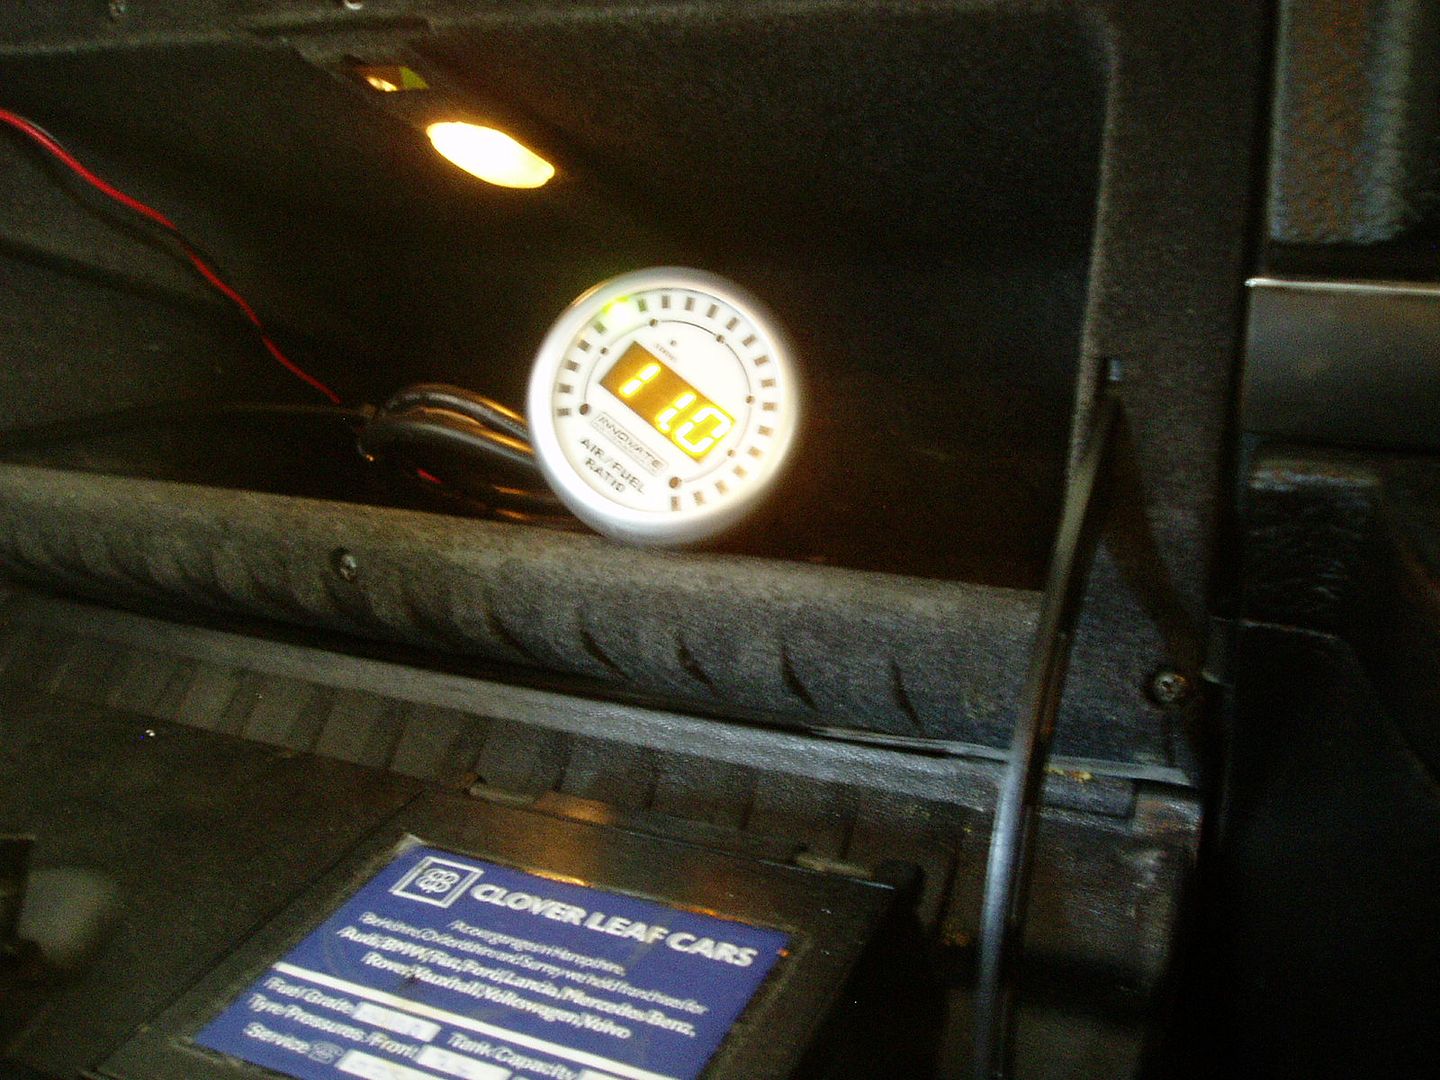 The K-jet needed a big adjustment. After doing that, we got an excellent reading which stays at or very close to 14.7 at tickover and under load at any revs or throttle opening. The also car runs and sounds better and I'm confident this will boost my mpg quite a bit. Job sorted. Thanks again to Wooble and Clan. Later today, we'll use the gauge on Steve's Polo to see how that's running. I'll also get another boss and fit that to my Mercedes, to aid the set-up on petrol (it's also on K-jet) and on LPG - I have a feeling we'll get good value out of this kit! Cheers John
__________________
XX
|
|
|
|
|
| The Following 5 Users Say Thank You to john h For This Useful Post: |
|
Jul 17th, 2012, 12:59
|
#190 |
|
VOC Member
|
I surprised and very pleased that after the tune-up, the GLT did 33.4mpg on the last tankful. That's mostly long journeys, not thrashing/racing but not particularly driving for economy either (mixing with normal lane-3 traffic speeds on the motorway, and overtaking when needed on A-roads).
Pretty good for old-tech fuel injection and bungalow aerodynamics! John
__________________
XX
|
|
|
|
| The Following 5 Users Say Thank You to john h For This Useful Post: |
|
| Currently Active Users Viewing This Thread: 1 (0 members and 1 guests) | |
|
|


 Linear Mode

