
|
|||||||
| PV, 120 (Amazon), 1800 General Forum for the Volvo PV, 120 and 1800 cars |
 Information
|
|
1965 Volvo Amazon (121)Views : 40880 Replies : 237Users Viewing This Thread : |
 |
|
|
Thread Tools | Display Modes |
 Dec 13th, 2013, 16:48
|
#221 |
|
Senior Member
Last Online: Today 16:17
Join Date: Sep 2010
Location: Bramhall
|
I agree, there will be a bit of patina but that grill was polished in the first pic. Whatever was left on it for nearly 20 years has done a good number on it.
(Wow it was last on the road in 94... that is nearly 20 years now) |

|

|
|
Dec 13th, 2013, 18:41
|
#222 |
|
Trader Volvo in my veins

Last Online: Today 23:26
Join Date: Dec 2004
Location: Anglesey
|
A shame that things are going so slowly for you but very glad you are keeping going with it.
at least cleaning parts up and welding can be done gradually and with very little outlay. |

|
|
|
Dec 13th, 2013, 20:39
|
#223 |
|
VOC Member

Last Online: Today 13:23
Join Date: Jul 2006
Location: Chatham
|
The grilles and all of the other aluminium trim is anodised. This is just a stable and controlled aluminium oxide layer which stops the alloy oxidising in air. After a while it does start to break down but keeping it clean and adding a coat of wax does help to slow things down. Unfortunately there is no way back. Grilles come off worse due to erosion by grit and road dirt so tend to be a rather pitted. Anodising does have some depth to the coating so it's pretty well impossible to polish a grille back to the alloy below it. Paint will improve things but better used ones maybe a sensible choice. New ones can be found if your pockets are deep enough.
|
|
|
|
|
Feb 6th, 2014, 13:13
|
#224 |
|
Senior Member
Last Online: Today 16:17
Join Date: Sep 2010
Location: Bramhall
|
Well ive been very slowly cleaning up the grills, doing a bit at a time as its fiddly work. Finally got my other car ready for its mot so i can now get back on with the Amazon.
Few things happened, i got my two hif44s cleanish to start designing the throttle linkages. Going to be similar to how the hif6's were fitted. 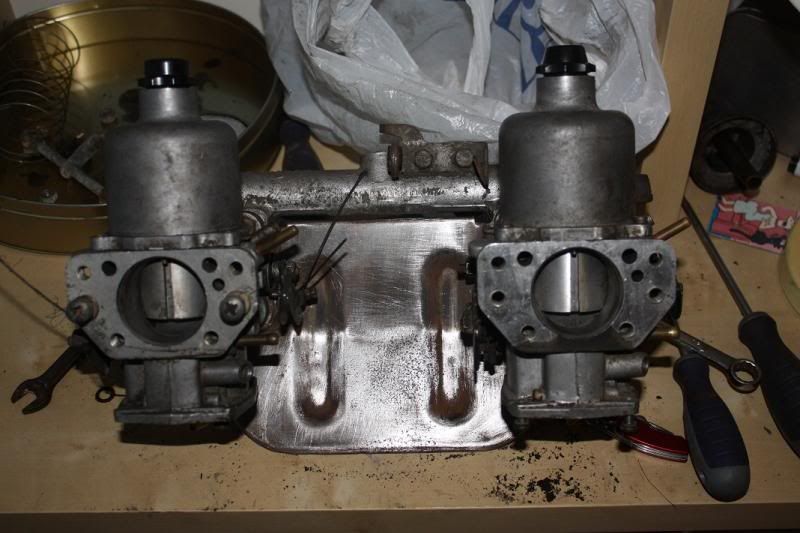 Also ground down all the welds on the passenger side and done most of the drivers side. 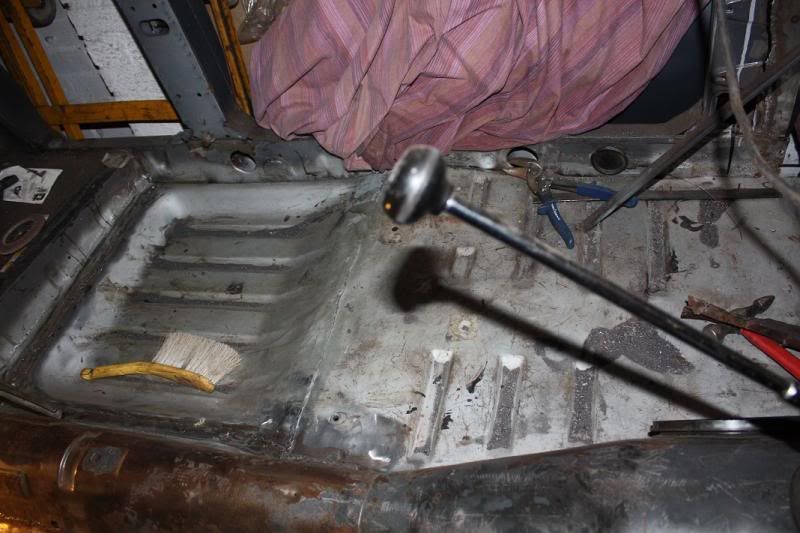 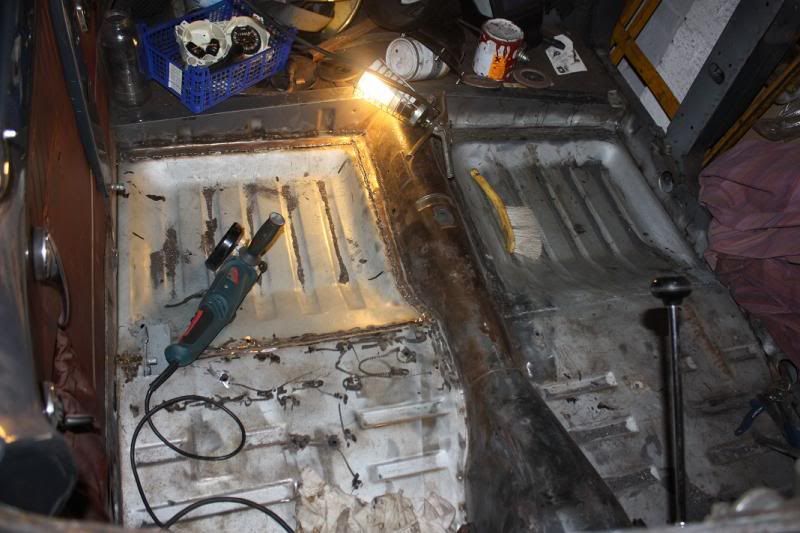 Now however i need to make a start to find the garage again after having all my tools etc at the front of the garage. Got a few questions and requests if possible. For those people who have twin carb setups, can you take a few pictures of the throttle linkages and the choke cables as im guessing the choke pulls two cables, one for each carb. Also for those people who have fitted the "Shotgun" i think its called (where the wing is bolted to) ive looked at pictures from how they have fitted them but i cant work out if the lip on the new panel goes above or below the sheet metal, some look below and some look above. Can anyone confirm the fitment to me? Any tips for removing the engine and gearbox? This is going to have to be done sooner rather than later so should ask that. Thanks in advance. Jackman |
|
|
|
|
Feb 6th, 2014, 13:34
|
#225 | |
|
Chief Bodger

Last Online: May 21st, 2024 08:18
Join Date: Oct 2009
Location: Aberdeen
|
Quote:
We've just fitted a couple of the shotgun repairs. Which lip do you mean? Do you mean where the repair is welded to the inner wing or where it attaches to the scuttle area? If so I butted both areas together and welded them together. Cut the old shotgun section off and then trial fit the new shotgun up, and then trim along the repair edge so it butts up perfectly to the inner wing. I used Mig for the inner wing section and Tig for the scuttle curved section. You can get the scuttle area to fit really well. The other area is top of A panel section and this is spot welded when it was built and we plug welded this section on Dave's car, but I butt welded along the vertical seam on mine. Trial fit the outer wing before welding the shotgun repair in place. I can't post pics at the moment sorry. |
|
|
|
|
|
Feb 6th, 2014, 13:56
|
#226 |
|
Senior Member
Last Online: Today 16:17
Join Date: Sep 2010
Location: Bramhall
|
Thanks for the quick reply, got some pictures to help with my explanation. I did mean the lip to the inner wing. Ive seen some pictures that look like its on top of the inner wing and welded like
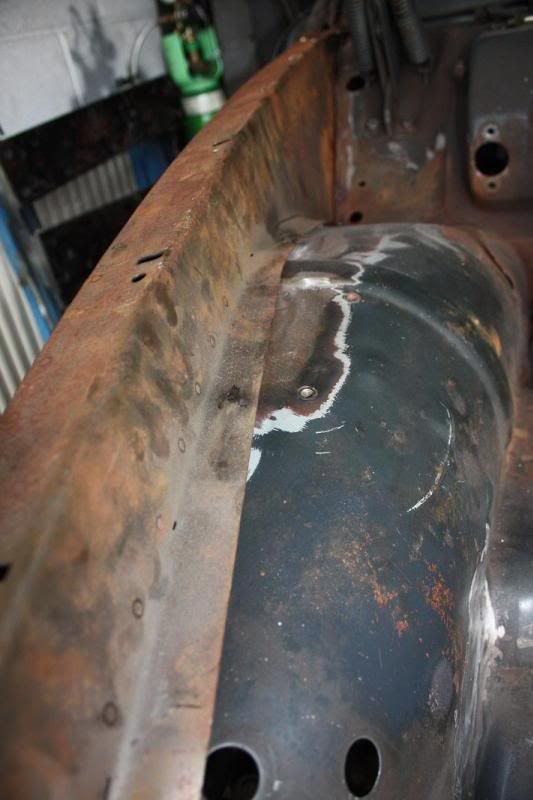 Then again some look below 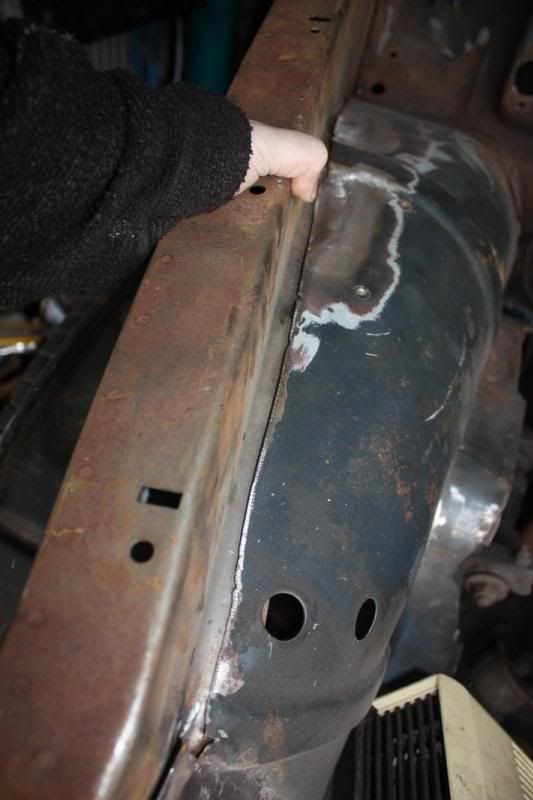 As for the scuttle area, ive got a bit of cutting and cleaning up to get it in correctly, joys of starting with a very rusty car. 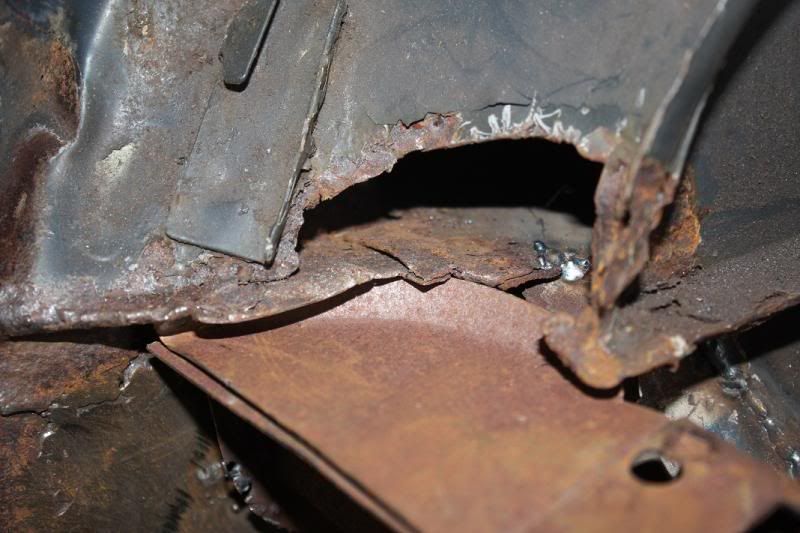 I did think the panel would get butt welded as thats what i would have done, but always best to double check than mess it up and spend ages trying to fix it. |
|
|
|
|
Feb 6th, 2014, 14:03
|
#227 |
|
Chief Bodger
Last Online: May 21st, 2024 08:18
Join Date: Oct 2009
Location: Aberdeen
|
Yep just butt weld that area. Best way I've found to get the joint matched up is get a 1m steel rule and mark along 5 to 10mm inside of the bend of the shotgun/inner wing, then cut the repair panel to suit.
|
|
|
|
| The Following User Says Thank You to Burdekin For This Useful Post: |
|
Feb 6th, 2014, 21:07
|
#228 | |
|
1800necwinner

Last Online: Today 21:36
Join Date: Oct 2008
Location: East Anglia ,Suffolk , uk
|
Quote:
be warned if you weld the new shotgun on top of the inner wing then the wings sit about 10-15mm to high afterwards so trial fit is a must !! i learned that the hard way the very first time i replaced a set the rest of the welding is a sinch i use a bradel aswell in the hole at the front of the new repair and poke it in the hole on the rad panel it keeps it inline and tru then a datum point i find the rest will then sit nice kind regards robert
__________________
 I grew up on classic volvos hence my passion for them born and breed into the lifestyle ! |
|
|
|
|
| The Following User Says Thank You to 123GT-AMAZON For This Useful Post: |
|
Feb 7th, 2014, 06:52
|
#229 |
|
Master Member

Last Online: May 8th, 2019 07:02
Join Date: Feb 2010
Location: Steyning
|
When I did my rear arches, I joddled the mating surfaces- in other words put a step in them, punched them and plug welded to start with. I would have thought you could go the same route with this job. Good luck
|
|
|
|
|
Feb 7th, 2014, 22:46
|
#230 |
|
VOC Member
Last Online: Today 13:23
Join Date: Jul 2006
Location: Chatham
|
It might have been a while since you cut the old ones out but you might recall that the vertical section is actually part of the inner wing so originally there is no join, just a small radius junction. As said, the correct position is vital to match in the wings, bonnet and front panel. With the bonnet fitted correctly in relation to the front panel and with a correct and even gap at the back, you can use that get the alignment with the front panel. Fitting the wings firmly but accurately will also get the side panels in line for a few small tack welds to make sure everything is in the right place.
Have you got both sides to do? If the other side is still sort of intact you can at least get some measurements. |
|
|
|
|
| Currently Active Users Viewing This Thread: 1 (0 members and 1 guests) | |
|
|


 Linear Mode

