
|
|||||||
| XC90 '02'15 General Forum for the P2-platform XC90 model |
 Information
|
|
MY2008 Parrot MKi9100 install guideViews : 27059 Replies : 24Users Viewing This Thread : |
|
|
Thread Tools | Display Modes |
 Oct 17th, 2010, 17:52
|
#1 |
|
Master Member

|
Below a guide on how I installed a Parrot MKi9100 bluetooth/Ipod unit to a MY2008 (connected to AUX input).
I only use the Ipod and therefore is acceptable for me that the bluetooth unit only works with the radio in AUX mode. With this unit I now have bluetooth handsfree, Ipod playback as well as a USB and 3.5mm jack for AUX input. The parrot also allows you to stream audio over bluetooth For the location of the display I chose to fit in it the little space below the radio display. The Parrot "bluebox" is fitted behind the radio unit. The below pictures are a mix of Volvo guide and my own photos: First remove the gearlever surrounds as follows: 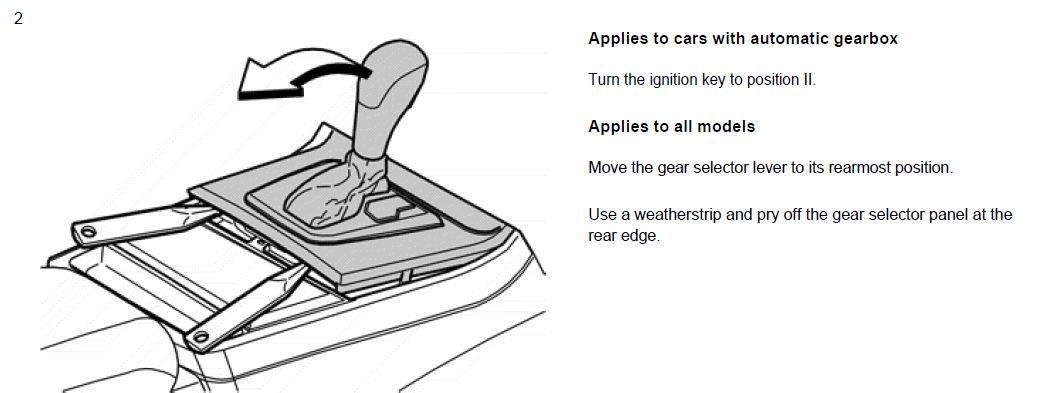 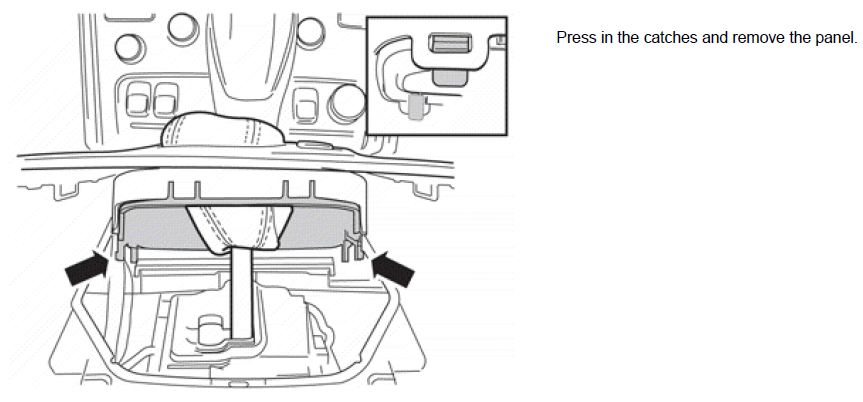 I found it easier to remove the entire top part of the console by removing the 6 screws as indicated by the arrows 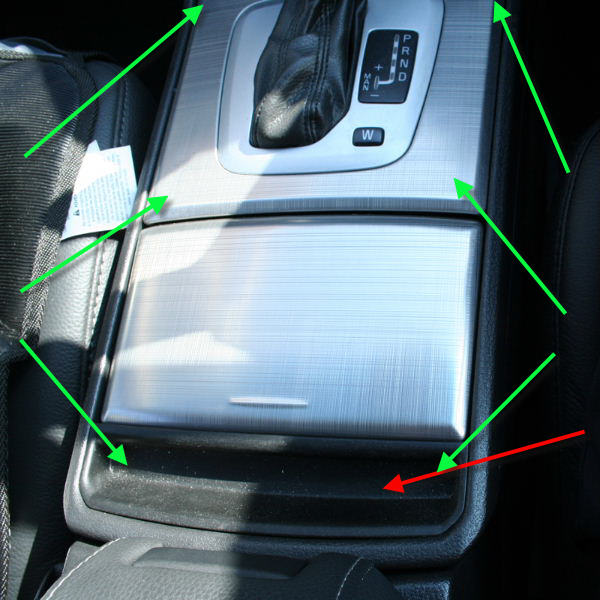 Next remove the side (carpet) panels below the centre console on each side. They are held in place by clips (see photo) and can be pulled off with a bit of force 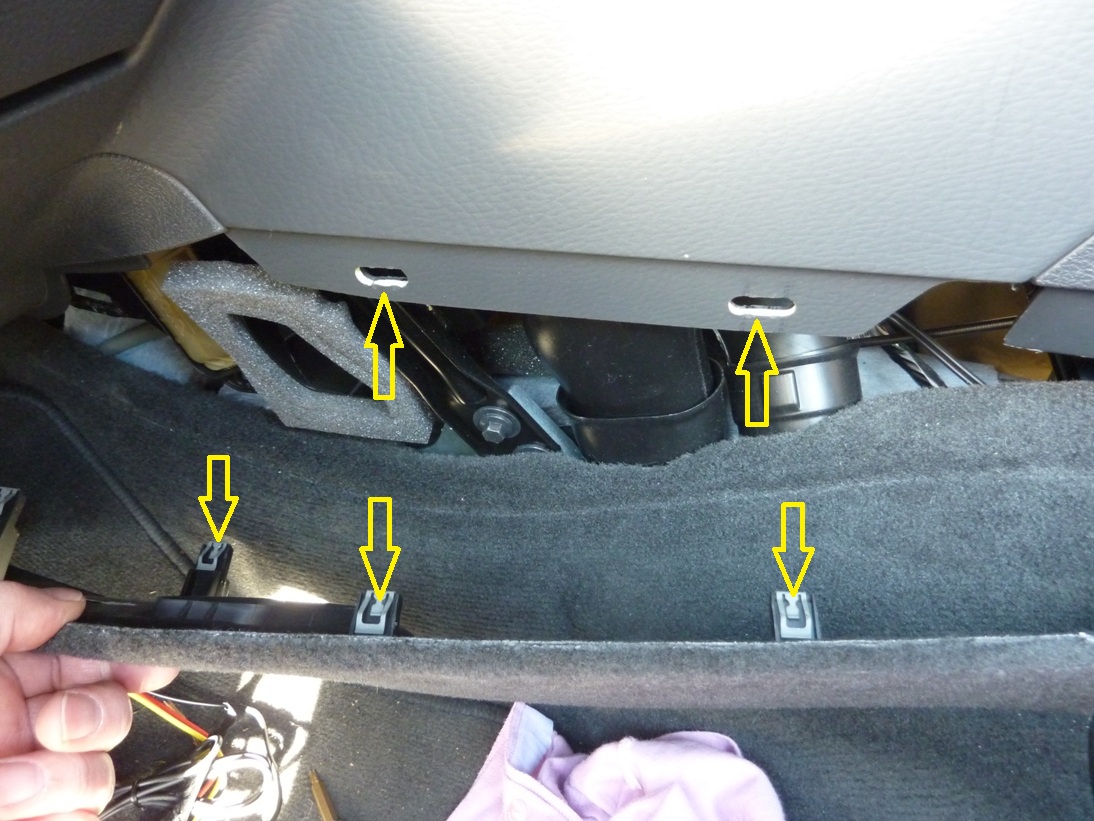 Next remove the radio unit  To remove the front of the radio to get access to the storage tray below the radio display, remove the screws as indicated (2 on each side). Then push the clips (as indicated) inwards and release the radio front 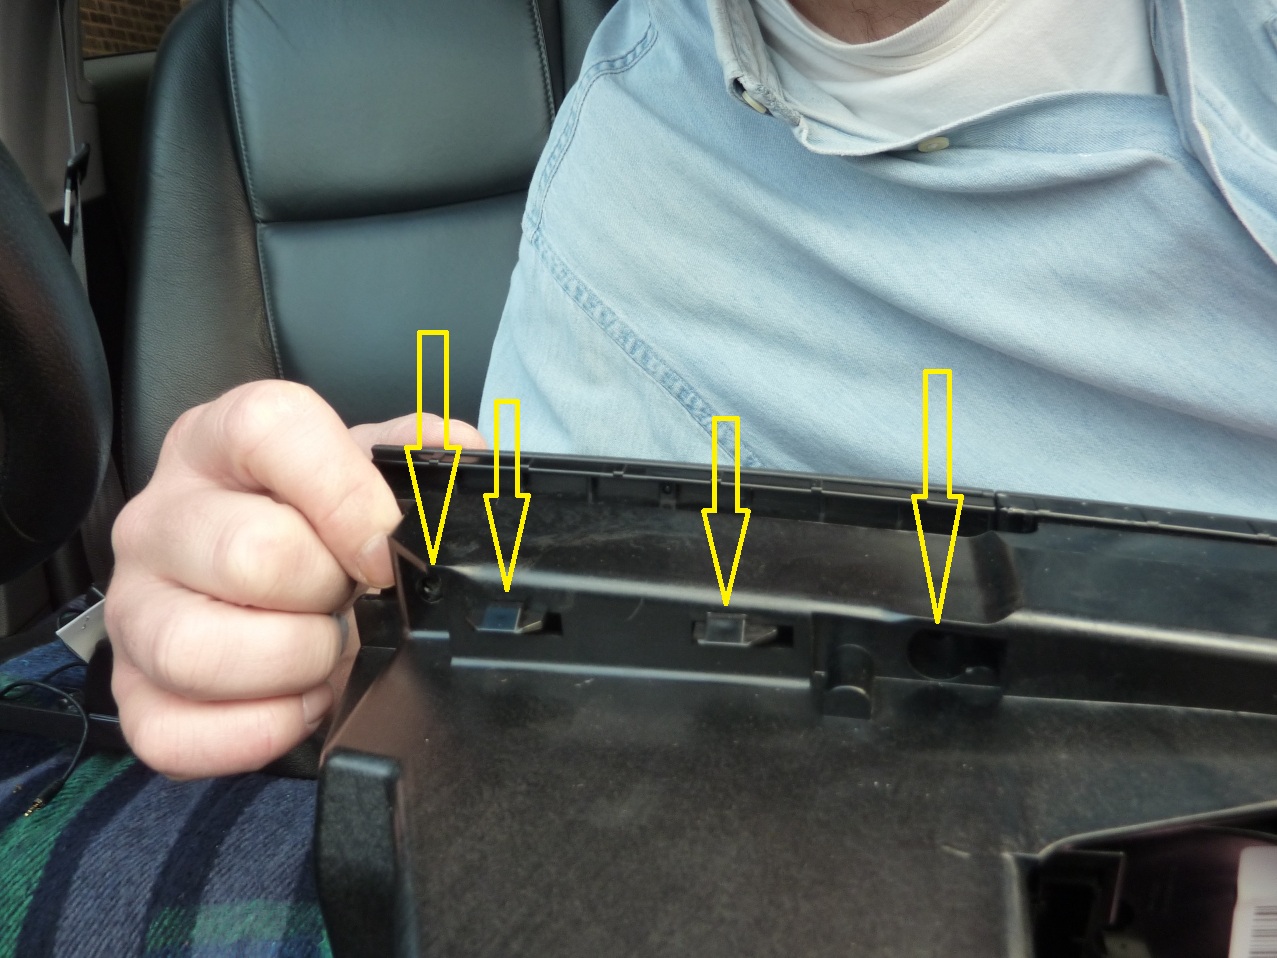 The storage tray can be removed by removing the 2 torx25 screws. The photo shows the parrot display already in place, I have use the mountings that are supplied with the parrot kit, and cut and glued a piece of black film on each side of the parrot display, as the display is slightly smaller than the opening. I've then cut a piece of PVC to keep the display in place and used the fixing points and screws from the removed tray. 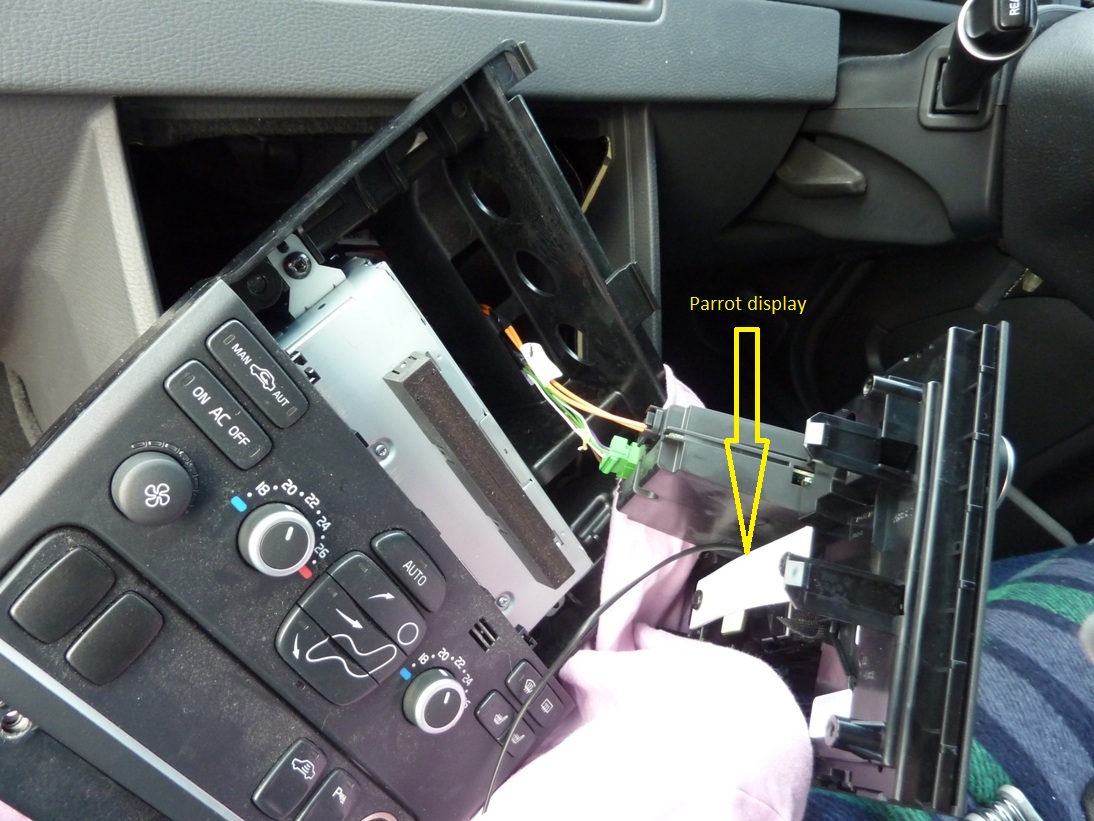 Close up view: 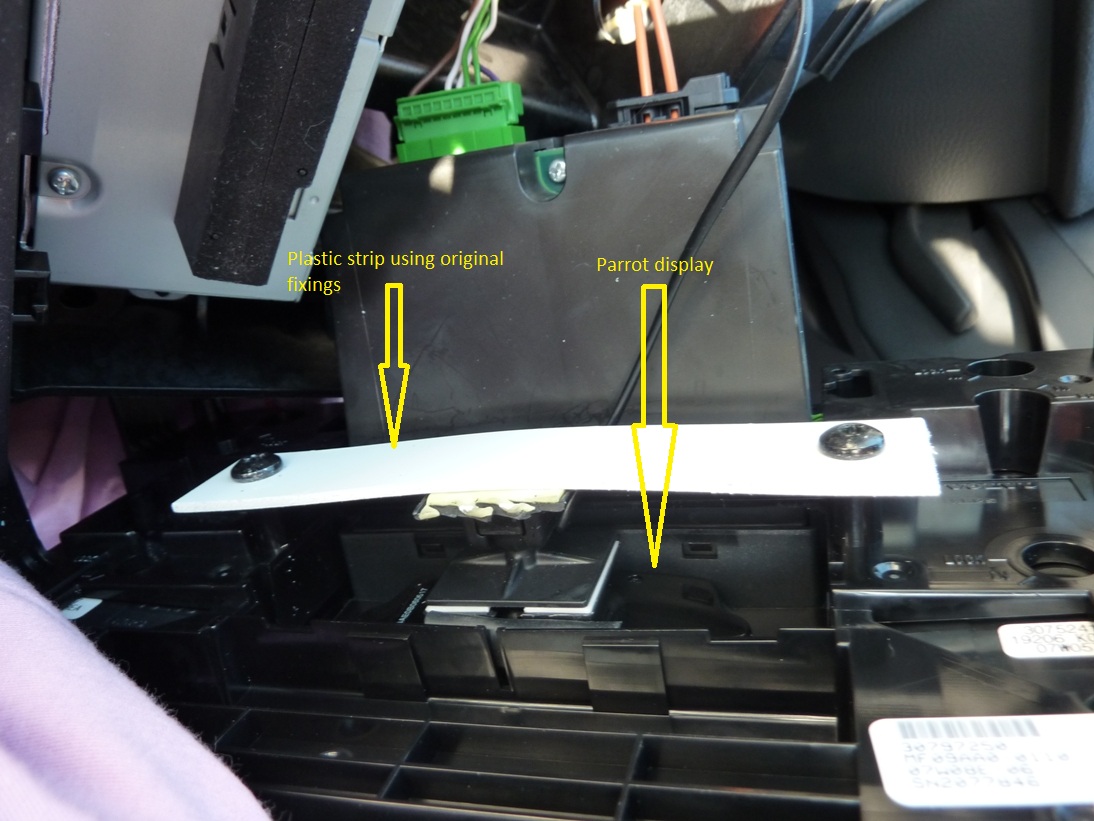 Interesting for people with broken dash-lights... here they are! 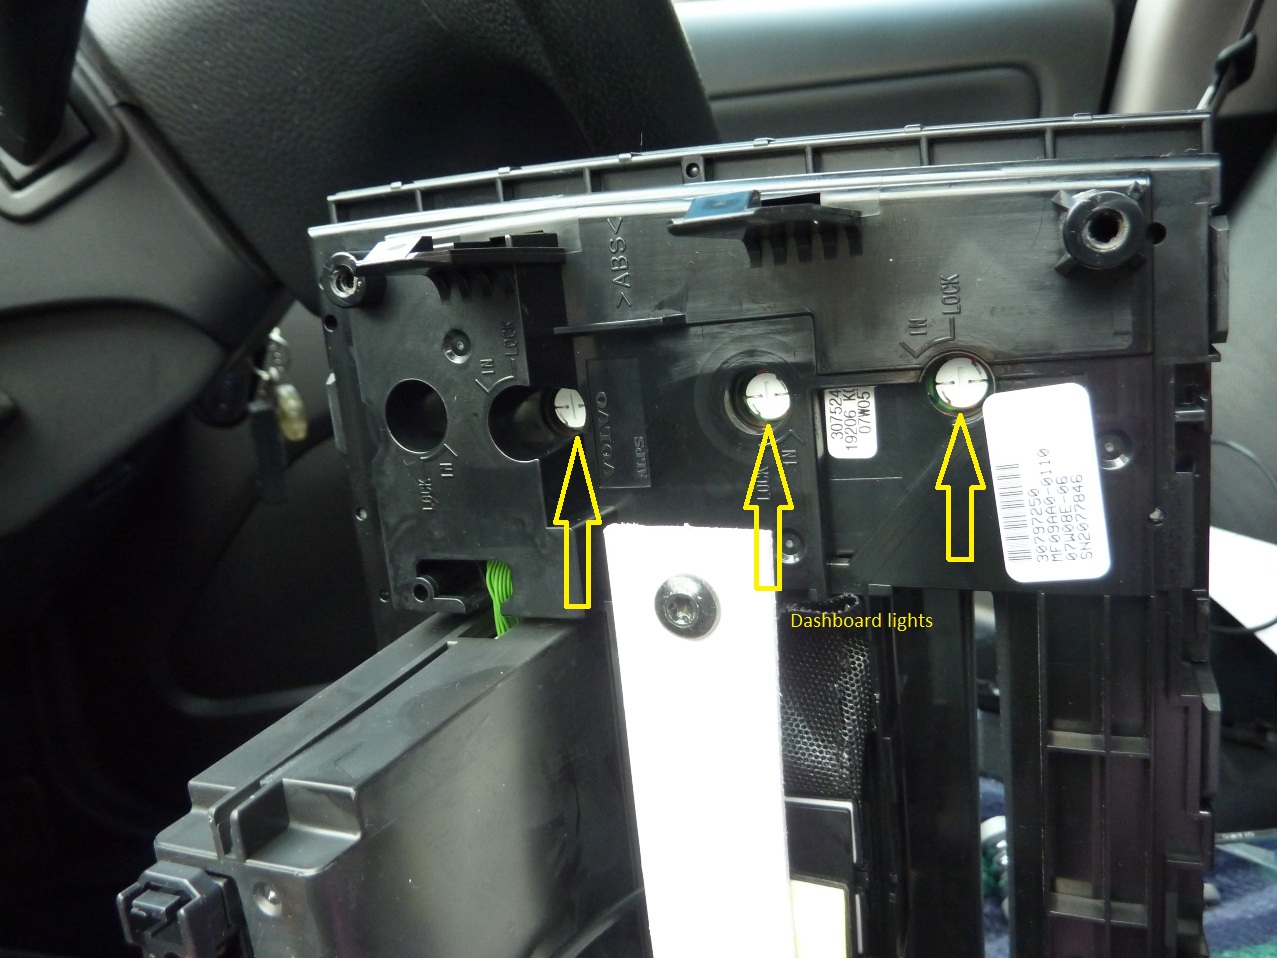 Next remove trim panel underneath dash at drivers side 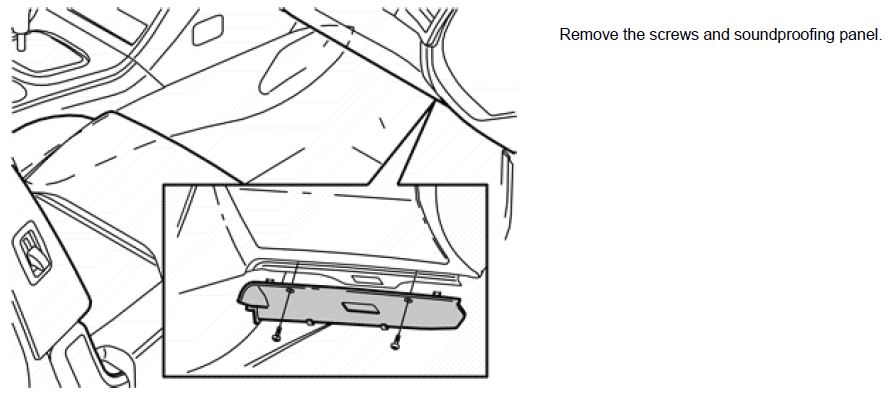 Remove the dash side panels on each side 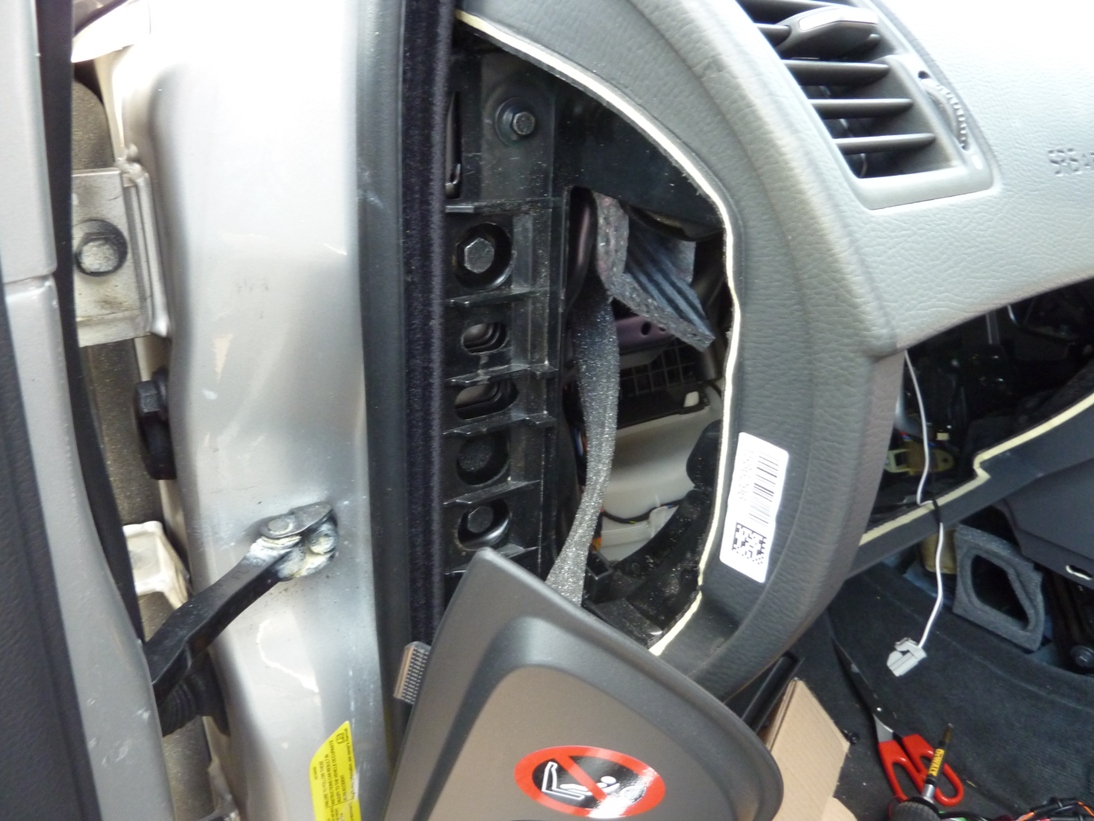 Remove glovebox 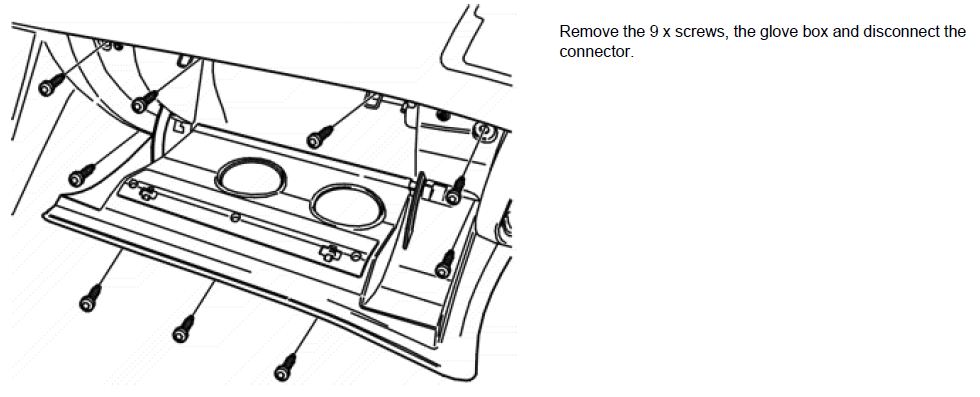 Remove the handle on the A pillar (passenger side) and remove the A pillar panel 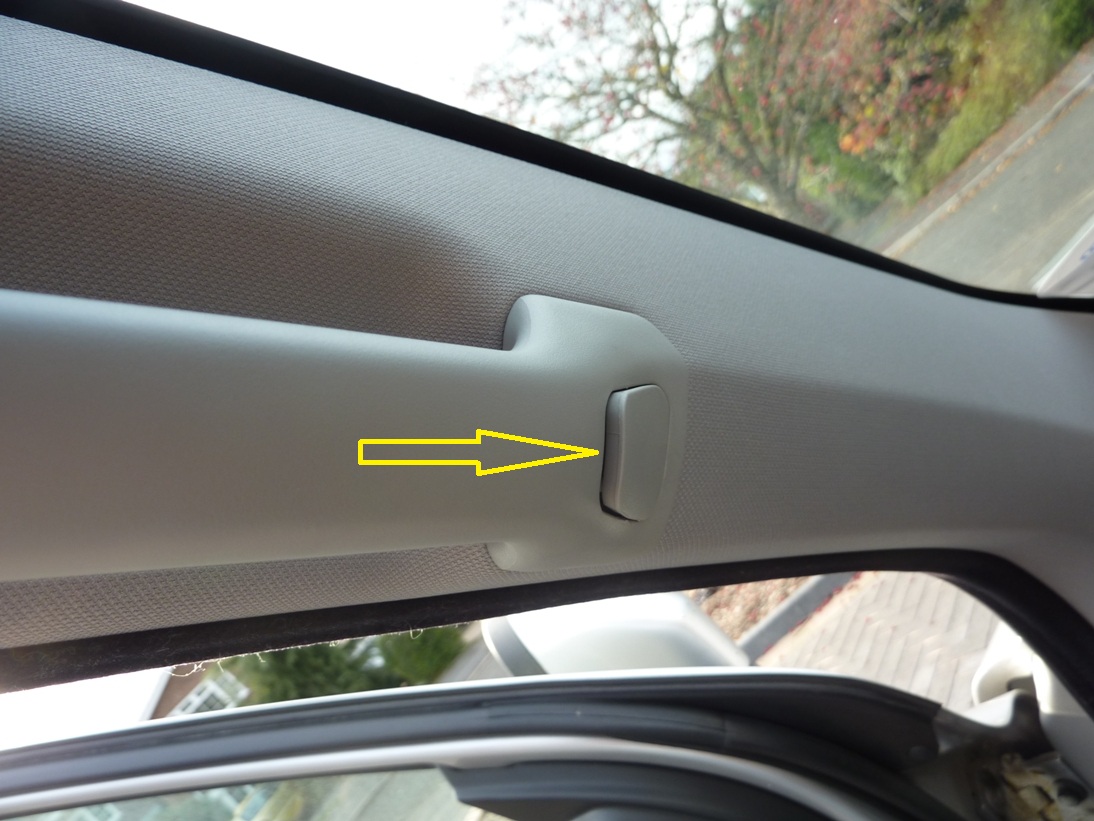 Remove the interior light panel as follows 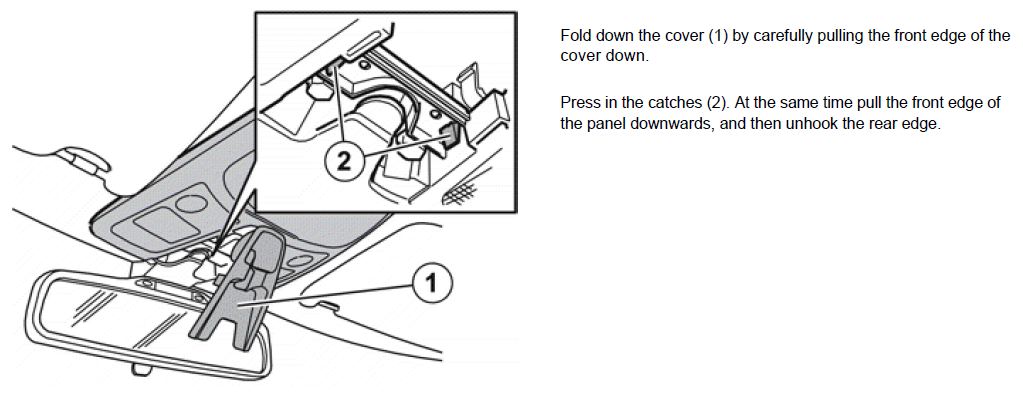  Fix the microphone to the preferred location and feed the cable over the headlining via the A-pillar to the area behind the glovebox. I fitted the microphone as in photo, I fixed it in place using the adhesive pad and a screw that goes through the panel and a pvc strip to make sure it stays in place 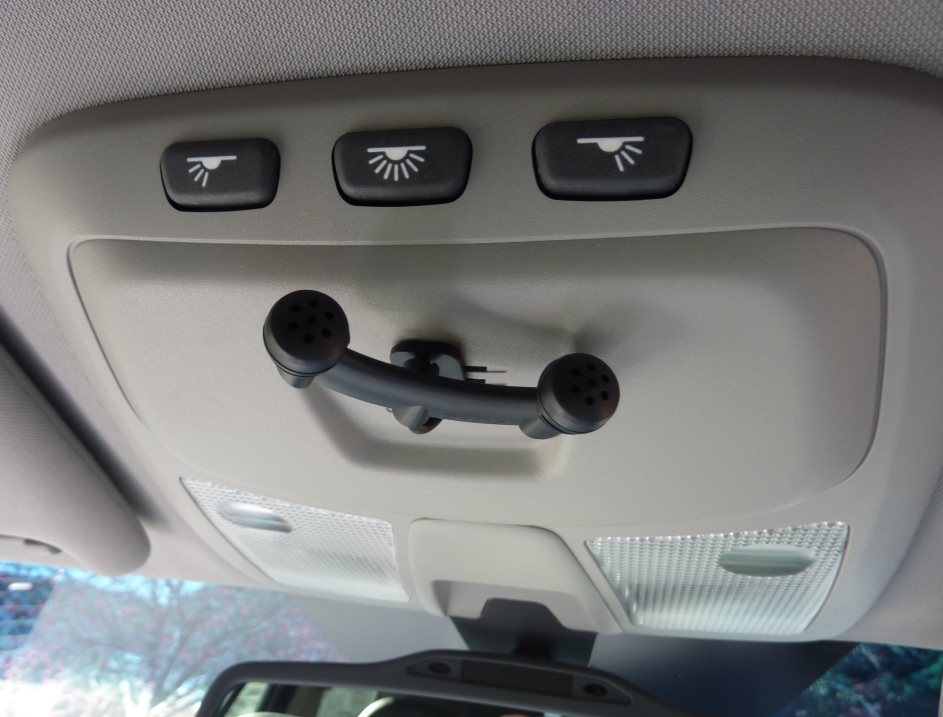 Drill a hole in the back of the glovebox of approx 30mm to feed the Ipod/USB connector through and secure in place using the rubber gromet 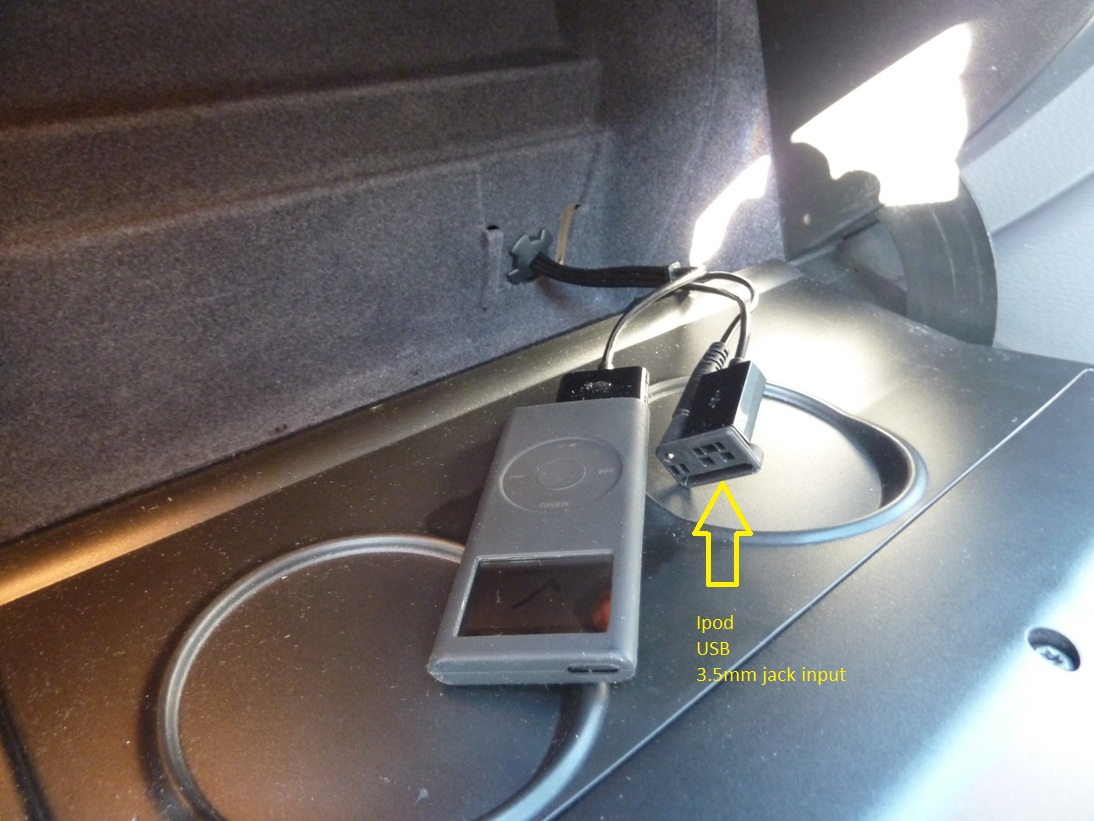 run both the microphone and Ipod cables to the area behind the radio You can now fit the interior light, A pillar and glovebox back in place For the constant 12v power supply I chose to run a cable direct from the fusebox (driver side). I fitted an in-cable fuse holder to make sure the entire cable is protected. Run this cable to the area behind the radio 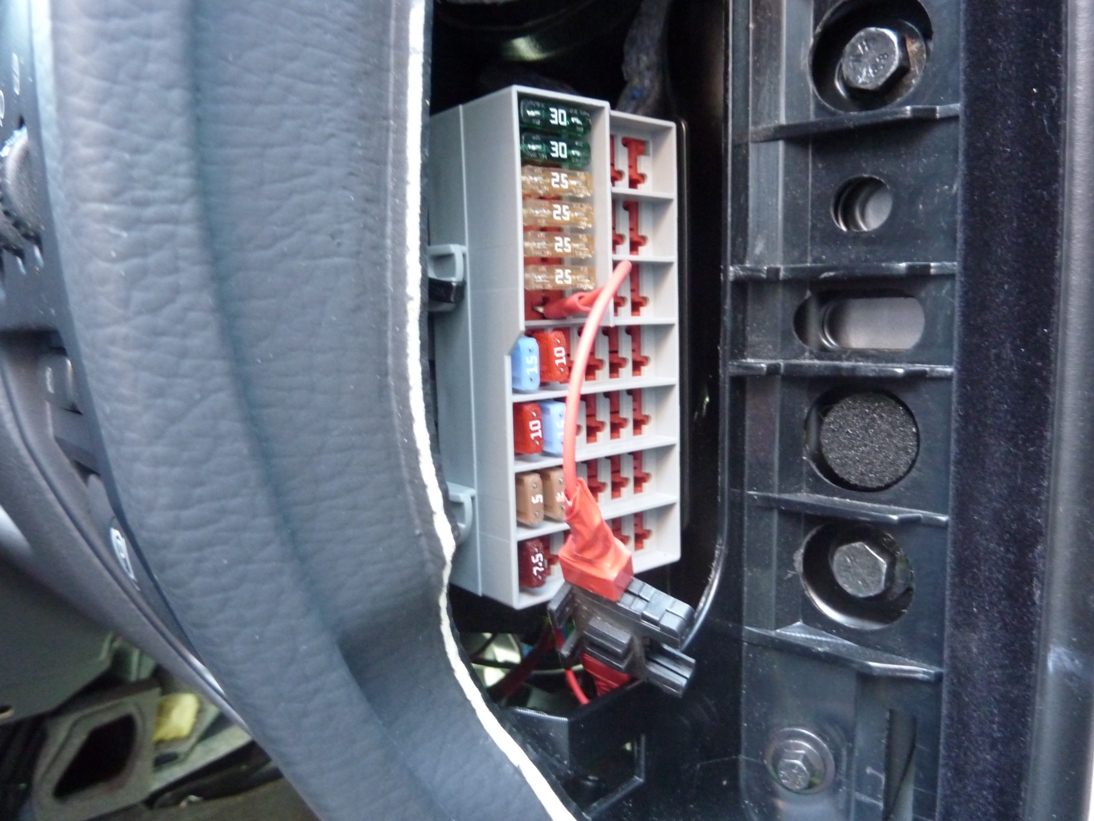 For the switched (ignition) 12V supply and Ground I used the wiring from the 12v accessory socket  To use the radio's AUX input I soldered the line cable from the Parrot unit to a cut-off 3.5mm jack 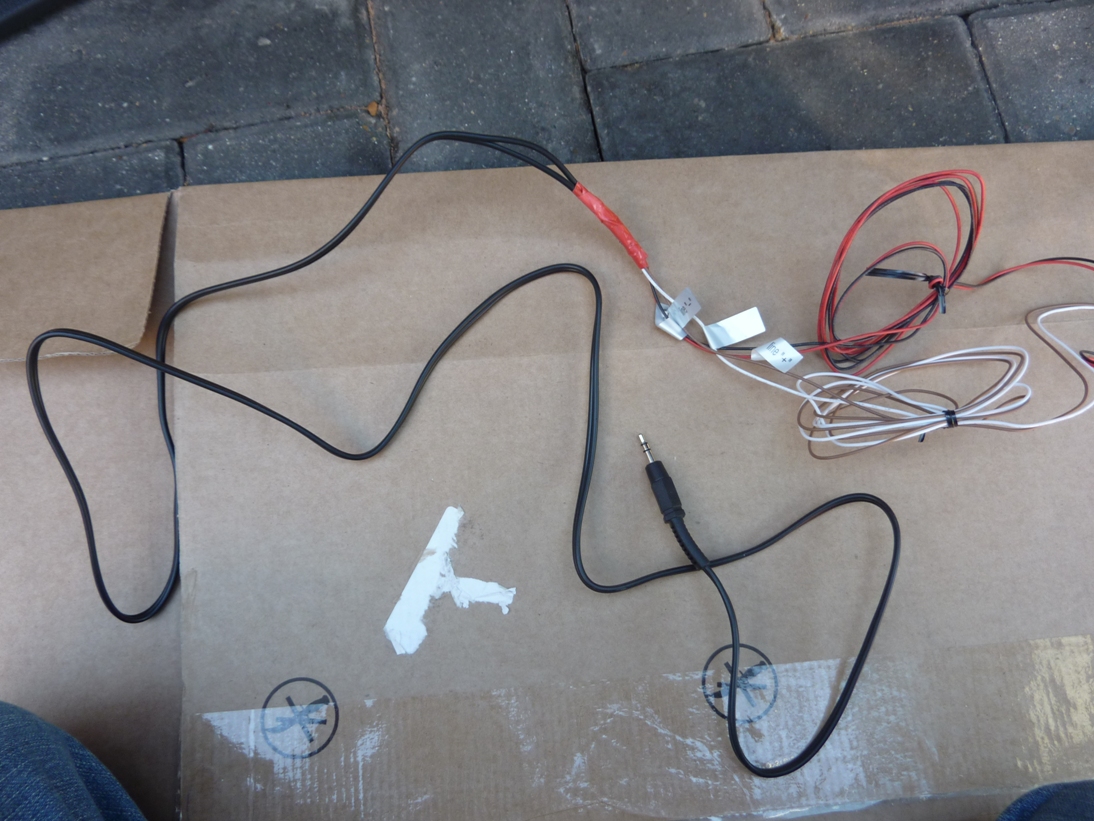 From the centre console I removed the AUX connector which can now be hidden below the console and connected to the Parrot 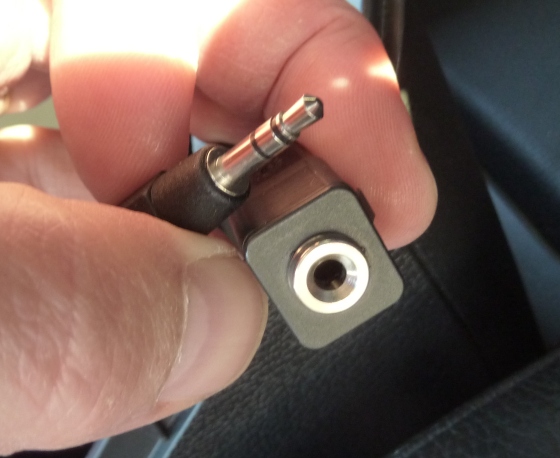 The Parrot bluebox fits perfect underneath the cd changer unit and there is enough space for all the excess cabling 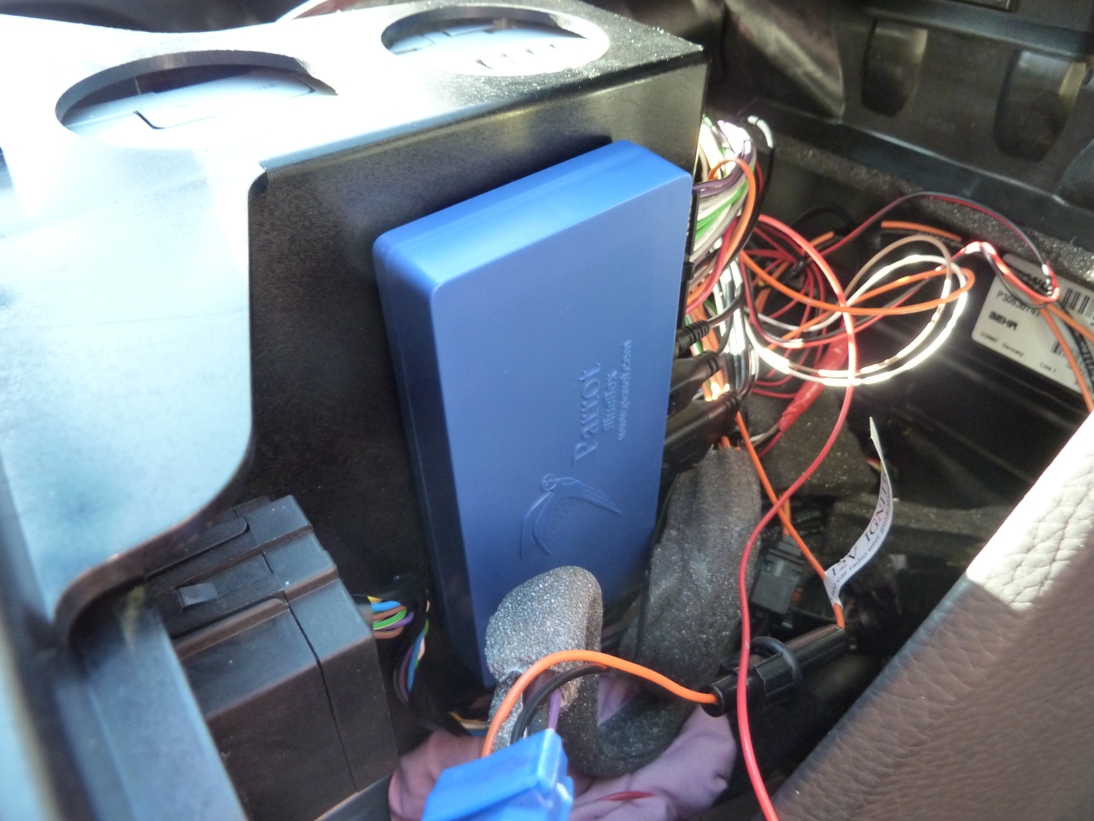 Photo of end result 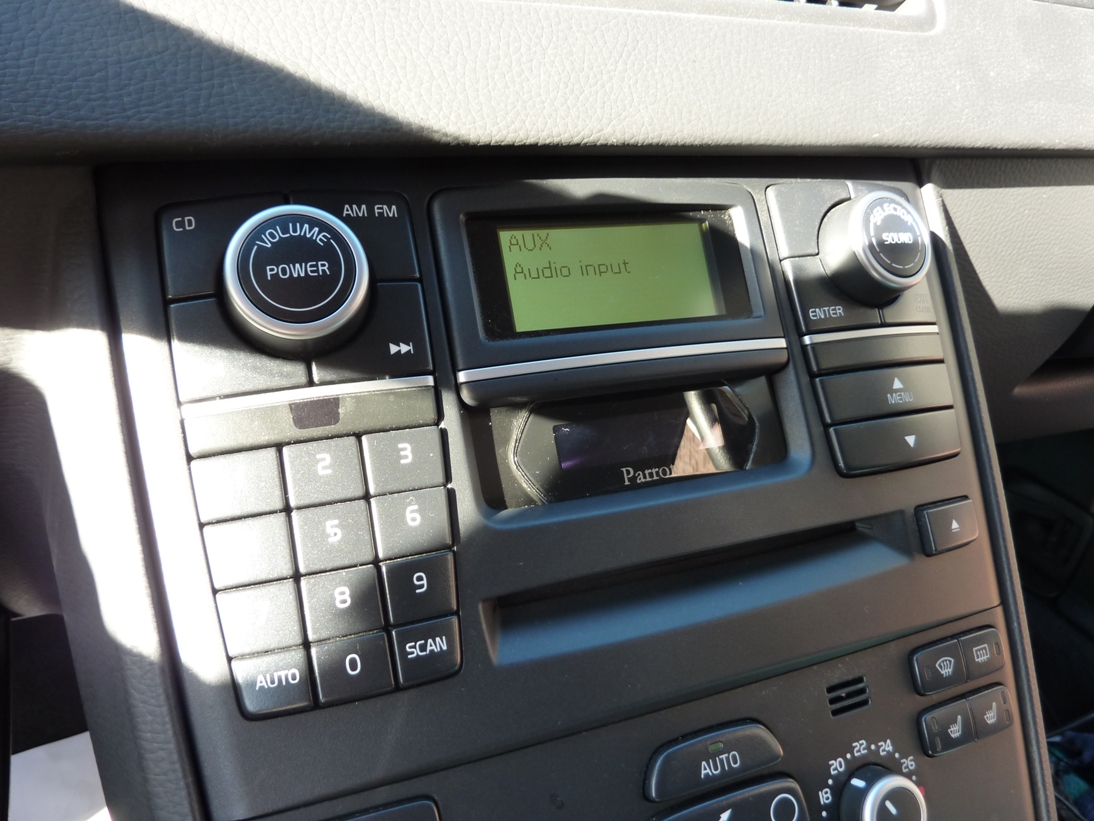 The Parrot remote control can go anywhere (wireless). I chose to fit it by the gearlever 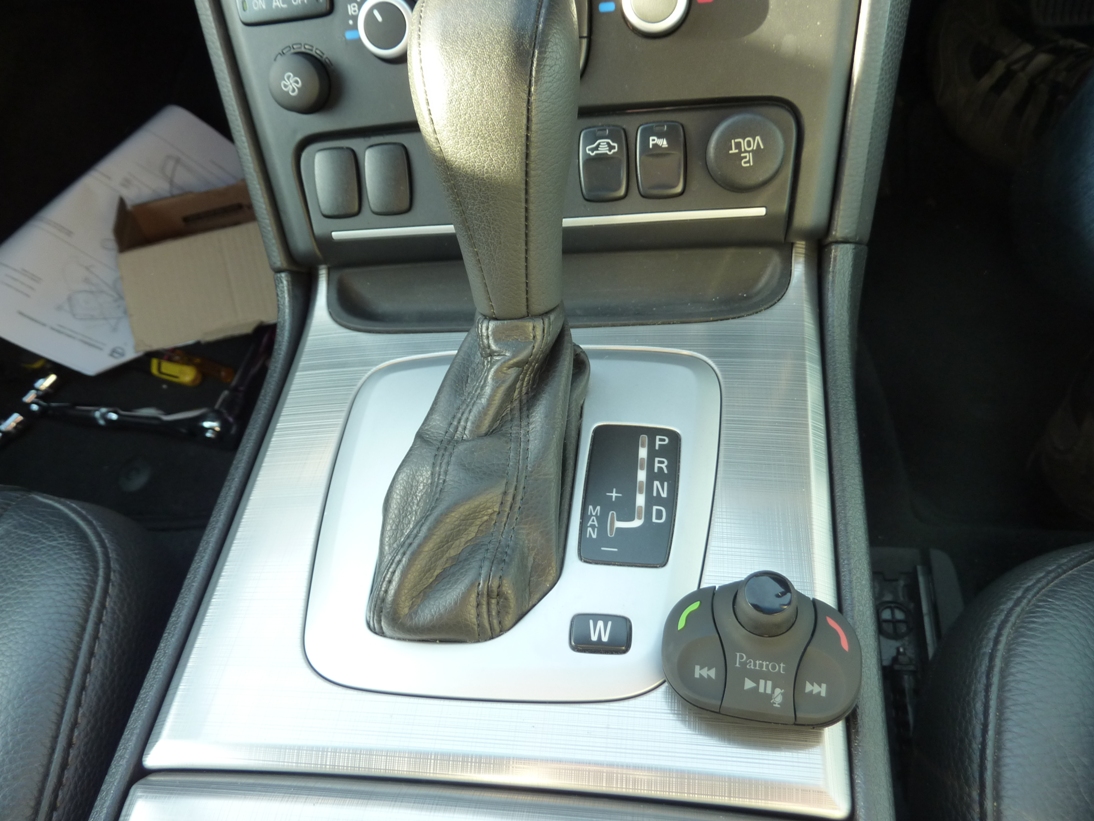 Hope these instructions are useful for someone
__________________
Chrysler Grand Voyager 2.8 CRD Limited 2010 XC90 D5 SE Geartronic, MY2008 (Now sold) Mitsi Pajero 2.8TD Super Exceed '96 (My Toy)  Member of the Gloucestershire & Worcestershire 4x4 Response group. www.gw4x4r.co.uk Member of the Gloucestershire & Worcestershire 4x4 Response group. www.gw4x4r.co.uk
|

|

|
| The Following 12 Users Say Thank You to Ron_XC90 For This Useful Post: |
| Currently Active Users Viewing This Thread: 1 (0 members and 1 guests) | |
|
|


 Threaded Mode