Quote:
Originally Posted by Laird Scooby

I might be speaking out of turn here and interpreted the photo incorrectly but it looks like the seam between the inner and outer has been welded over with a final patch above the three indicated.
I've been told (not sure but it sounds right) this isn't a great idea as it can create moisture traps in the seam area. Something to consider maybe?  |
I wouldn't worry about speaking out of turn - hopefully the following photos will illustrate how the panels fit together -
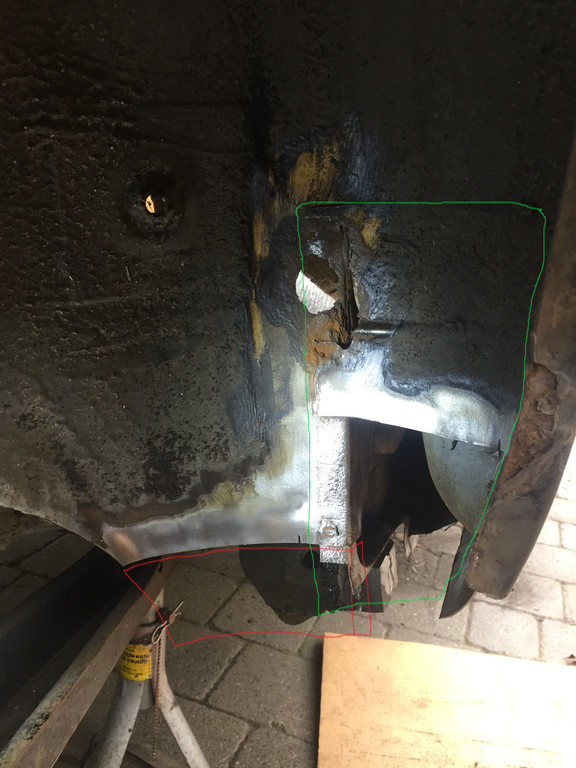
I've already used a wire brush on the inner wheel arch area in this photo and have cut away part of the closing panel - but I've outlined in green where it extended to. Ignoring the rusty hole through to the interior that I fix first, the panel outlined in green was spot-welded in place over the vertical seam between the two panels that make up the inner arch.
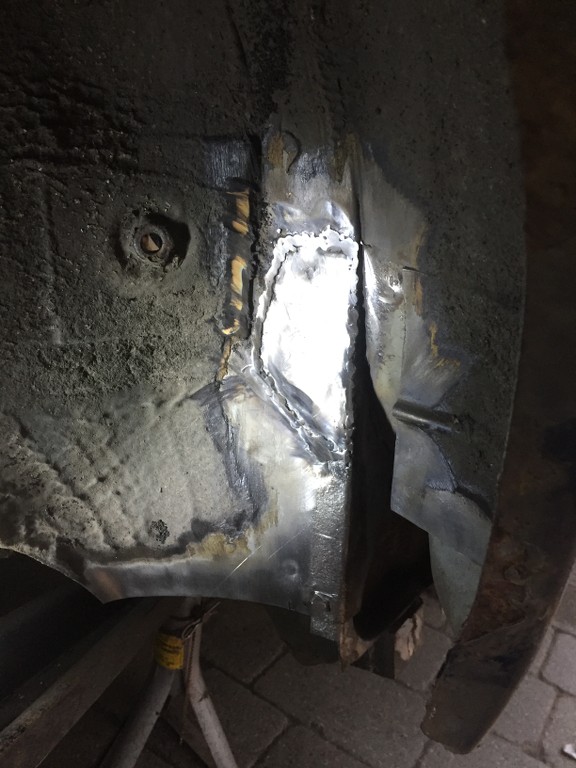
Another view - I've made a cardboard template for the repair patch, and the vertical seam between panels is clearer as I've cut away the top part of the closing panel (that I highlighted green in the previous photo)

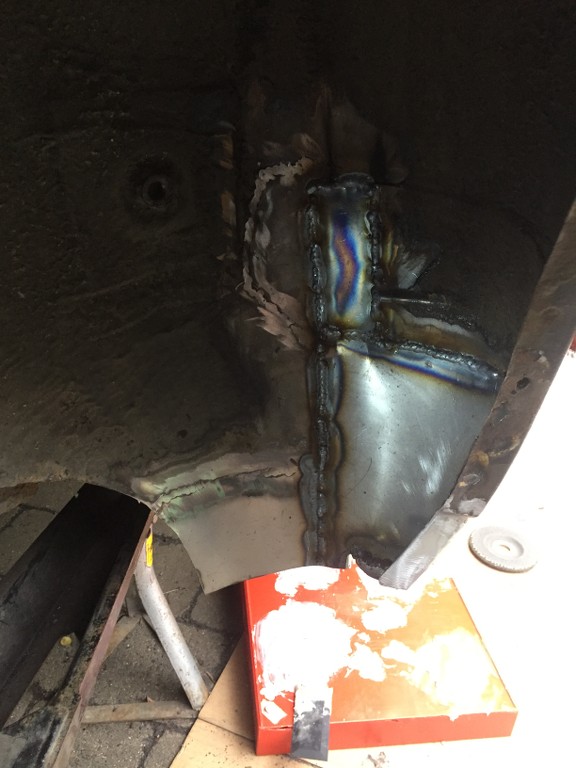
Repair patch is welded in now and below it you can see the textured finish on the strip of metal that previously had the closing panel spotwelded over it
Then finally - the inner arch was repaired first, then as it was easier to make in two parts the closing panel was replaced - the lower section first, butt welded to the retained part of the closing panel, then the top section last, butt welded in place.
I suppose the short answer to your query is that yes the seam has been welded over, but the longer answer is that the final plate welded over other repairs replicated what was there previously.
Open to comments.
Cheers