Notes:
240's came with two different brake 'set-ups' - Girling or ATE. There is a label under the boot 'cubby-(Estates) or in the boot (Saloons) which will tell you which set-up you have:
On the label next to 'Brake' will be a number 1 or 2.
1= Girling
2= ATE.
Though, just to confuse matters this does depend on year model (the label location may be elsewhere on different year models too).
76 & 77 year models codes relate to the rears, all fronts will be girling.
83 onwards #2 = Front Girling & rear ATE.
When it comes to replacing discs & pads, always replace in sets, both front and/or both rears.
NEVER replace discs/pads on one side of an axle only.
This guide is a general how-to & as the work is the literally the same procedure for front & rear can be used as a guide for either infact, some of the pics jump from showing a front to showing a rear - I hope this is okay for you. The obvious difference being that front discs are 'vented', rears are solid & incorporate a drum to house the handbrake mechanism. A tin of spray brake cleaner should be available, so that you can clean away any excess brake dust as you go along.
As with my other how-to's please feel free to add any 'tips'.
The work:
1) Chock the car & then jack up & place on axle-stands (follow Mikes how to:
http://www.volvoforums.org.uk/showthread.php?t=50445)
2) Remove the wheel.
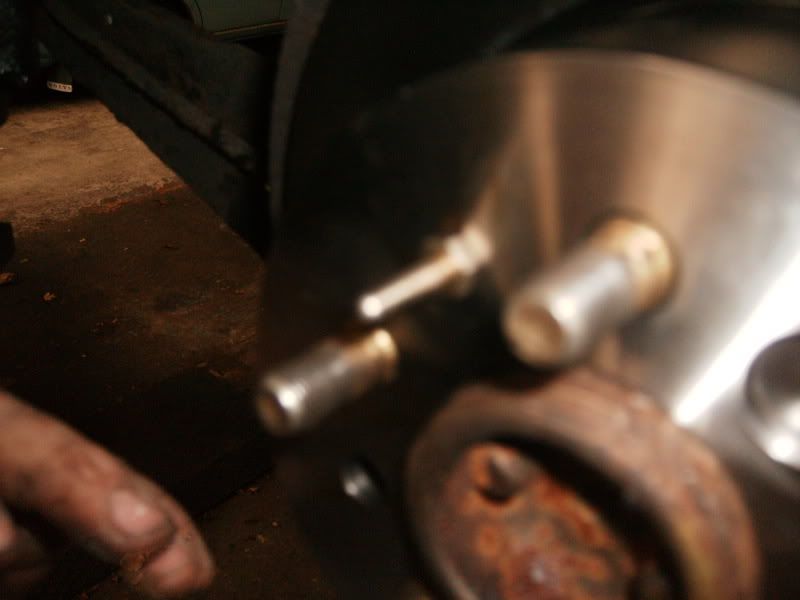
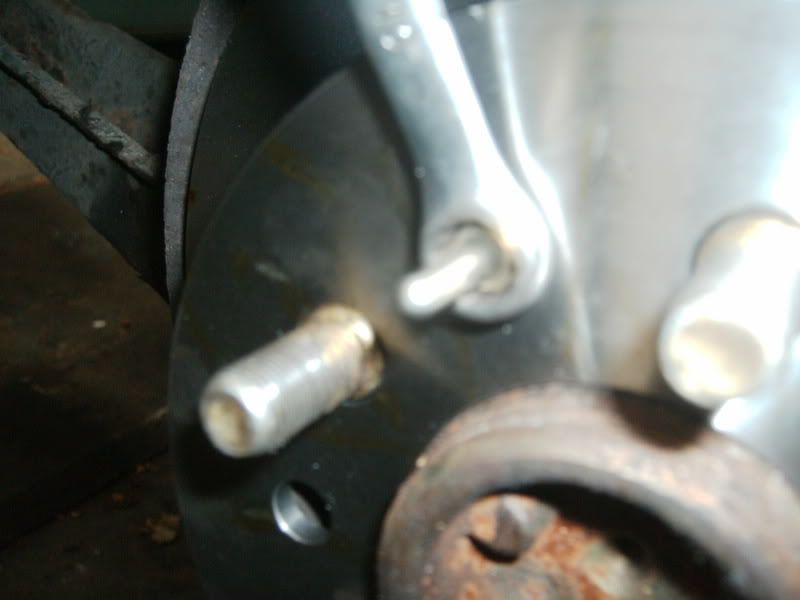
3) You will see this:
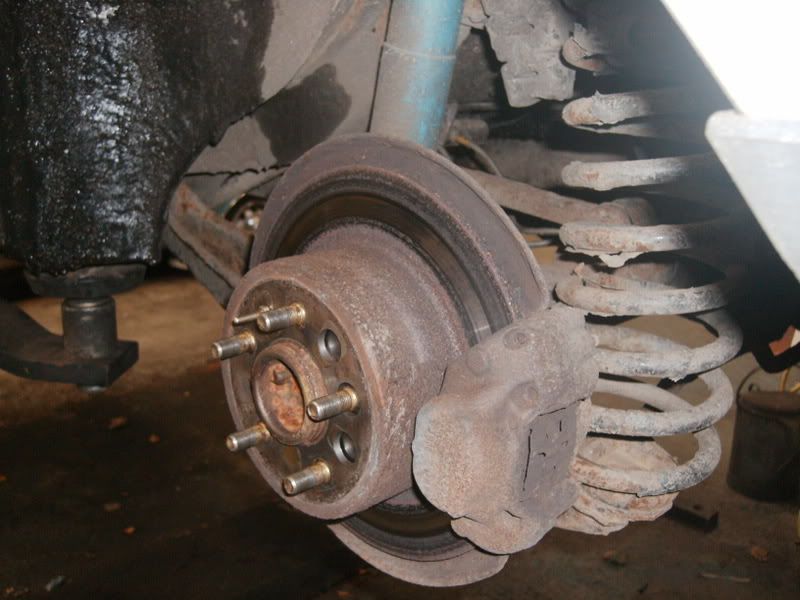
The calliper holding the brake pads & the disc itself.
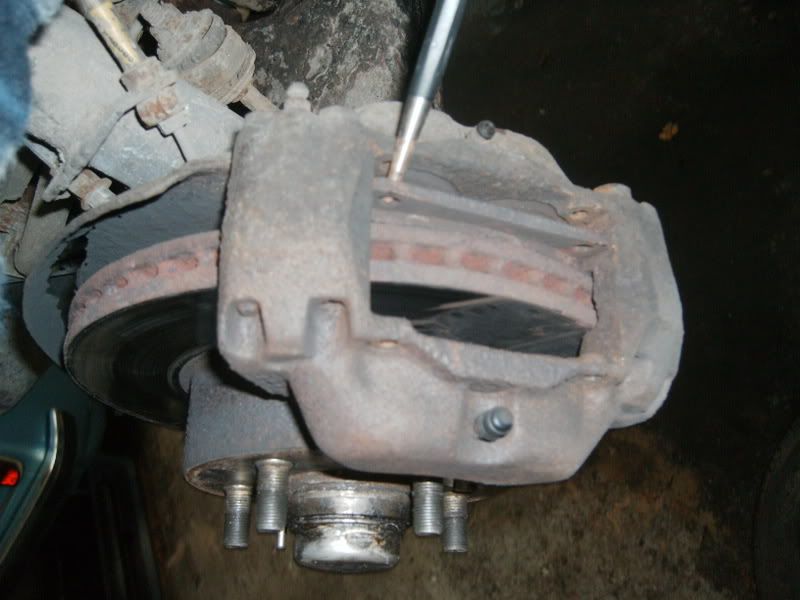
TIP: Take a digital photo of how the pads, retaining pin & springs look in situ' use this to refer to when refitting the new items. Girling & ATE fitting pins & springs are different, but once you see how yours is set up all will become clear. These two pics (above & below) show one of each type of set-up.
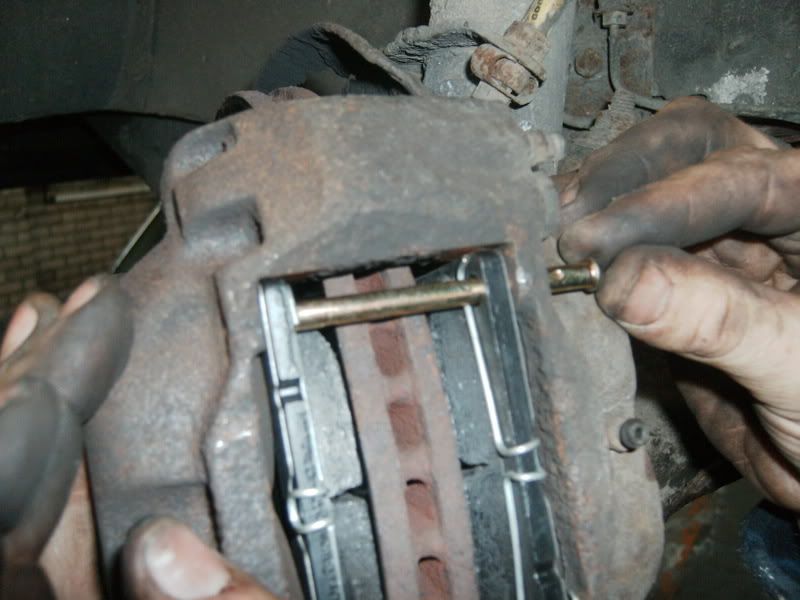
4) Next you need to remove the pins that hold in the pads. (Depending on which type, there maybe a spring clip to keep the pins from working loose). Then tap out the pin using a suitable drift.
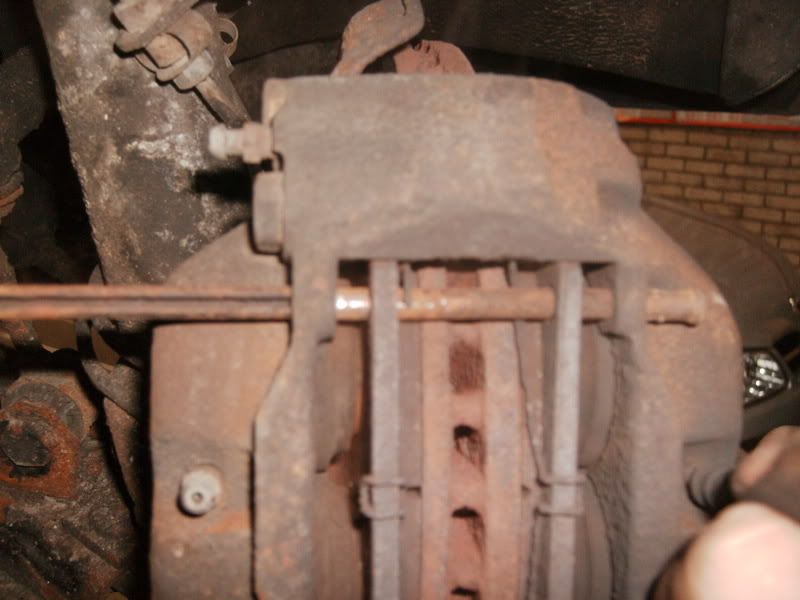
Only tap gently on this as there is a retaining spring hooked behind the pins that will need to be freed the spring will probably 'try' to move with the pin, so keep an eye on it & if it moves, push it back to save from braking it. Once the pin is so far out you will be able to free one end of the spring. Also you should be able to use a set of pliers now to completely pull out the pin.
Repeat with the second pin.
5) Now it is time to remove the pads. First try them using a pair of pliers, if you are very lucky they may move easily. If you may need to press the pads 'out' remove the brake master cylinder cap & put a plastic bag over the neck with an elastic band to hold it. This is just in case any fluid is pushed over the neck. Then gently ease the pad back:
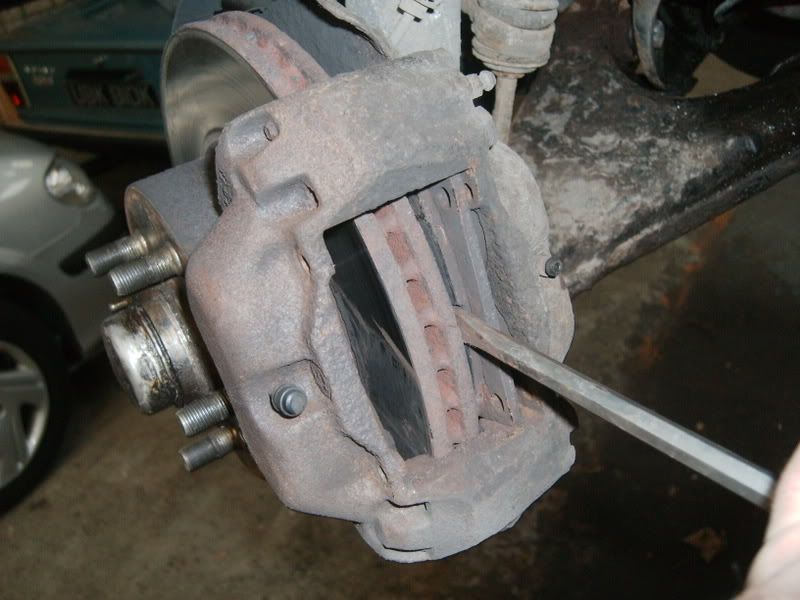
(Do not worry about damage to the disc or the pad, as they are being replaced)
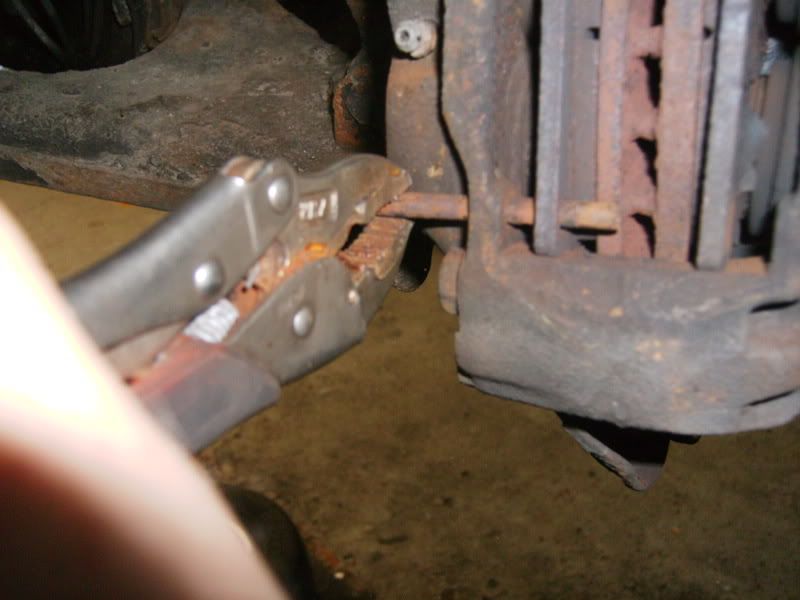
If the pad still is reluctant to budge, persuade it like this, it will come:
Some pads are fitted with an anti-squeal shim on the rear, check that (if fitted) they are still on the pad & not stuck in the calliper. You can now refit the master cylinder cap (saves forgetting later).
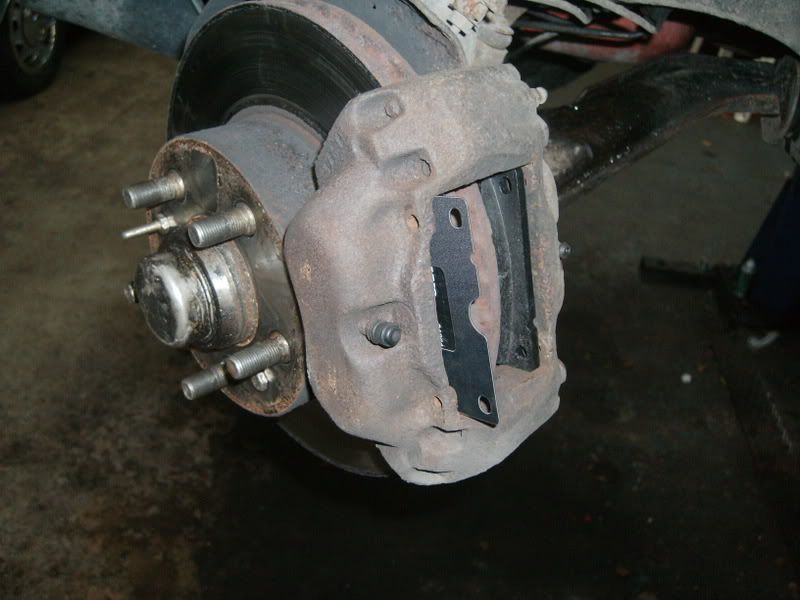
6) Now it is time to remove the calliper. it can be removed without needing to detach the brake pipes. You will need some wire, as you are going to hang it from the road springs once it is free. Look at the rear of the calliper, you will find two bolts an upper & a lower. If memory serves these are 17mm (some models have 15mm with a 'fixed washer' to bring them up to 17mm at the face that holds the calliper. (Use a 6 sided socket if available). Free one bolt (maybe very tight & need an extension bar over your wrench). Once you have 'cracked' free the 2nd bolt support the calliper with one hand. continue to loosen the 2nd bolt & remove it. You can now gently move the calliper free of the disc & hang it on the wire you have prepared out of way of the disc:

(Pic shows with disc off sorry)
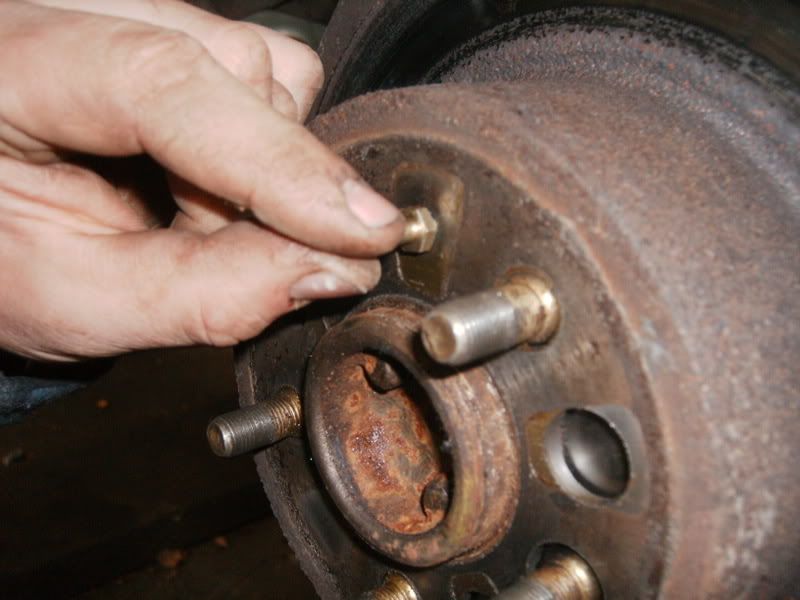
7) Now it is time to remove the disc (if you are doing the 'rear's make sure the front wheels are well chocked & handbrake is off). There is a 10mm bolt with a locating pin for the wheel position attached to it. This needs removing:
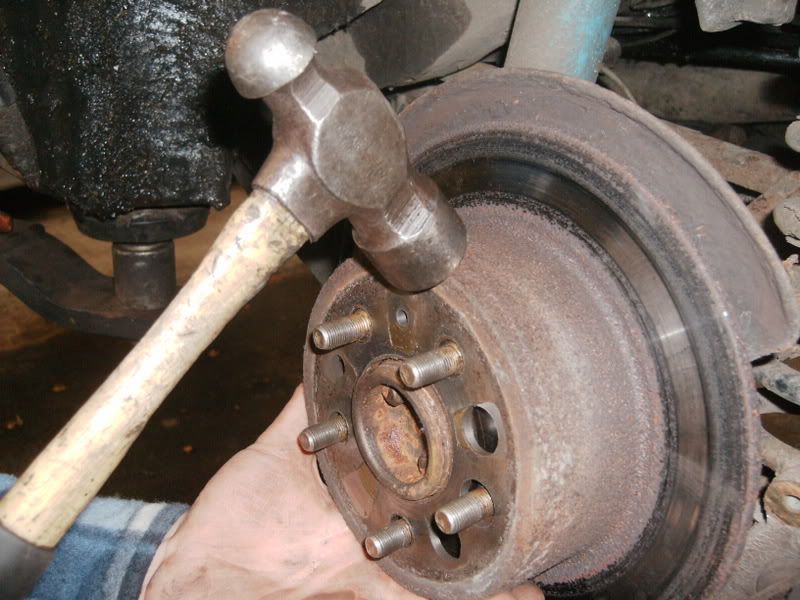
Once removed the disc (if you are very lucky) will pull off. If not it may need a good tap to free any rust / brake dust that is holding it:
Then pull the disc off:
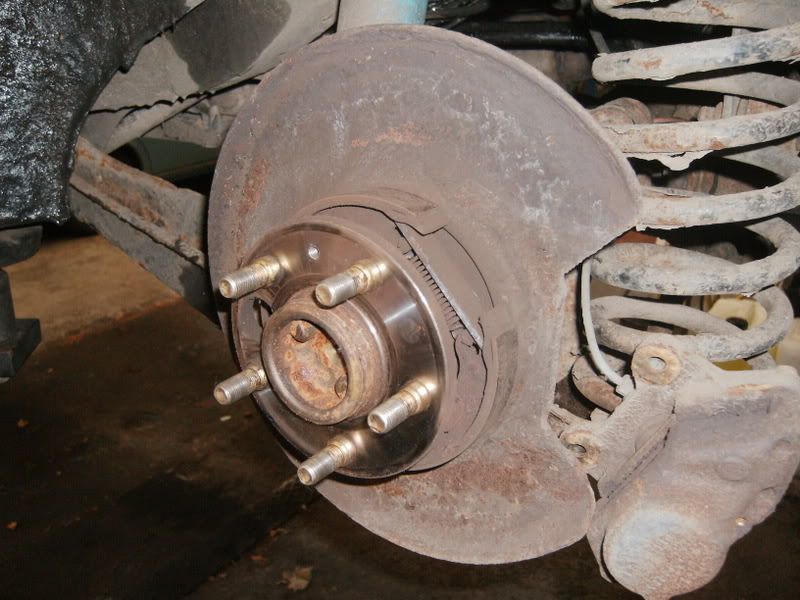
8) Now we are onto refitting. The new discs faces will have a protective coating on it, this will need cleaning off with the Brake cleaner Spray. Then push the disc into place noting the location of the hole for the locating pin/bolt:

Nip it up hand tight:
Then tighten:
9) Time to refit the calliper now. By the book you should have new bolts Some re-use the old with a smidge of loctite This is a decision for you to make. Put it in place & hand tighten both bolts enough to hold the calliper. Then torque up correctly. Front calliper: 74 Ft-lbs Rear Calliper 43 Ft-lbs.
10) Next it is time to fit the new pads. Before you do so, bearing in mind the new pads will be thicker you may need to press the pistons in further. So as before, remove the master cylinder lid & fit the plastic bag & press the pistons inwards:

11) Then slip the new pads into place. (Don't forget to refer to your digital pics if needed) Anti-squeal shims onto the rear of them if supplied. I 'stick' mine in place with a smear of copper-slip grease. If yours do not come with the shims, then smear the rear of the pads with copper-slip. The idea being that this will stop any squealing occurring too.
Pads & anti-squeal shims going in:
12) Then refit the springs, pins & spring clips (good practice to fit new):
Now replace the master cylinder lid, (having cleaned up if any spilt over & top up as required
13) Refit the roadwheel & tighten to bolts. lower the car to the ground & torque the wheel nuts
to 81 Ft-lbs
That is it, job done. All you need to do now it repeat on the other end of the axle & then go for a test drive. (If you have done the rears, the handbrake may need adjusting this will be subject of further article).